Draining And Filling The Engine Cooling System
WARNING: This page is about a different variant/trim than selected.
NOTE:
DO NOT WASTE reusable coolant. If the solution is clean, drain the coolant into a clean retainer for reuse.
Draining Procedure
- Remove the belly pan. Refer to BELLY PAN, ENGINE, REMOVAL AND INSTALLATION or BELLY PAN, REAR, REMOVAL AND INSTALLATION or BELLY PAN, REAR SUSPENSION, REMOVAL AND INSTALLATION or BELLY PAN, SIDE, REMOVAL AND INSTALLATION .
- Remove the engine cover. Refer to COVER, ENGINE, REMOVAL AND INSTALLATION .
- Remove the left front lamp unit. Refer to UNIT, FRONT LAMP, REMOVAL AND INSTALLATION .
- Remove the front air dam. Refer to AIR DAM, FRONT, REMOVAL AND INSTALLATIONAIR DAM, FRONT CROSSMEMBER, REMOVAL AND INSTALLATION
.WARNING:
DO NOT REMOVE THE COOLING SYSTEM PRESSURE CAP WITH THE SYSTEM HOT AND UNDER PRESSURE BECAUSE SERIOUS BURNS FROM COOLANT CAN OCCUR.
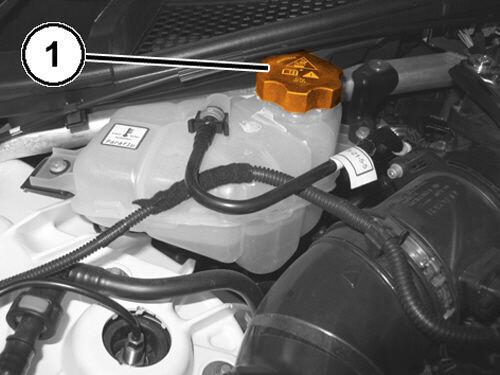
- With the engine cold, remove the engine coolant reservoir cap (1).
- Position a suitable container for collecting the coolant.
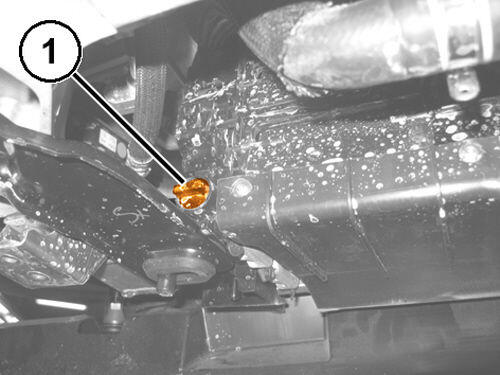
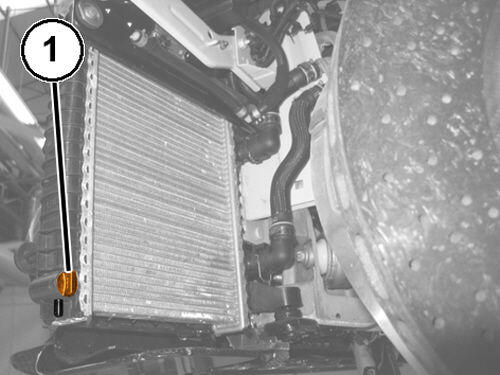
- Open the main radiator drain plug (1).
- Open the secondary radiator drain plug (1).
- When they are completely drained, close the plugs of the two radiators.
Filling Procedure
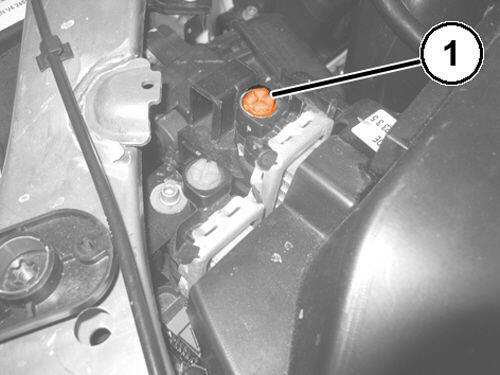
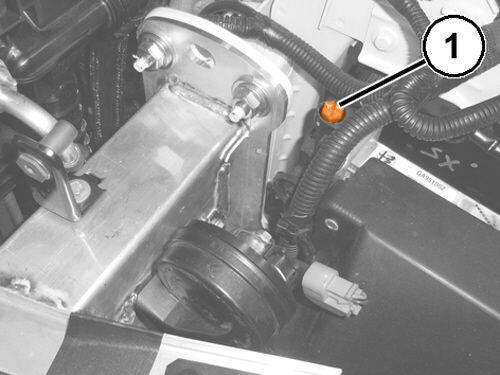
- Open the bleed screw on the main radiator (1).
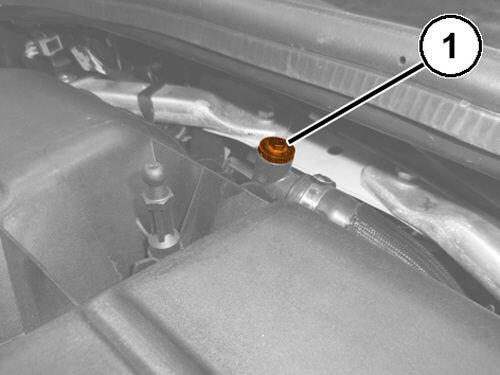
- Open the bleed screw on the secondary radiator (1).
- Open the bleed screw on the heater return pipe (1).
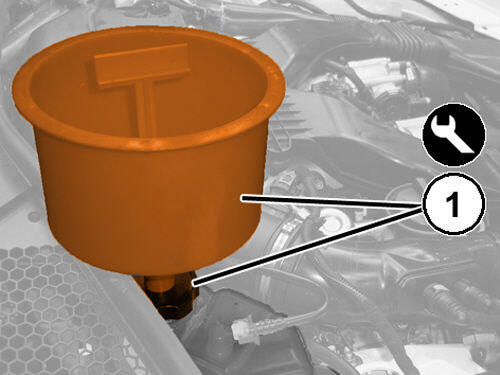
- Install the 2000040987 measuring container on the filler of the expansion tank.
- Fill the cooling system with prescribed coolant until fluid is coming out of the three bleed screws and tighten the bleed screws. Refer to CAPACITIES AND RECOMMENDED FLUIDS, SPECIFICATIONS .
- Continue filling until the fluid reaches about 1/3 of the height of the measuring container previously fitted on the expansion tank.
- Start up the engine and let it idle for about two minutes. In the meantime the fluid level will fall to about the "MAX" mark.
- Switch off the engine.
- Install the front air dam. Refer to AIR DAM, FRONT, REMOVAL AND INSTALLATION and AIR DAM, FRONT CROSSMEMBER, REMOVAL AND INSTALLATION .
- Install the left front lamp unit. Refer to UNIT, FRONT LAMP, REMOVAL AND INSTALLATION .
- Install the belly pan. Refer to BELLY PAN, ENGINE, REMOVAL AND INSTALLATION or BELLY PAN, REAR, REMOVAL AND INSTALLATION or BELLY PAN, REAR SUSPENSION, REMOVAL AND INSTALLATION or BELLY PAN, SIDE, REMOVAL AND INSTALLATION .
- Install the engine cover. Refer to COVER, ENGINE, REMOVAL AND INSTALLATION .