Draining And Filling The Turbocharger Cooling System
WARNING: This page is about a different variant/trim than selected.
- Remove the belly pan. Refer to BELLY PAN, ENGINE, REMOVAL AND INSTALLATION or BELLY PAN, REAR, REMOVAL AND INSTALLATION or BELLY PAN, REAR SUSPENSION, REMOVAL AND INSTALLATION or BELLY PAN, SIDE, REMOVAL AND INSTALLATION .
- Remove the engine cover. Refer to COVER, ENGINE, REMOVAL AND INSTALLATION .
- Remove the right front lamp unit. Refer to UNIT, FRONT LAMP, REMOVAL AND INSTALLATION .
- Remove the front air dam. Refer to AIR DAM, FRONT, REMOVAL AND INSTALLATIONAIR DAM, FRONT CROSSMEMBER, REMOVAL AND INSTALLATION .
- Procedure for draining the circuit. NOTE:
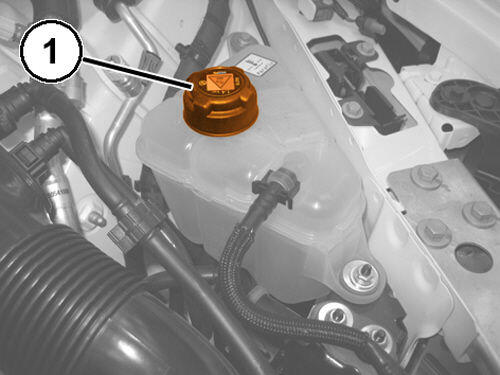
Do not remove the pressurized coolant bottle cap when the engine is hot as there is a danger of scalding.
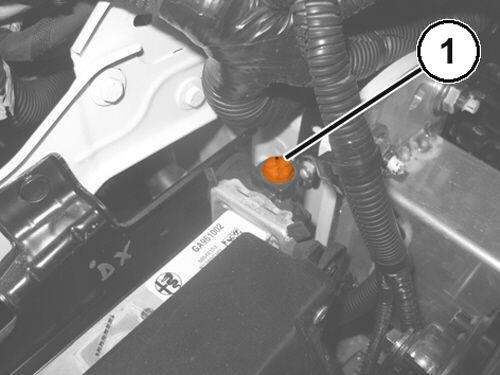
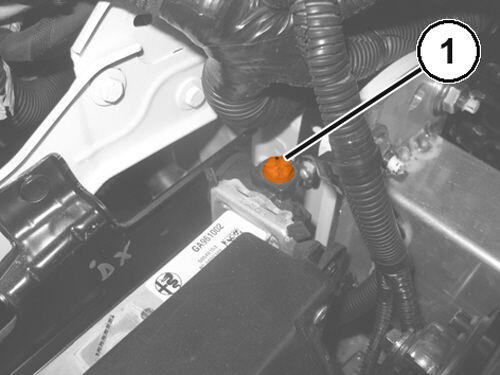
- With the engine cold, undo the turbocharger air system coolant reservoir cap (1).
- Position a suitable container for collecting the coolant.
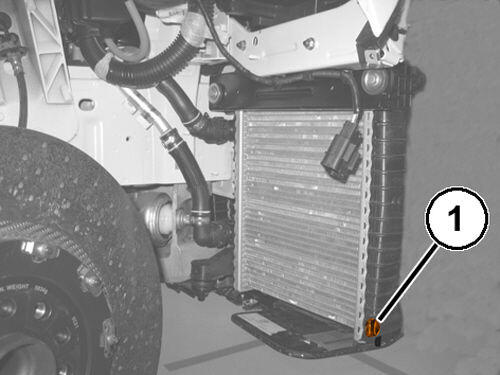
- Open the main radiator drain plug (1).
- Open the secondary radiator drain plug (1).
- When they are completely drained, close the plugs of the two radiators.
- Procedure for refilling the circuit.
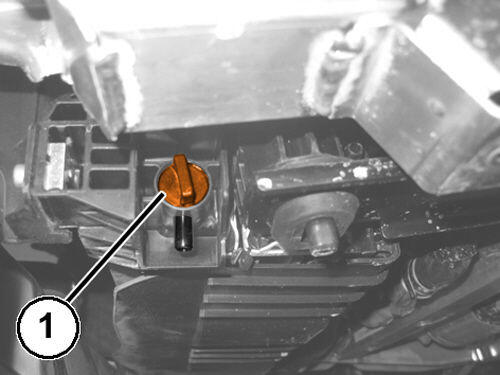
- Open the bleed screw (1) on the main radiator.
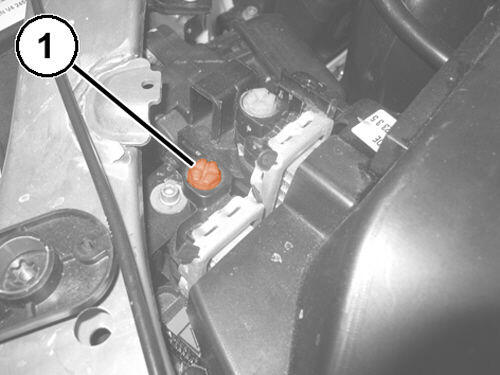
- Open the bleed screw (1) on the secondary radiator (1).
- Pour in the prescribed coolant until fluid is coming out of the two bleed screws. Tighten the bleed screws.
- When refilling is complete, the level will be flush with the filler.
- Close the supply tank cap.
- Connect the diagnosis equipment to the vehicle diagnosis socket, activate the electric pump at 75% of its power and let it run for about 15 minutes.
- If there is a noticeable drop in the level in the supply tank at this point, turn off the engine and open the cap very carefully and top up the fluid to the mark, keeping the pump running at 75%.
- Then switch off the power to the electric pump.
- Open only the bleed screw on the secondary radiator to eliminate any air residue.
- Install the front air dam. Refer to AIR DAM, FRONT, REMOVAL AND INSTALLATIONAIR DAM, FRONT CROSSMEMBER, REMOVAL AND INSTALLATION .
- Install the right front lamp unit. Refer to UNIT, FRONT LAMP, REMOVAL AND INSTALLATION .
- Install the belly pan. Refer to BELLY PAN, ENGINE, REMOVAL AND INSTALLATION or BELLY PAN, REAR, REMOVAL AND INSTALLATION or BELLY PAN, REAR SUSPENSION, REMOVAL AND INSTALLATION or BELLY PAN, SIDE, REMOVAL AND INSTALLATION .
- Install the engine cover. Refer to COVER, ENGINE, REMOVAL AND INSTALLATION .