Removal And Installation
REMOVAL
- Disconnect and isolate the negative battery cable.
- Remove the engine covers. Refer to COVER, ENGINE, REMOVAL AND INSTALLATION
.
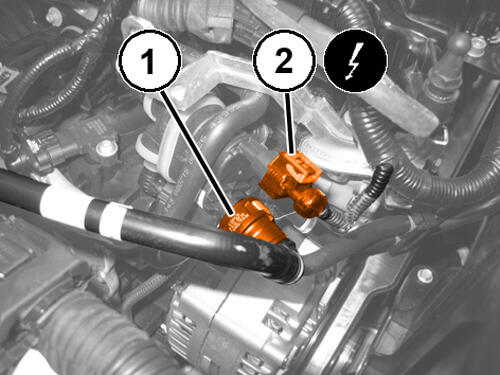
- Disconnect the quick coupling of the fuel vapor supply pipe (1) to the purge solenoid.
- Disconnect the purge solenoid wire harness connector (2).
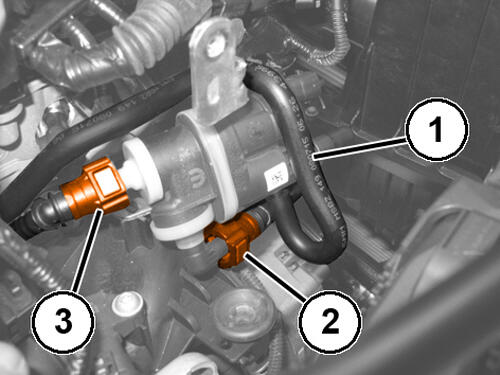
- Disconnect the line (1) connecting to the OBD vent valve.
- Disconnect the quick coupling for the fuel vapor supply line (2) to the turbocharger.
- Disconnect the quick couplings for the fuel vapor supply line (3) to the intake manifold.
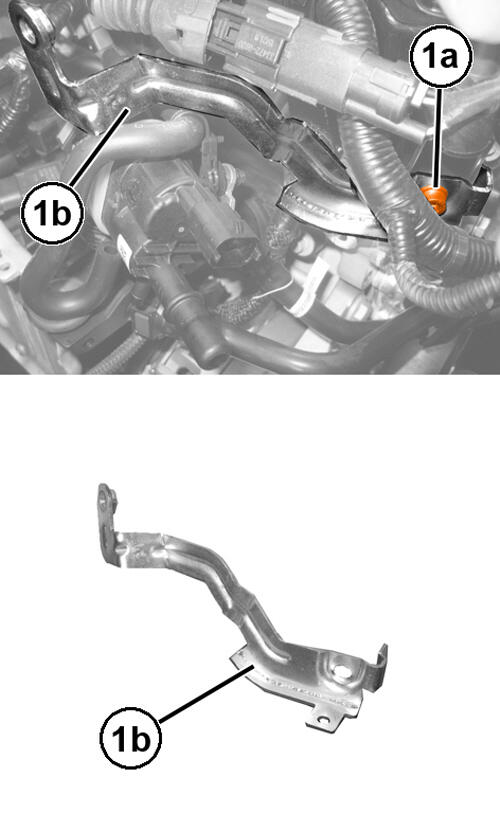
- Remove the bolts (1a) and the heat exchanger support bracket (1b).
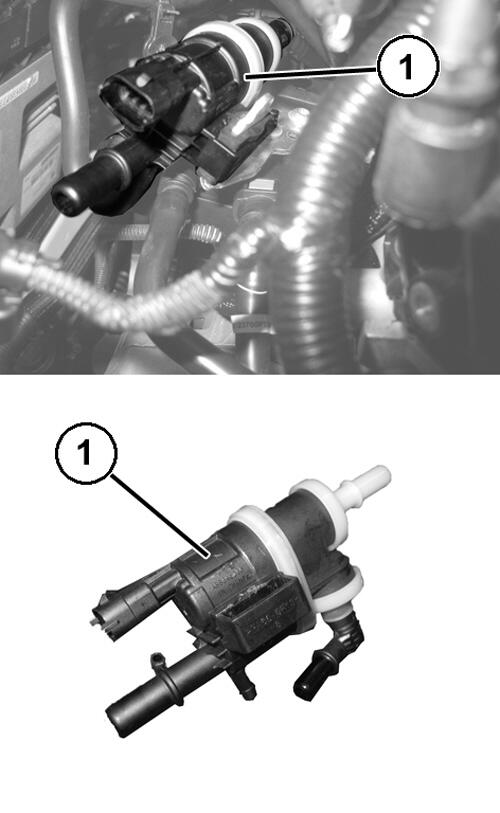
- Release and remove the purge solenoid (1) from the mounting bracket.
INSTALLATION
- Install the purge solenoid and secure it to the mounting bracket.
- Install the heat exchange support bracket and securely tighten the bolts.
- Connect the quick coupling of the fuel vapor supply pipe to the intake manifold, complete with NEW O-ring.
- Connect the quick coupling of the fuel vapor supply pipe to the turbocharger, complete with NEW O-ring.
- Connect the pipe connecting to the OBD vent valve.
- Connect the evaporative emissions purge solenoid wire harness connector.
- Connect the quick coupling of the fuel vapor supply pipe to the purge solenoid.
- Install the engine covers. Refer to COVER, ENGINE, REMOVAL AND INSTALLATION .
- Connect the negative battery cable.