Low Pressure EGR Tube
REMOVAL
- Remove the left side wheel house splash shield. Refer to SHIELD, SPLASH, FRONT WHEELHOUSE, REMOVAL AND INSTALLATION or SHIELD, SPLASH, REAR WHEELHOUSE, REMOVAL AND INSTALLATION .
- Remove the exhaust pipe. Refer to PIPE, EXHAUST, REMOVAL AND INSTALLATION .
- Remove the catalytic converter heat shield. Refer to SHIELD, HEAT, REMOVAL AND INSTALLATION .
- Remove the left engine box reinforcement brace. Refer to BRACE, ENGINE BOX REINFORCEMENT, REMOVAL AND INSTALLATION
.
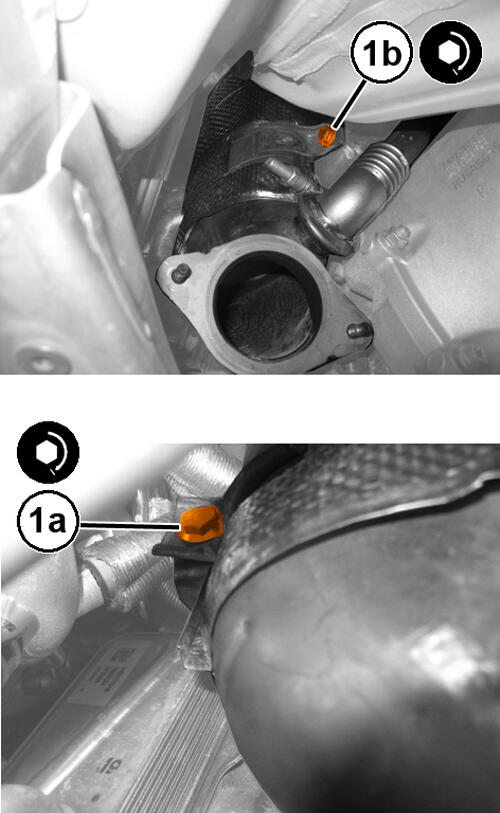
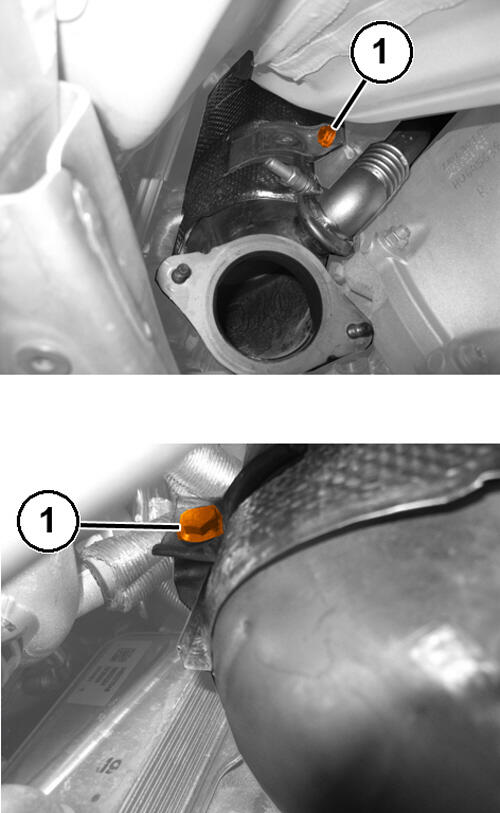
- Remove the low pressure EGR tube bolts (1), EGR cooler side.
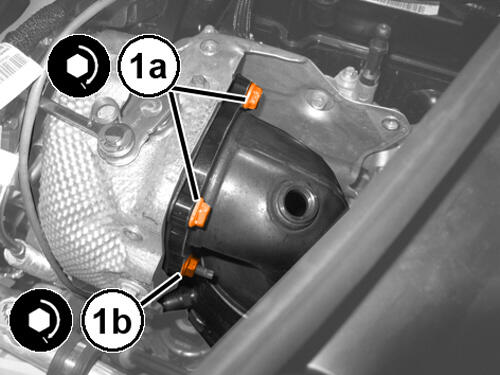
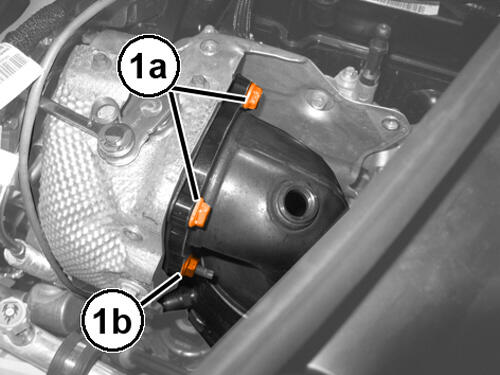
- Remove the bolts (1a) and the nuts (1b) securing the catalytic converter turbocharger.
- Remove the bolts (1) securing the catalytic converter to the mounting bracket.
- Release the catalytic converter from the turbocharger and position it on the suspension crossmember.
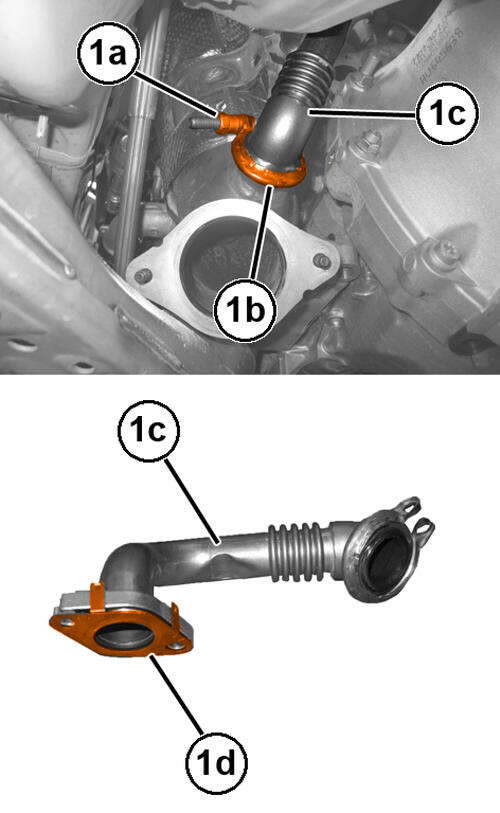
- Loosen the nut (1a), the clamp (1b), and remove the low pressure EGR tube (1c), complete with gasket (1d).
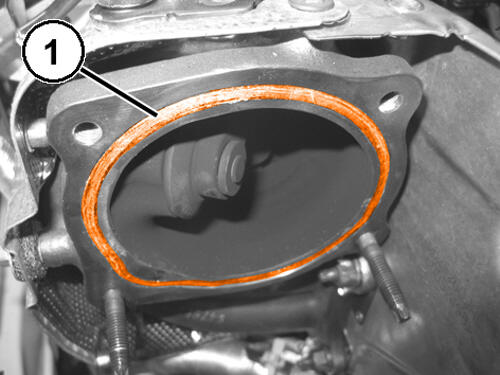
- Remove the gasket (1) from the turbocharger opening.
INSTALLATION
- Install a NEW
gasket on the turbocharger in its housing.
- Position he catalytic converter on to the mounting bracket and install the first bolt (1a) then bolt (1b) and tighten to the proper specification. Refer to TORQUE SPECIFICATIONS
.
- Install the bolts (1a) and the nuts (1b) securing the catalytic converter to the turbocharger and tighten finger tight.
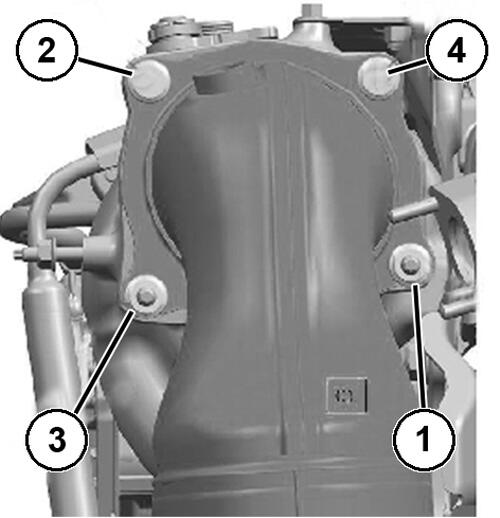
- Using the tighten sequence shown in illustration, the bolts and nuts to the proper specification. Refer to TORQUE SPECIFICATIONS .
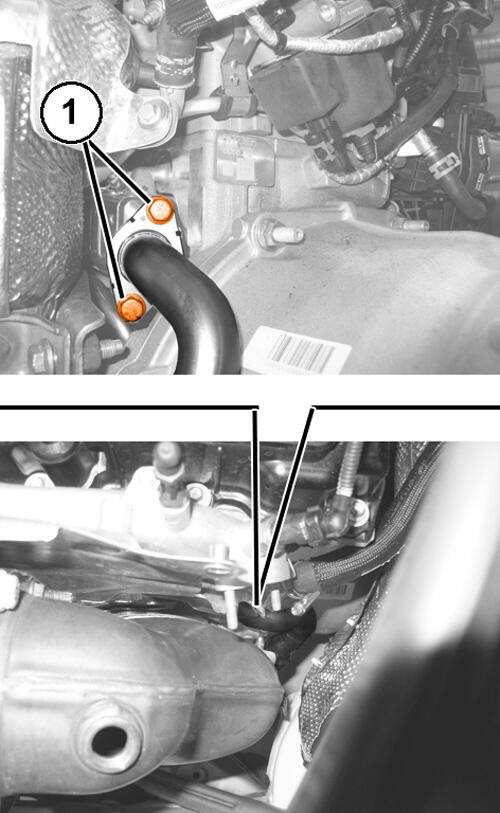
- Install low pressure EGR tube and tighten the bolts to the proper specification. Refer to EXHAUST GAS RECIRCULATION, TECHNICAL SPECIFICATIONS .
- Install low pressure EGR tube clamp and tighten the nut to the proper specification. Refer to EXHAUST GAS RECIRCULATION, TECHNICAL SPECIFICATIONS .
- Install the left engine box reinforcement brace. Refer to BRACE, ENGINE BOX REINFORCEMENT, REMOVAL AND INSTALLATION .
- Install the catalytic converter heat shield. Refer to SHIELD, HEAT, REMOVAL AND INSTALLATION .
- Install the exhaust pipe. Refer to PIPE, EXHAUST, REMOVAL AND INSTALLATION .
- Install the left side wheel house splash shield. Refer to SHIELD, SPLASH, FRONT WHEELHOUSE, REMOVAL AND INSTALLATION .