Left Side
WARNING: This page is about a different variant/trim than selected.
REMOVAL
- Disconnect and isolate the negative battery cable.
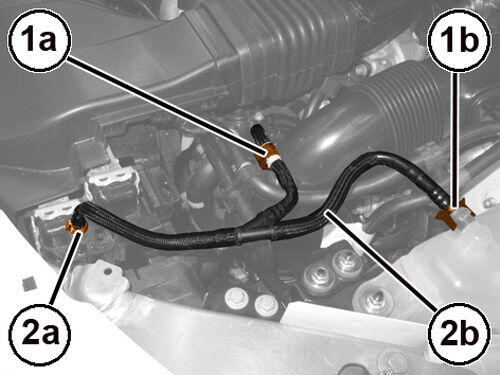
- Open the clip (1a) and disconnect the quick coupling of the degassing tube (1b).
- Loosen the clamp (2a) and disconnect the degassing tube (2b).
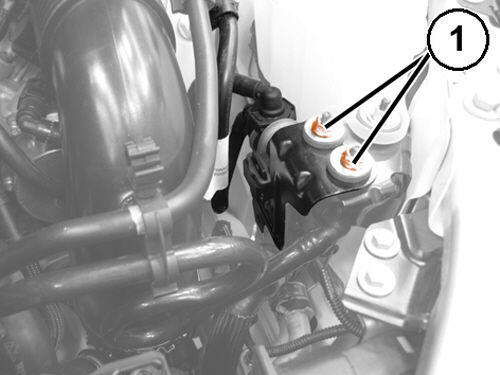
- Remove the nuts (1) of the evaporative emission purge solenoid mounting bracket.
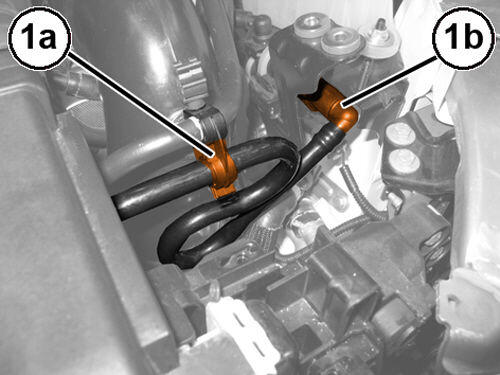
- Open the clip (1a) and disconnect the quick coupling (1b) of the fuel vapor supply tube to the solenoid valve.
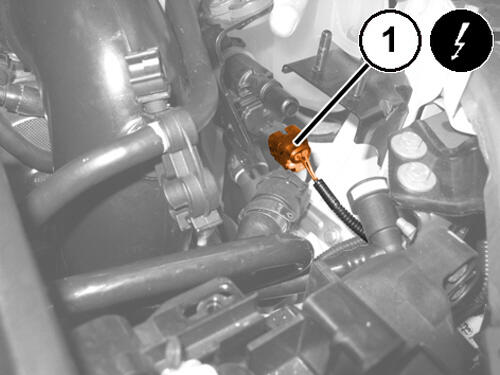
- Disconnect the evaporative emission purge solenoid wire harness connector (1).
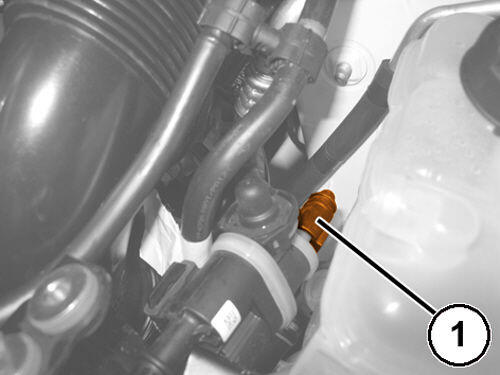
- Disconnect the quick coupling of the fuel vapor supply tube (1).
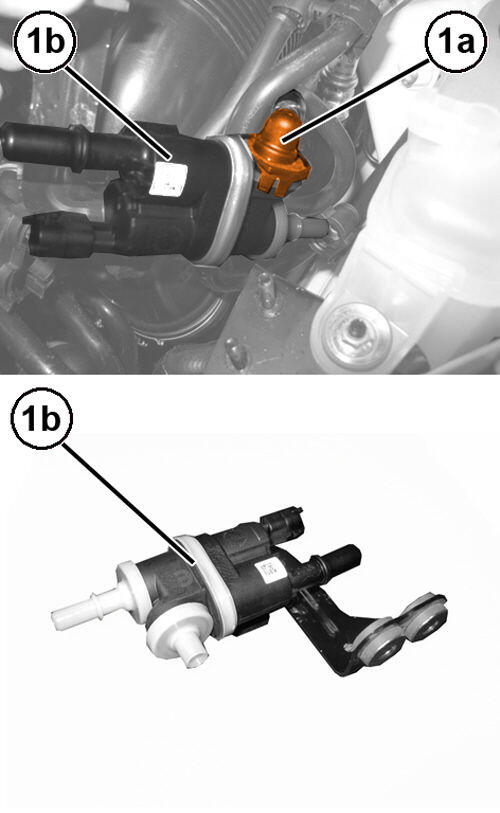
- Release the clips and disconnect the fuel vapor delivery tube to the intake manifold (1a) and remove the evaporative emission purge solenoid (1b).
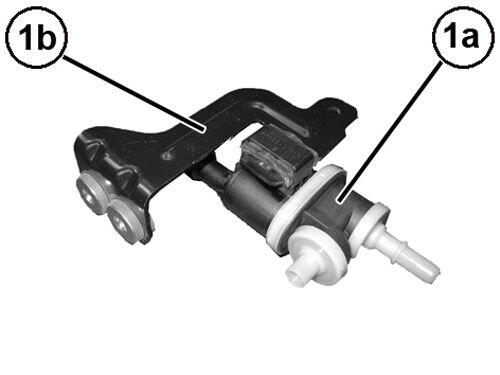
- If required, disengage the evaporative emission purge solenoid (1a) from the mounting bracket (1b).
INSTALLATION
- Install the evaporative emission purge solenoid for consent of the fuel vapor passage to the intake, connect the fuel vapor supply tube to the intake manifold and close the retaining clips.
- Connect the quick coupling of the fuel vapor supply tube.
- Connect the evaporative emission purge solenoid wire harness connector.
- Connect the quick coupling of the fuel vapor supply pipe to the evaporative emission purge solenoid valve and close the related retaining clip.
- Install the nuts securing the evaporative emission purge solenoid mounting bracket and securely tighten the nuts.
- Install the degassing pipe in its housing and close the related clamp.
- Connect the degassing pipe quick coupling and close the retaining clip.
- Connect the negative battery cable.