Removal And Installation: Camshaft
multimedia:A supplement to the article is available.
REMOVAL
- Disconnect the negative battery cable.
- Remove the cylinder head cover. Refer to COVER(S), CYLINDER HEAD, REMOVAL AND INSTALLATION .
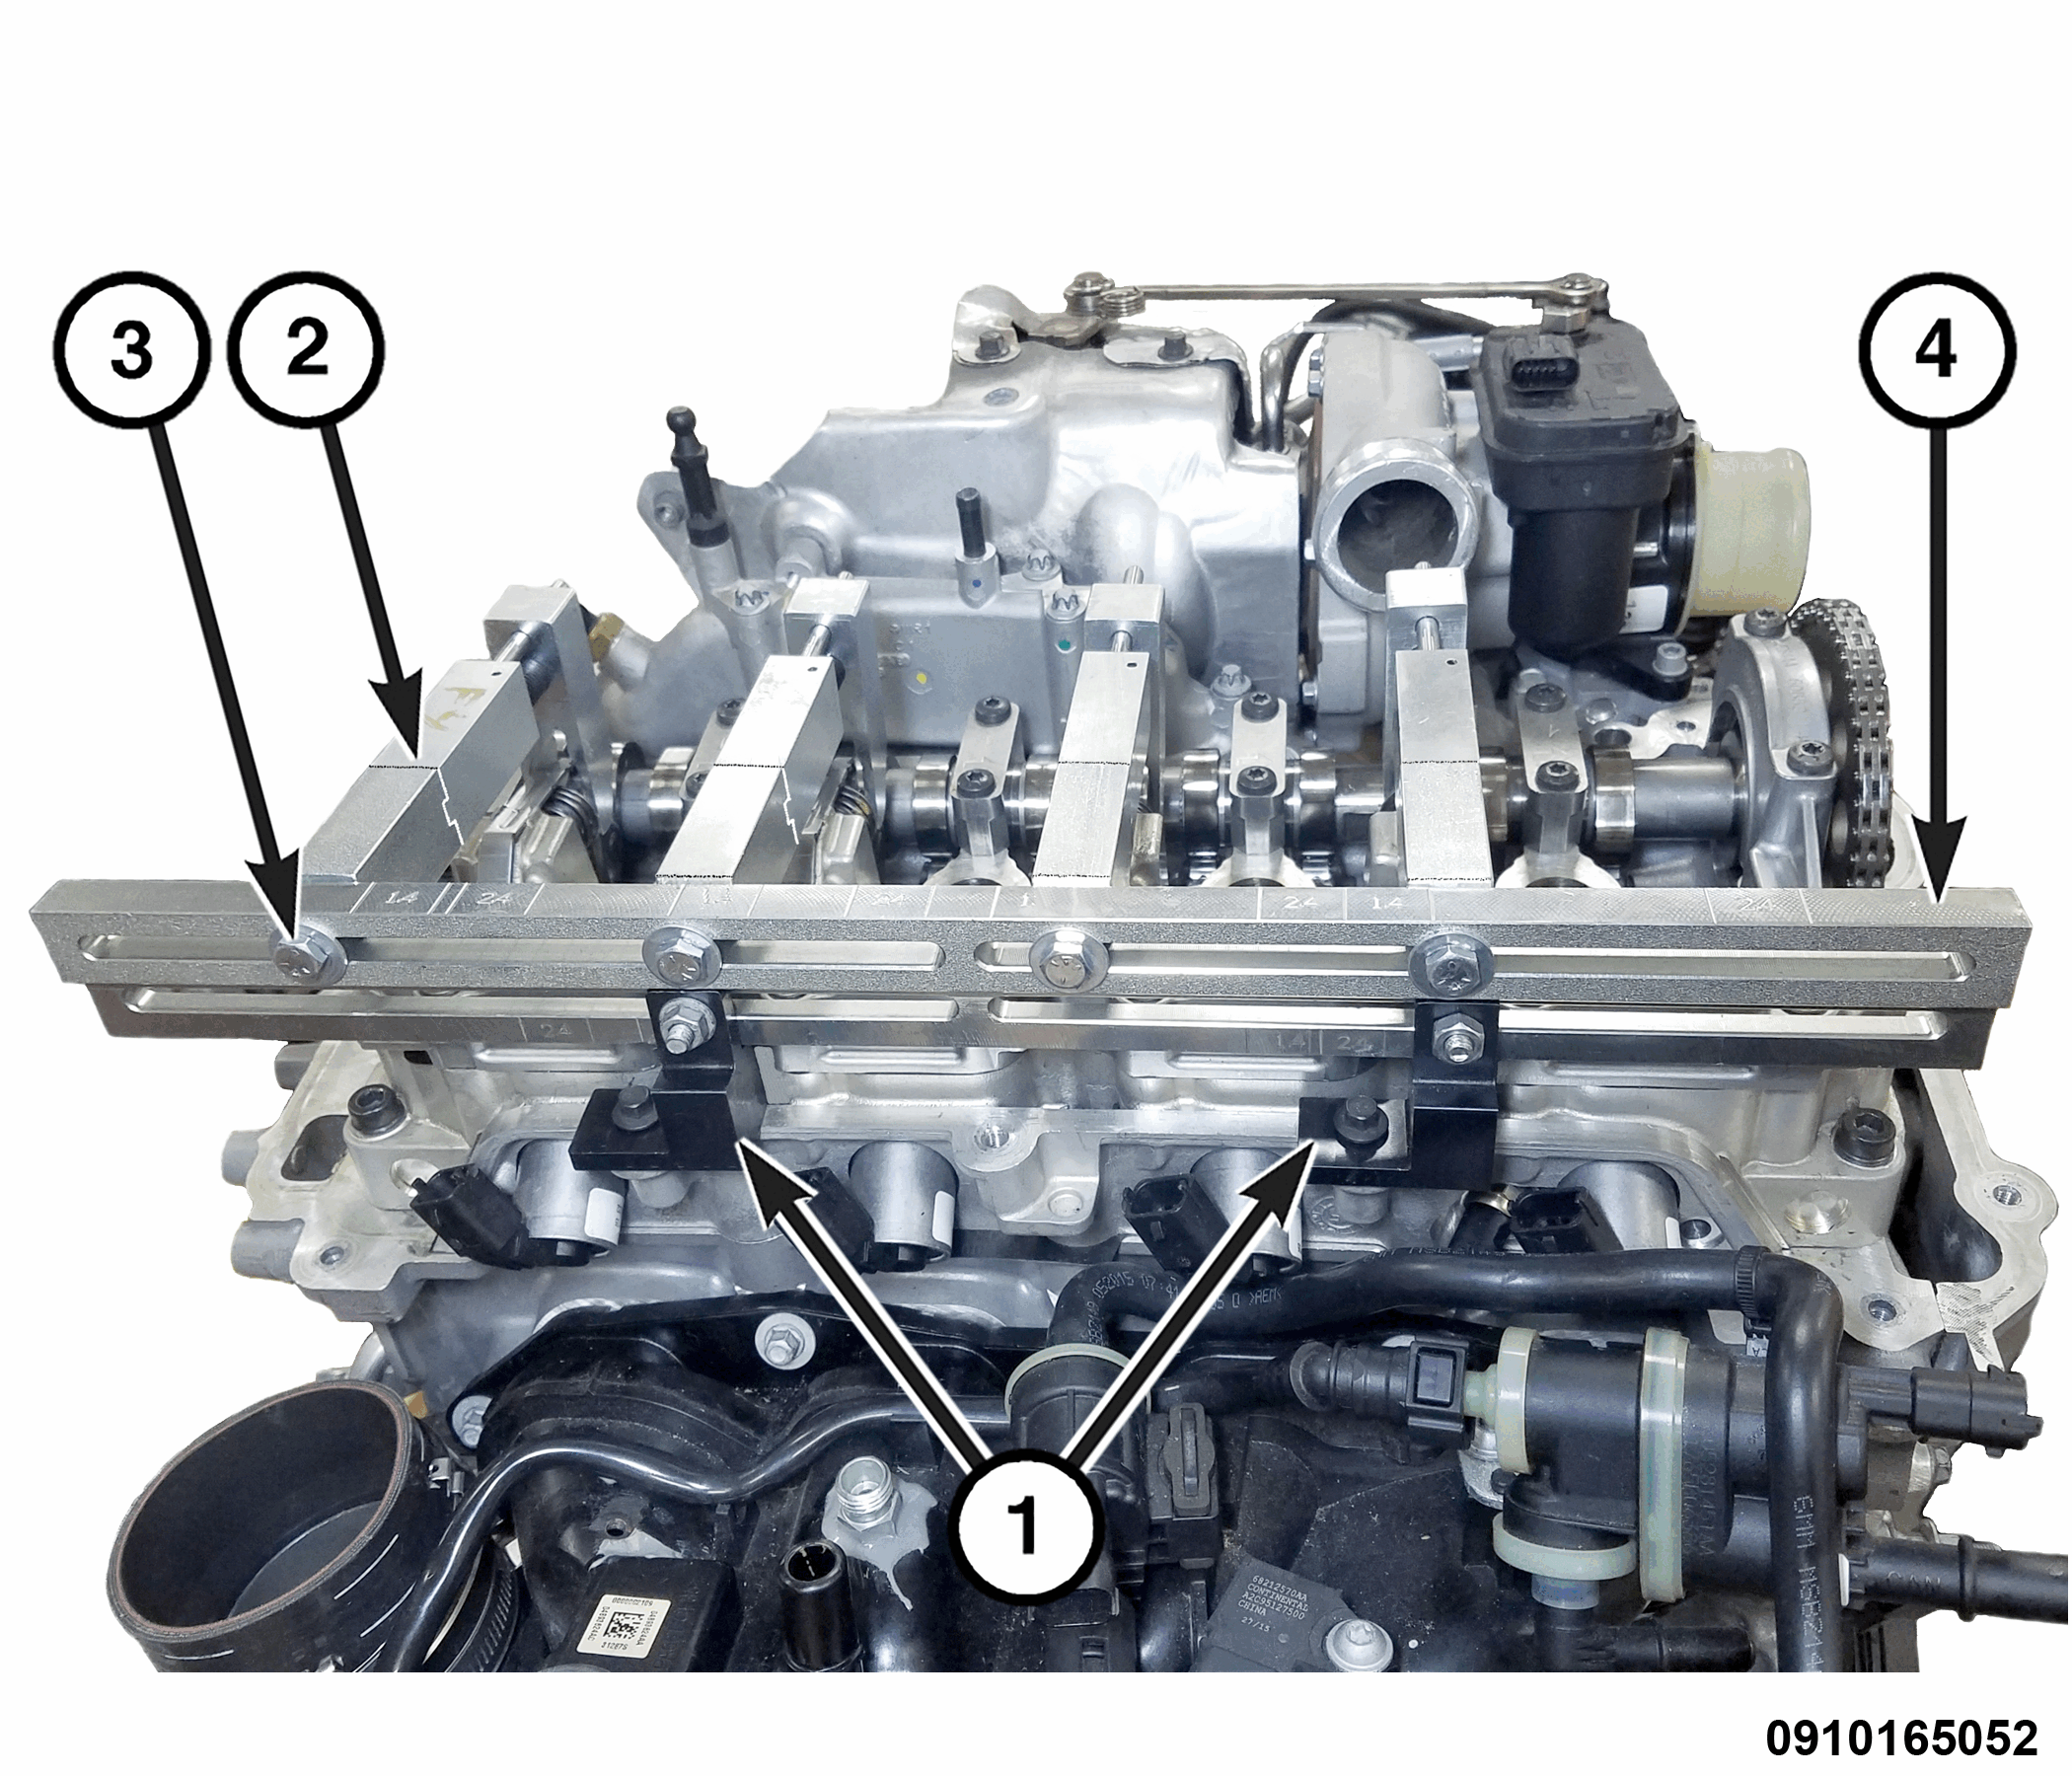
- Assemble the (special tool #2027207090, Tab, 90 Degree) (1) and (special tool #2027204090, Adapter, Stand-Off) (2) with the (special tool #2027212090, Bolt, Stand-Off Adapter) (3) to the (special tool #10259B, Compressor, MultiAir® Spring) (4) or the UNIAIR Module Compression Plate 2020000090.
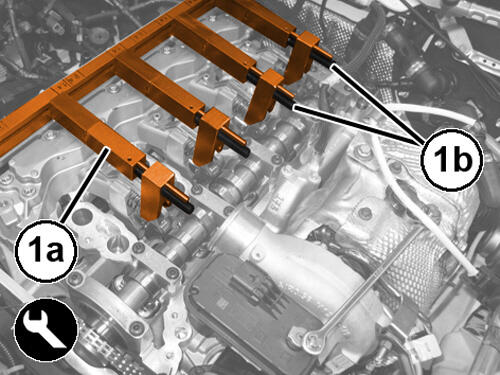
- Position the tool (1a) and tighten the screws (1b) to compress the springs on the Variable Valve Actuation Assembly (VVAA).
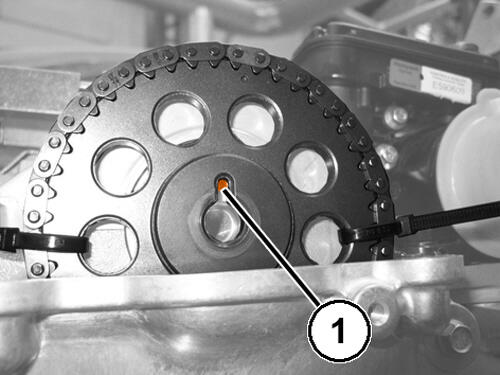
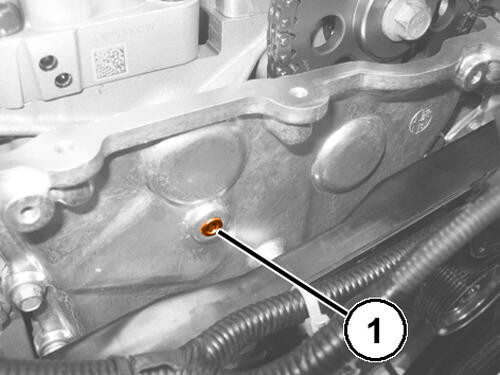
- Remove the cap (1) from the timing chain cover.
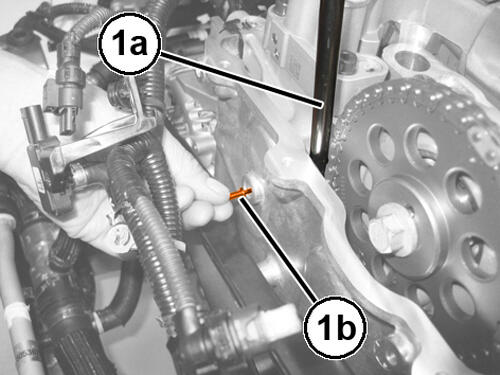
- Using a suitable tool (1a) press the cam chain tensioner arm to retract the piston of the cam chain tensioner and lock it in the retracted position with the (special tool #8514A, Pins, Tensioner) (1b).
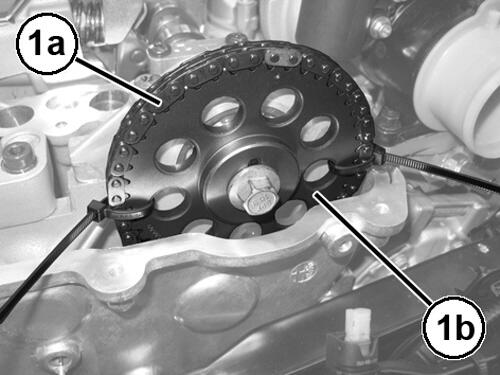
- Temporarily secure the cam chain (1a) to the camshaft sprocket (1b) as shown in the illustration.
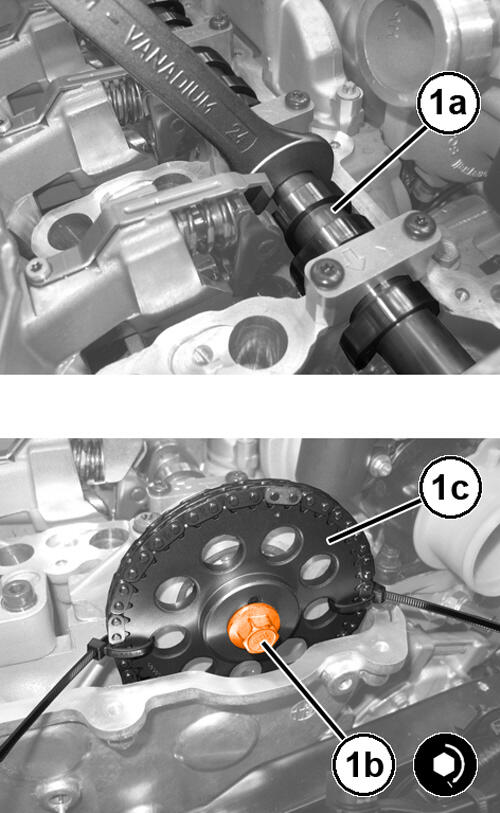
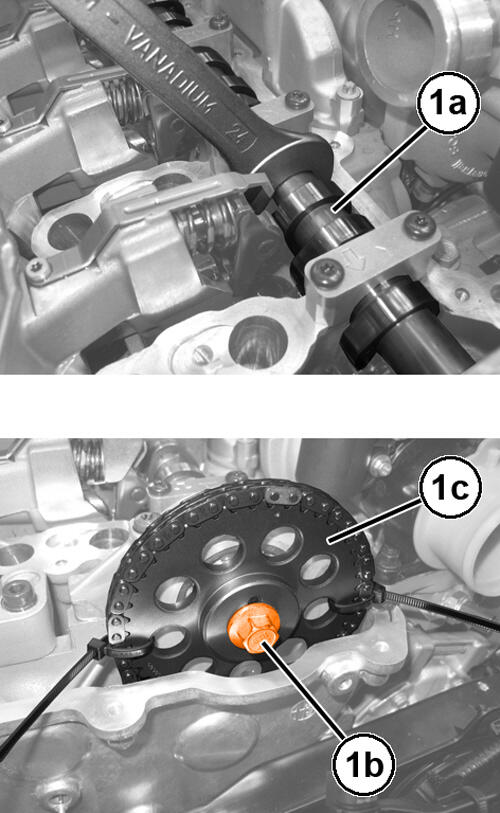
- Use the wrench flats to hold the camshaft (1a) and loosen the bolt (1b) on the camshaft sprocket (1c).
- Remove the camshaft sprocket from the camshaft and rest it on the inner rib of the engine timing chain cover.NOTE:
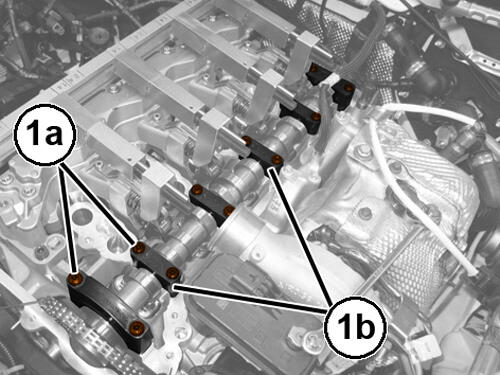
To avoid bending the camshaft, partially loosen each cam cap bolt, one turn at a time, to remove the camshaft caps.
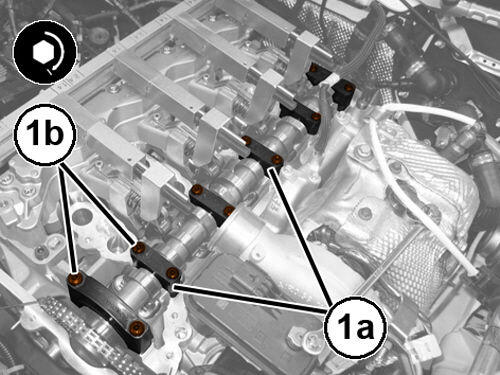
- Remove the bolts (1a) and remove the camshaft caps (1b).
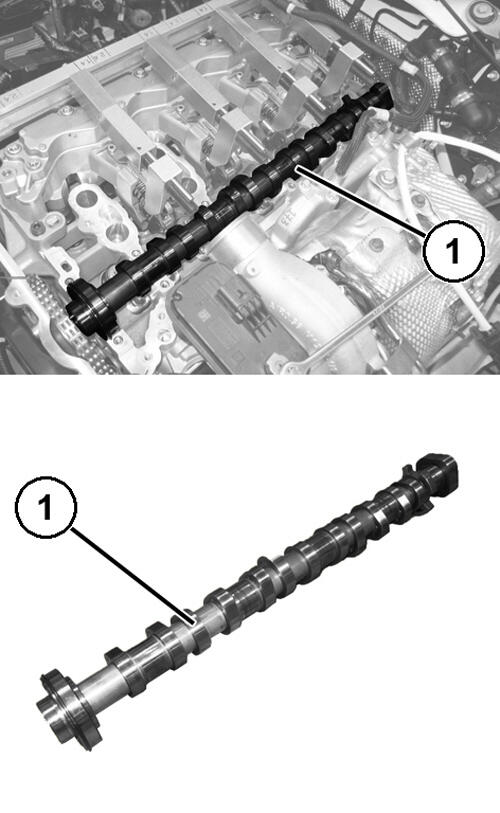
- Remove the camshaft (1) from the cylinder head.
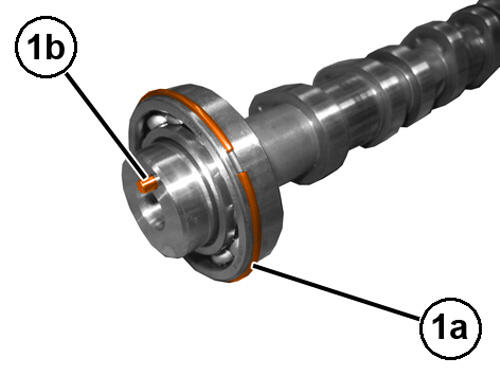
- Check the integrity of the snap ring (1a) and the centering bushing (1b).
- If required, use a suitable hydraulic press to remove the bearing from the camshaft.
INSTALLATION
multimedia:A supplement to the article is available.
- If removed, use a suitable hydraulic press and install the bearing on the camshaft.NOTE:
To avoid bending the camshaft, partially tighten each cam cap bolt, one turn at a time, to seat the camshaft to the head. Do not torque to specification until the cam caps are in full contact with the cylinder head.
- Position the camshaft in the cylinder head, install the camshaft bearing caps (1a) and bolts (1b).
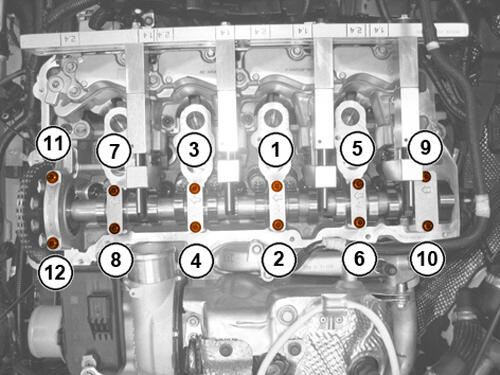
- Tighten the bolts in the sequence shown to the proper specification Refer to TORQUE SPECIFICATIONS
.
- Align the camshaft bushing (1) and install the camshaft sprocket.
- Use the wrench flats to hold the camshaft (1a) and tighten the new bolt (1b) on the camshaft sprocket (1c) to the proper specification Refer to TORQUE SPECIFICATIONS .
- Remove the temporary securing of the cam chain to the camshaft sprocket.
- Remove the cam chain tensioner locking pin.
- Install the cap to the timing chain cover and tighten securely.
- Remove the tools used to compress the springs on the VVAA.
- Install the cylinder head cover. Refer to COVER(S), CYLINDER HEAD, REMOVAL AND INSTALLATION .
- Connect the negative battery cable.