Rear Crankshaft Oil Seal Retainer
REMOVAL
NOTE:
If the crankshaft is replaced for any reason, the rear oil seal must also be replaced.
NOTE:
If the rear oil seal retainer is removed from the engine for any reason, the gasket and oil seal must be replaced.
- Remove the powertrain from the vehicle, separate the transmission from the engine and mount the engine on a maintenance stand. Refer to REMOVAL AND INSTALLATION REMOVAL AND INSTALLATION
.
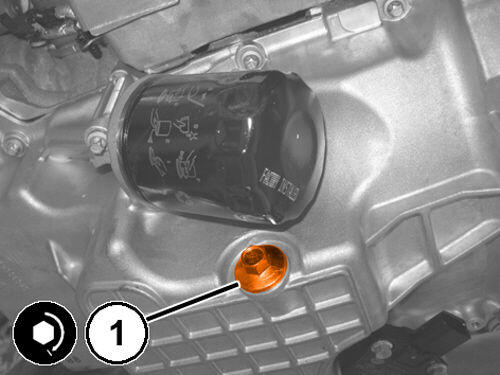
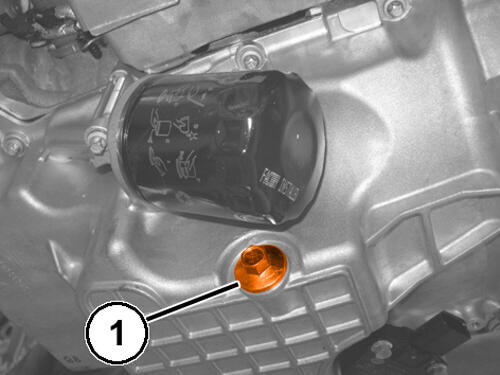
- Remove the drain plug (1) complete with gasket, and drain the engine oil into a suitable container.
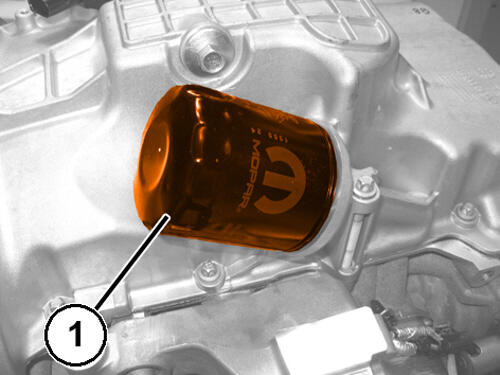
- Remove the engine oil filter (1).
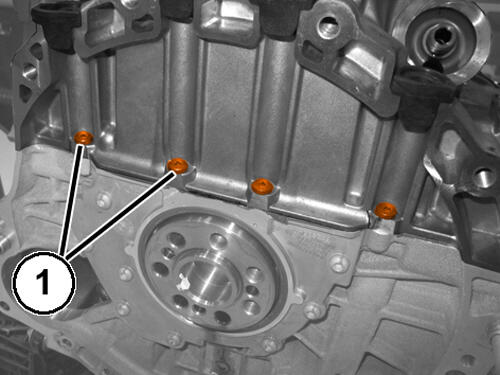
- Remove the flywheel side oil pan bolts (1).
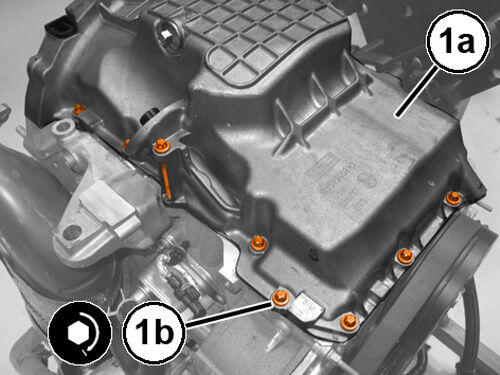
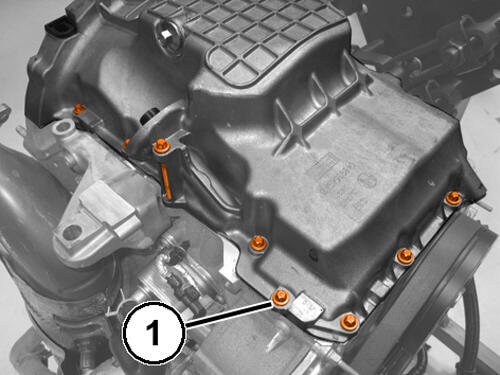
- Remove the remaining bolts (1) securing the engine oil pan.
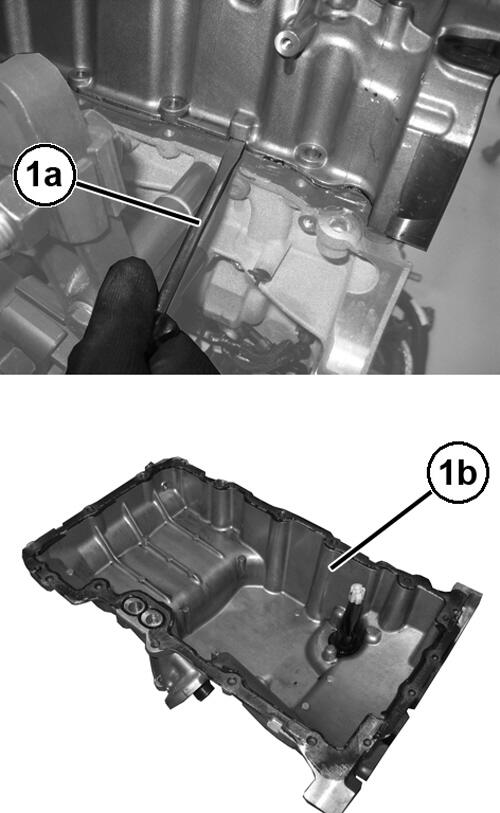
- Use a suitable tool (1a) and the indicated pry point to release the oil pan (1b) from the sealant.
- Remove sealant residues from the oil pan and the engine crankcase.
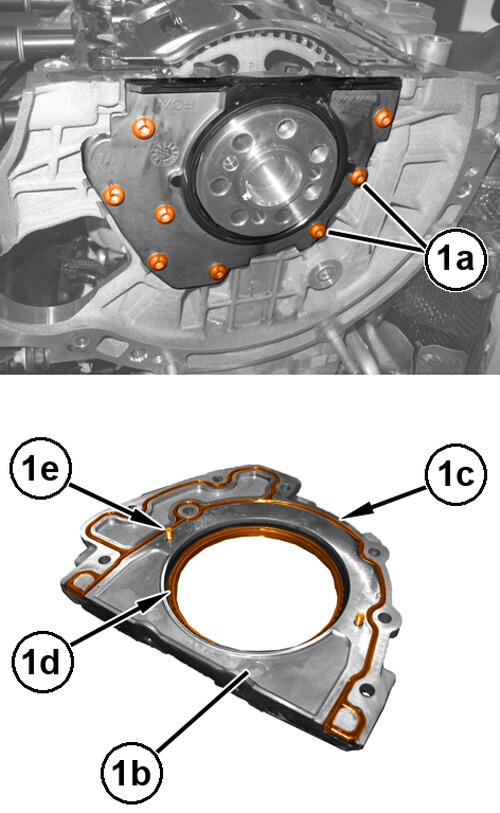
- Remove the bolts (1a) and the crankshaft oil seal retainer (1b) complete with gasket (1c), oil seal (1d) and locating pins (1e).
- Remove and discard the gasket (1c) and the oil seal (1d). Care must be taken when removing the oil seal to avoid scratching the seal bore.
INSTALLATION
NOTE:
If a NEW crankshaft oil seal retainer is installed, the gasket and oil seal are integrally contained in the spare part.
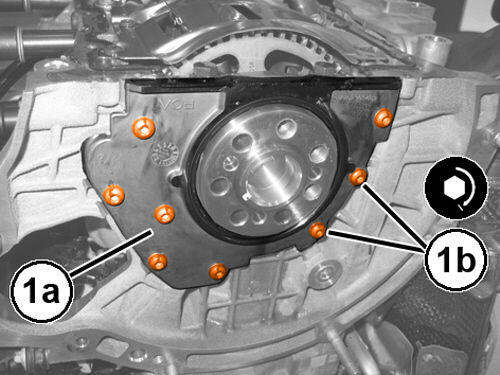
- Install the crankshaft oil seal retainer (1a) complete with locating pins and a NEW gasket using the (special tool #2044800090, Guide, Crankshaft Seal). Install and tighten the bolts (1b) to the proper specification Refer to TORQUE SPECIFICATIONS .
- Install a NEW
rear crankshaft oil seal. Refer to SEAL, CRANKSHAFT OIL, REAR, REMOVAL AND INSTALLATION .
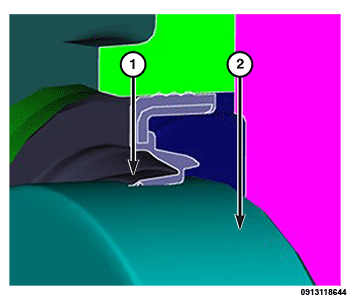
- Verify that the seal lip (1) on the retainer is uniformly curled inward toward the engine on the crankshaft (2).
- Apply a 3 to 4 mm wide bead of Mopar® Threebond Engine RTV Sealant on the engine oil pan coupling flange to the crankcase.NOTE:
Finish the oil pan installation within 20 minutes of applying the sealant.
- Install the oil pan (1a) and tighten the bolts (1b) finger tight.
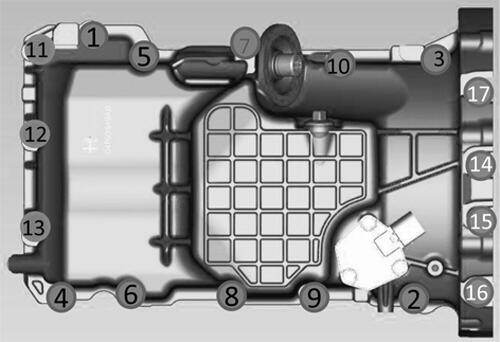
- Tighten the bolts in the sequence shown in illustration to the proper specification Refer to TORQUE SPECIFICATIONS
.
- Install the engine oil filter and securely tighten.
- Install the engine oil drain plug (1) complete with NEW gasket and tighten to the proper specification Refer to TORQUE SPECIFICATIONS .
- Remove the engine from maintenance stand, install the transmission to the engine and install the powertrain in the vehicle. Refer to REMOVAL AND INSTALLATION .