Removal - RWD
- Raise and support the vehicle. Refer to HOISTING, STANDARD PROCEDURE .
- Remove the engine belly pan. Refer to BELLY PAN, ENGINE, REMOVAL AND INSTALLATION .
- Remove the right and left front wheelhouse splash shields. Refer to SHIELD, SPLASH, FRONT WHEELHOUSE, REMOVAL AND INSTALLATION
.
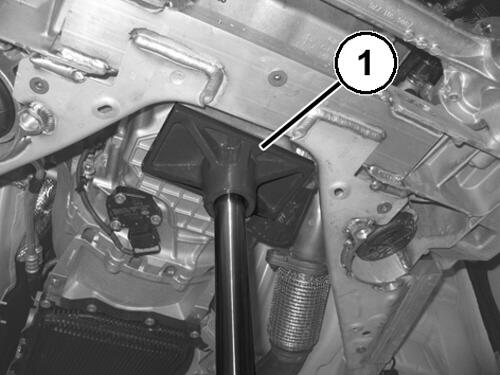
- Place a suitable hydraulic jack under the oil pan and support the engine to take the weight off of the engine mount.
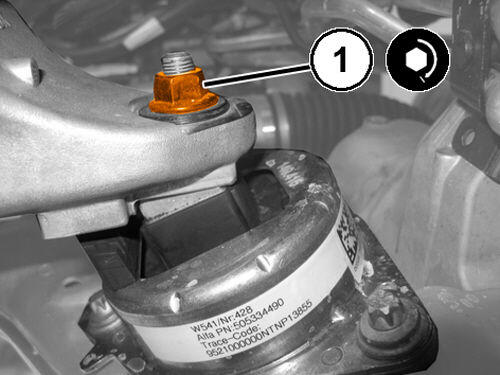
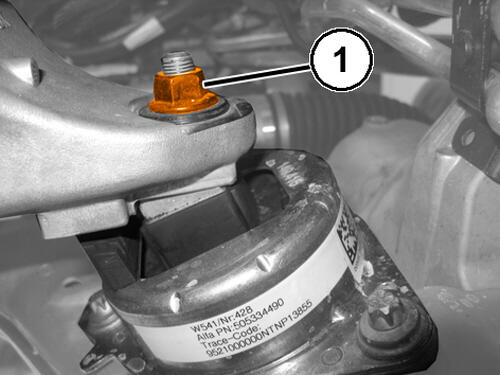
- Remove the nut (1) securing the left engine mount bracket to the engine mount insulator.
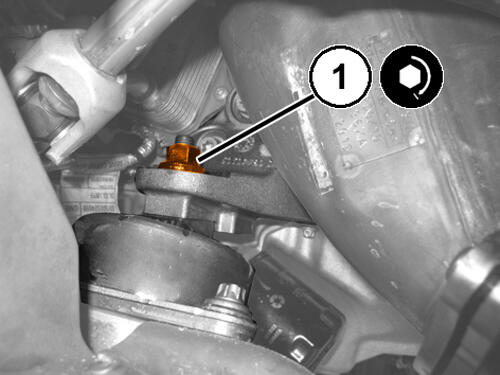
- Remove the nut (1) securing the right engine mount bracket to the engine mount insulator.
- Using the hydraulic jack lift the engine about 15 mm.
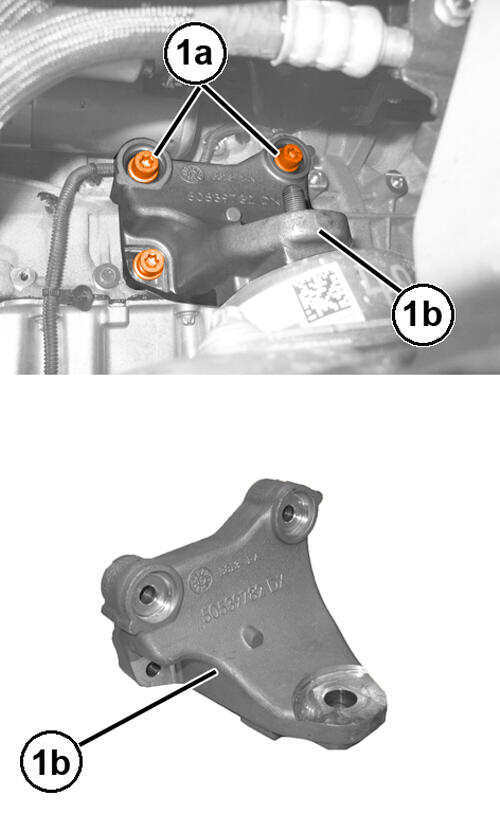
- Remove and DISCARD the bolts (1a). Remove the right engine mount bracket (1b).
INSTALLATION
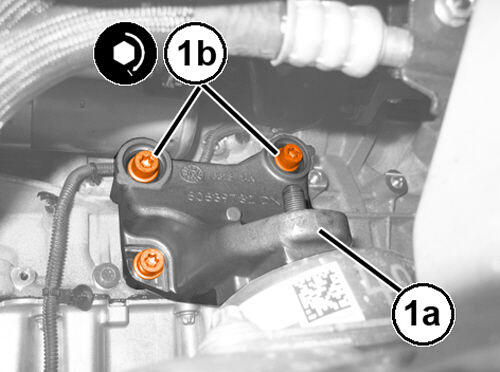
- Install the right engine mount bracket (1a) and tighten the NEW
bolts (1b) to the proper specification Refer to TORQUE SPECIFICATIONS
.
- Operate the hydraulic jack to lower the engine.
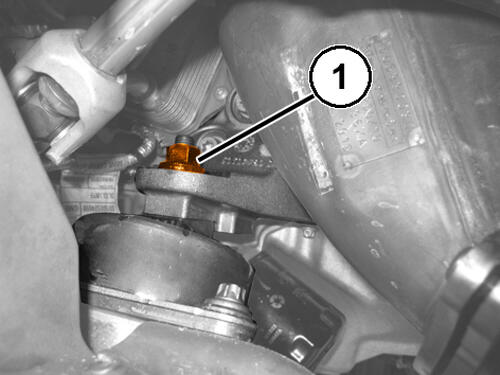
- Tighten the right engine mount bracket to the engine mount insulator nut (1) to the proper specification Refer to TORQUE SPECIFICATIONS
.
- Tighten the left engine mount bracket to the engine mount insulator nut (1) to the proper specification Refer to TORQUE SPECIFICATIONS .
- Remove the hydraulic jack.
- Install the front wheelhouse splash shields. Refer to SHIELD, SPLASH, FRONT WHEELHOUSE, REMOVAL AND INSTALLATION .
- Install the engine belly pan. Refer to BELLY PAN, ENGINE, REMOVAL AND INSTALLATION .
- Remove the support and lower the vehicle.