Turbo Charger
REMOVAL
- Raise and support the vehicle. Refer to HOISTING, STANDARD PROCEDURE .
- Disconnect and isolate the negative battery cable.
- Drain the turbocharger coolant system. Refer to DRAINING AND FILLING THE TURBOCHARGER COOLING SYSTEM .
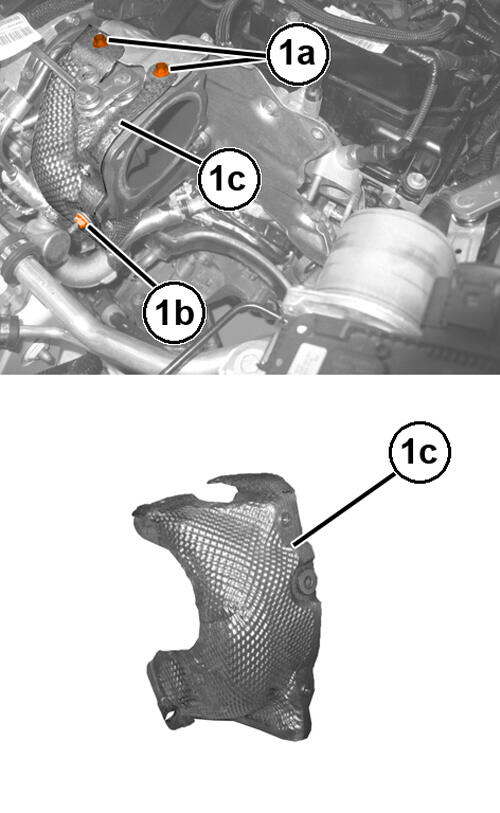
- Remove the turbocharger heat shield. Refer to TURBOCHARGER, REMOVAL AND INSTALLATION .
- Remove the low pressure EGR valve. Refer to VALVE, EXHAUST GAS RECIRCULATION (EGR), REMOVAL AND INSTALLATION
.
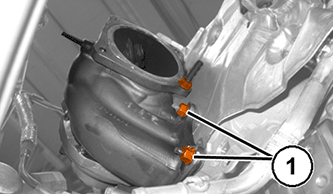
- Remove and discard the rear nuts (1) securing the turbocharger.NOTE:
Do not lift the turbocharger by the wastegate lever (1c).
- Remove and discard the remaining nut (1a) and remove the turbocharger (1b).
- Remove the exhaust manifold heat shield. Refer to MANIFOLD, EXHAUST, REMOVAL AND INSTALLATION .
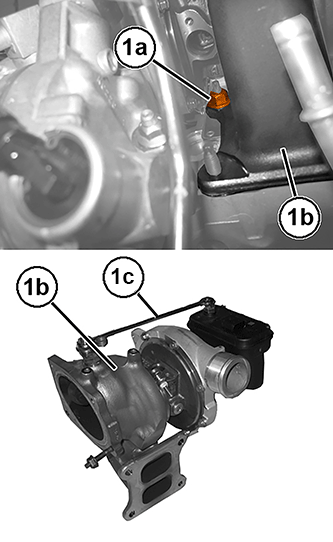
NOTE:
The exhaust manifold heat shield and exhaust manifold gasket are part of the same assembly. They cannot be reused and must be replaced.
INSTALLATION
- Install a NEW
exhaust manifold heat shield. Refer to MANIFOLD, EXHAUST, REMOVAL AND INSTALLATION .NOTE:
Do not lift the turbocharger by the wastegate lever (1c).
- Install the turbocharger (1b) with a NEW
upper front nut (1a) finger tight.
- Install the two NEW rear nuts (1) finger tight.
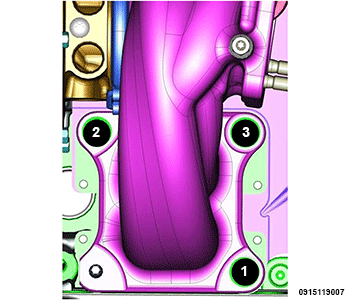
- Tighten the three nuts in the sequence shown in two steps. Tighten according to the following torque values:
- Step 1: All to 12 N.m (9 ft. lbs.)
- Step 2: All to 25 N.m (18 ft. lbs.)
- Install the turbocharger heat shield (1c) with two bolts (1a) and nut (1b) tightened to the proper specification Refer to TORQUE SPECIFICATIONS
.
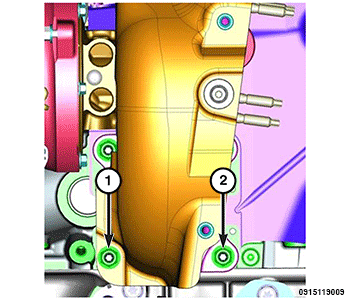
- Install a NEW lower front nut (1) to the turbocharger heat shield and tightened to the proper specification Refer to TORQUE SPECIFICATIONS .
- Retighten the lower rear turbocharger nut (2) to 25 N.m (18 ft. lbs.).
- Install the low pressure EGR valve. Refer to VALVE, EXHAUST GAS RECIRCULATION (EGR), REMOVAL AND INSTALLATION .
- Install the turbocharger oil return pipe. Refer to LINES, TUBES AND HOSES, TURBOCHARGER, OIL AND COOLANT, REMOVAL AND INSTALLATION .
- Install the turbocharger coolant supply pipe. Refer to LINES, TUBES AND HOSES, TURBOCHARGER, OIL AND COOLANT, REMOVAL AND INSTALLATION .
- Install the water pump inlet tube. Refer to TUBE, WATER INLET, REMOVAL AND INSTALLATION .
- Install the catalytic converter mounting bracket and the catalytic converter. Refer to CONVERTER, CATALYTIC, REMOVAL AND INSTALLATION .
- Fill the turbocharger coolant system. Refer to DRAINING AND FILLING THE TURBOCHARGER COOLING SYSTEM .
- Connect the negative battery cable.
- Remove the support and lower the vehicle.