Cam Chain
REMOVAL
multimedia:A supplement to the article is available.
- Remove the timing chain cover. Refer to COVER(S), ENGINE TIMING, REMOVAL AND INSTALLATION .
- Position the number one cylinder piston to top-dead-center.NOTE:
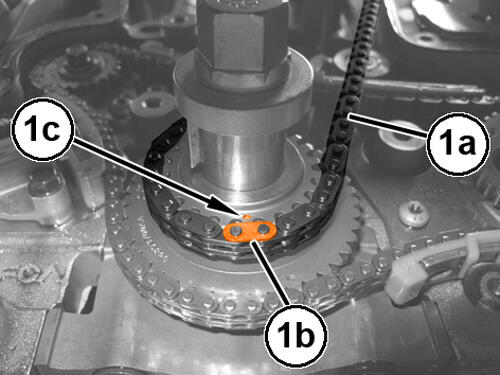
If the timing chain plated link (1b) can no longer be seen, the timing chain link corresponding to the timing mark (1c) must be marked prior to removal if the chain (1a) is to be reused.
- Mark chain link (1b) corresponding to crankshaft sprocket timing mark (1c).
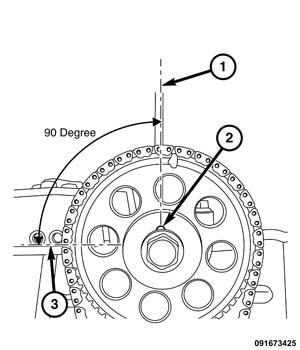
- While maintaining this alignment, verify that the camshaft dowel (2) is at the 12 o'clock position. The dowel center line (1) will be 90° from the horizontal surface line at the top of the cylinder head (3).
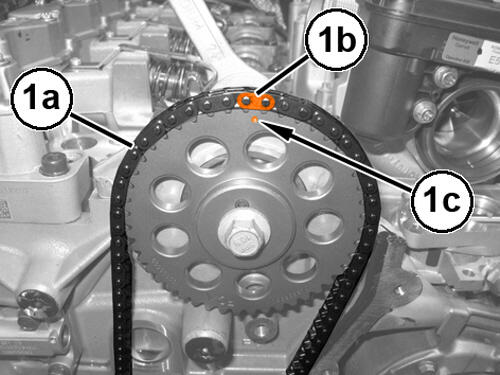
- Mark the chain link (1b) corresponding to camshaft sprocket timing mark (1c).
- Remove the cam chain guide. Refer to GUIDES, TIMING CHAIN, REMOVAL AND INSTALLATION .
- Remove the cam chain tensioner arm. Refer to GUIDES, TIMING CHAIN, REMOVAL AND INSTALLATION .
- Remove the cam chain (1).
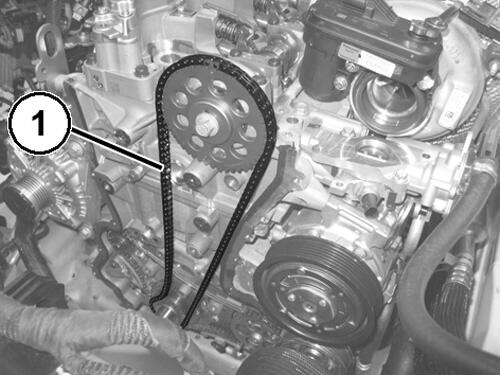
INSTALLATION
- Remove all sealant residues.
- Install the cam chain (1a) starting from the crankshaft sprocket, position the painted chain link (1b) at the reference mark (1c).
- Install the cam chain (1a) on the camshaft sprocket, so the reference mark (1c) aligns with the painted chain link (1b).
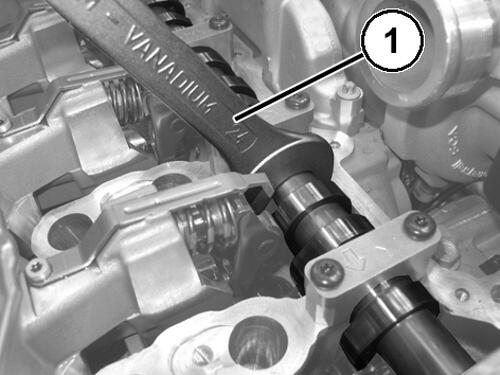
- If needed, turn the camshaft slightly using a suitable tool at the location shown in the illustration.
- Install the cam chain tensioner arm. Refer to GUIDES, TIMING CHAIN, REMOVAL AND INSTALLATION .
- Install the cam chain guide. Refer to GUIDES, TIMING CHAIN, REMOVAL AND INSTALLATION .
- Install the timing chain cover. Refer to COVER(S), ENGINE TIMING, REMOVAL AND INSTALLATION .
- If removed, install the oil filter and fill the engine crankcase with the proper oil to the correct level. Refer to OIL, STANDARD PROCEDURE .
- Run the engine until it reaches normal operating temperature. Check cooling system for correct fluid level. Refer to ADDING ADDITIONAL COOLANT .