Oil Pump Drive Chain
REMOVAL
multimedia:A supplement to the article is available.
- Remove the timing chain cover. Refer to COVER(S), ENGINE TIMING, REMOVAL AND INSTALLATION .
- Remove the cam chain. Refer to CHAIN AND SPROCKETS, TIMING, REMOVAL AND INSTALLATION .
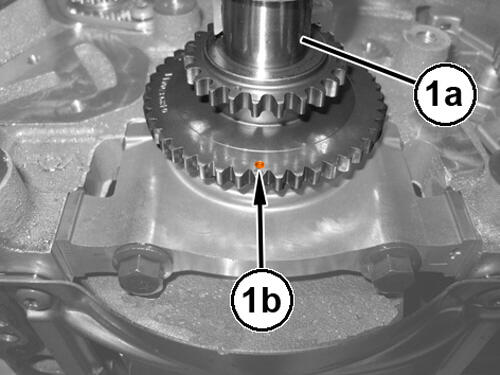
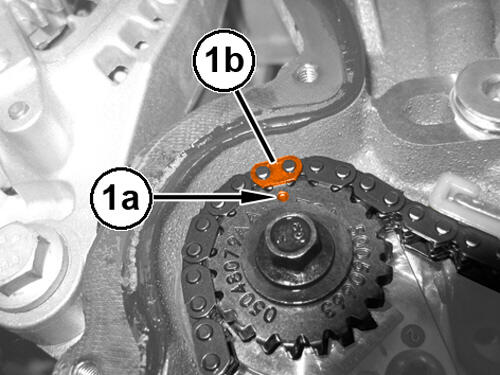
- Place the No. 1 cylinder piston at top-dead-center by rotating the crankshaft clockwise (as viewed from the front) to position the engine crankshaft reference mark (1a) at 6 o'clock as shown in the illustration.NOTE:
If the oil pump drive chain plated links (1b) can no longer be seen, the chain links corresponding to the timing mark (1a) must be marked prior to removal if the chain is to be reused.
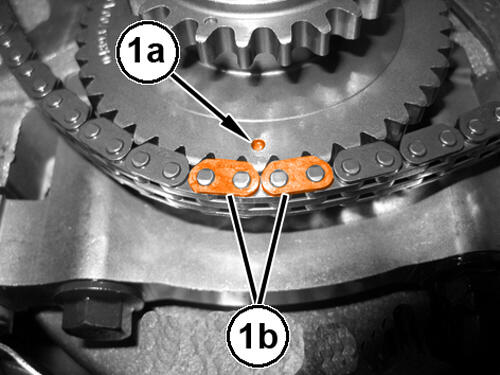
- Mark chain links (1b) corresponding to crankshaft sprocket timing mark (1a).
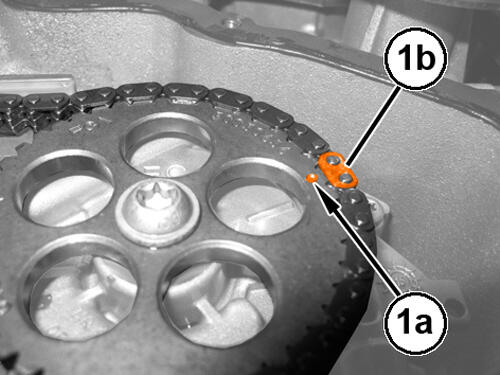
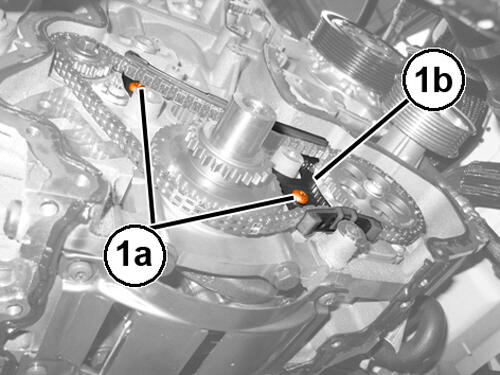
- While maintaining this alignment, mark chain link (1b) corresponding to the engine oil pump sprocket timing mark (1a).
- Mark the chain link (1b) corresponding to the balance shaft sprocket timing mark (1a).
- Remove the oil pump drive chain tensioner shoe. Refer to TENSIONER, ENGINE TIMING, REMOVAL AND INSTALLATION .
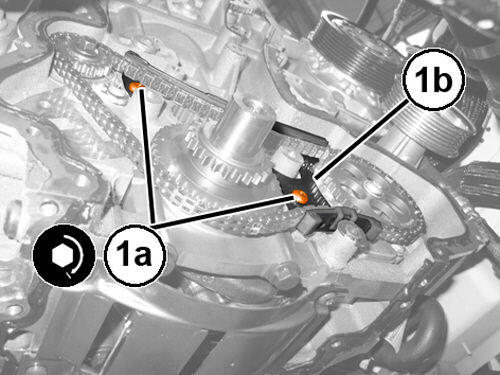
- Undo the plate screws (1a) fastening the oil pump drive chain guide (1b).
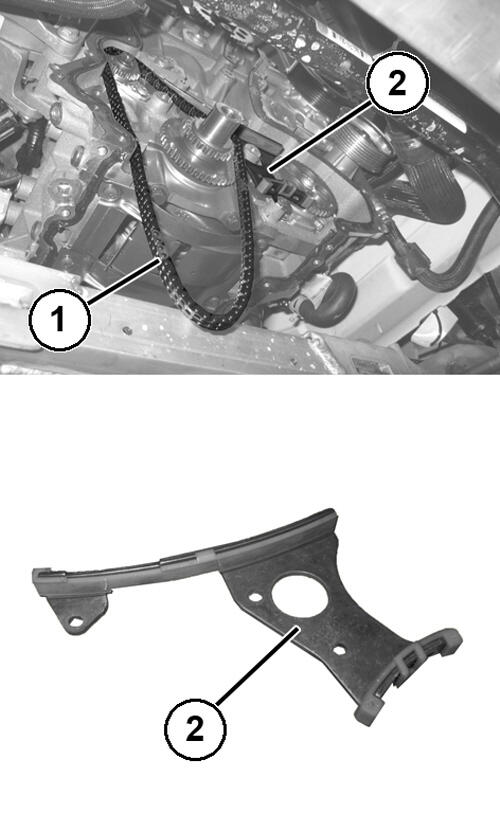
- Release and remove the oil pump drive chain (1).
- Remove the oil pump drive chain guide (2).
INSTALLATION
- Remove all sealant residues.
- Verify that the engine crankshaft reference mark (1b) is at 6 o'clock indicating that the No. 1 cylinder piston is at top-dead-center.
- Install the oil pump drive chain guide in position.
- Starting from the crankshaft sprocket, position the two painted chain links (1b) at the reference mark (1a).
- Position the balance shaft sprocket so the reference mark (1a) aligns with the painted chain link (1b).
- Position the engine oil pump sprocket so the reference mark (1a) aligns with the painted chain link (1b).
- Install the screws (1a) fastening the oil pump drive chain guide (1b) and tighten to the proper specification Refer to TORQUE SPECIFICATIONS .
- Install the oil pump drive chain tensioner shoe. Refer to TENSIONER, ENGINE TIMING, REMOVAL AND INSTALLATION .
- Install the cam chain. Refer to CHAIN AND SPROCKETS, TIMING, REMOVAL AND INSTALLATION .
- Install the timing chain cover. Refer to COVER(S), ENGINE TIMING, REMOVAL AND INSTALLATION .
- If removed, install the oil filter and fill the engine crankcase with the proper oil to the correct level. Refer to OIL, STANDARD PROCEDURE .
- Run the engine until it reaches normal operating temperature. Check cooling system for correct fluid level. Refer to ADDING ADDITIONAL COOLANT .