Transmission Oil Pump
DISASSEMBLY
- Remove the oil pump from the transmission case. Refer to PUMP, TRANSMISSION OIL, REMOVAL AND INSTALLATION .NOTE:
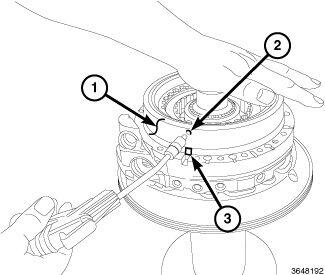
Apply air pressure slowly, oil may spray when B-piston releases from the assembly.
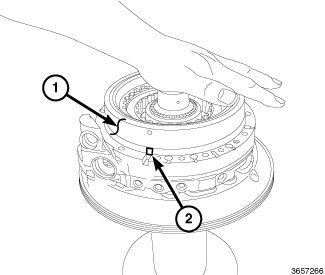
- With one hand above B-piston (1), carefully apply air pressure into the hole directly above the B-piston alignment tab (3) to remove B-piston (2) from the assembly.
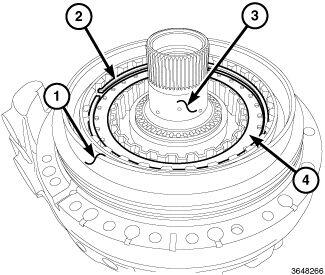
- Remove the outer ring (1) (inside B-piston).
- Remove the snap ring (2).
- Remove the clutches and spacers (4).
- Remove the hub (3).
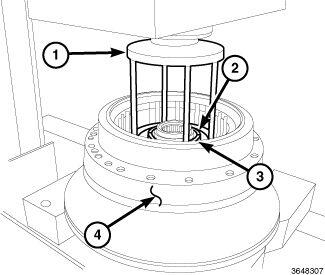
- Position the oil pump housing assembly (4) in a suitable press.
- Using (special tool #8285, Compressor, Spring) (1), press on the fingers of the piston retainer to remove tension on the split retaining ring (2), and remove the two halves of the retaining ring (2).
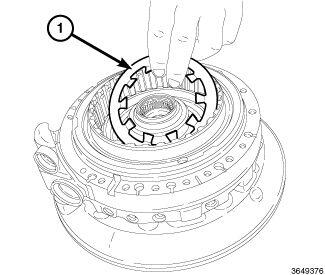
- Remove the piston retainer and the belleville spring (1).
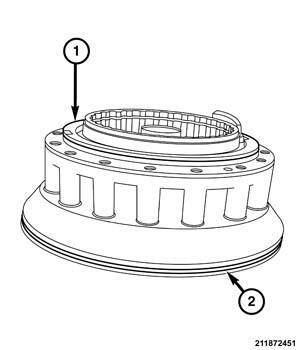
- Remove the A-piston (1) and seal (2) from the oil pump.
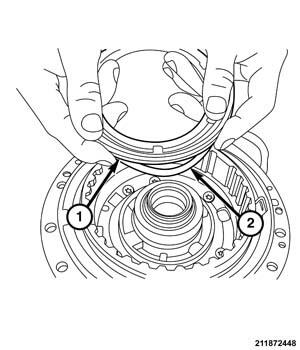
- Remove the inner (1) and outer (2) oil pump O-rings.
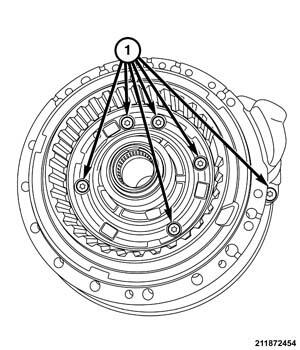
- Remove and
DISCARD
the six bolts (1) from the oil pump.
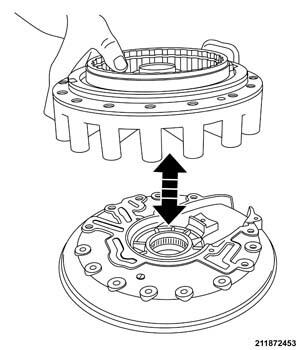
- Separate the two halves of the oil pump, by pushing on the hub.
- Carefully pry up on the oil pump (1), separating it from the housing (2).
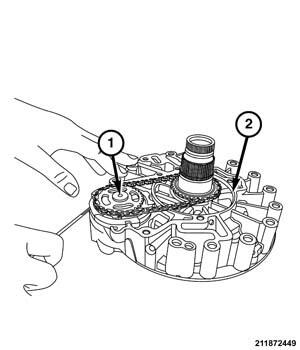
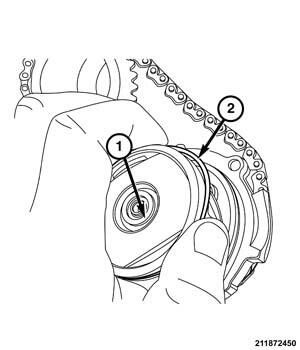
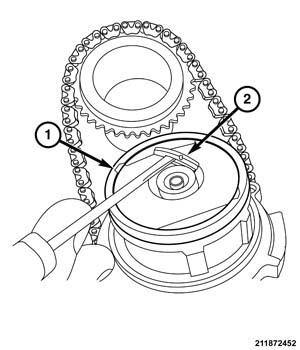
- Remove the oil pump O-ring (2).
- Remove the oil pump seal (2).
ASSEMBLY
- Install the oil pump seal (2).
- Install the oil pump O-ring (2).
- Carefully seat the oil pump into the housing, make sure the pump is seated properly.
- Install the two oil pump housing halves together.
- Install six NEW oil pump housing bolts (1).
- Tighten the bolts to 5 N.m (44 in. lbs). plus 45°.
- Replace the inner and outer oil pump housing O-rings (1).
- Replace the A- piston seal (2) and install the A-piston (1).
- Install the belleville spring (1).
- Position the oil pump housing assembly (4) in a suitable arbor press.
- Using (special tool #8285, Compressor, Spring) (1), press on the fingers of the piston retaining ring to remove tension, and install the two halves of the split retainer ring (2).
- Install the hub (3).
- Install the clutches and spacers (4).
- Install the snap ring (2).
- Install the outer ring (1) (below B-piston).
- Position the B-piston alignment tab (2) above the notch and install B-piston (1) on the assembly.
- Install the oil pump into the transmission. Refer to PUMP, TRANSMISSION OIL, REMOVAL AND INSTALLATION .