High Pressure
REMOVAL
- Perform the fuel system pressure release procedure. Refer to FUEL SYSTEM PRESSURE RELEASE .
- Disconnect and isolate the negative battery cable.
- Remove the hood. Refer to HOOD, REMOVAL AND INSTALLATION .
- Remove the cowl panel. Refer to COVER, COWL PANEL, REMOVAL AND INSTALLATION .
- Remove the turbocharger air outlet pipe to throttle body. Refer to COOLER AND HOSES, CHARGE AIR, REMOVAL AND INSTALLATION
.
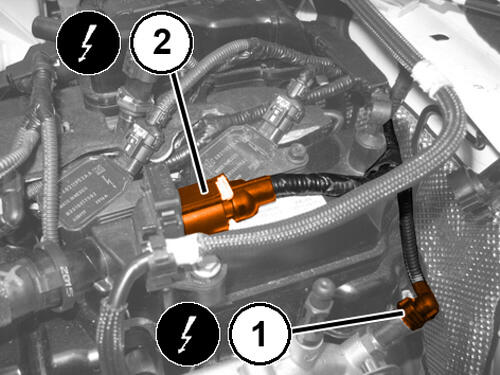
- Disconnect the engine coolant temperature sensor wire harness connection (1).
- Disconnect the upper oxygen sensor wire harness connection (2).
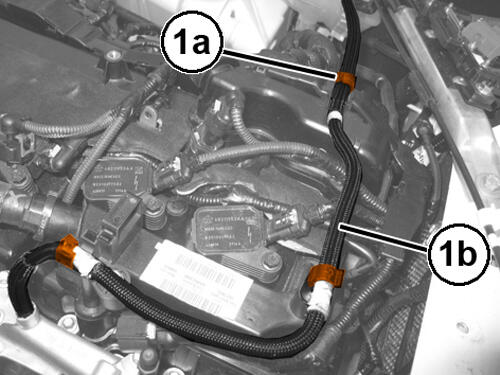
- Open the clips (1a) and release the degassing pipe (1b).
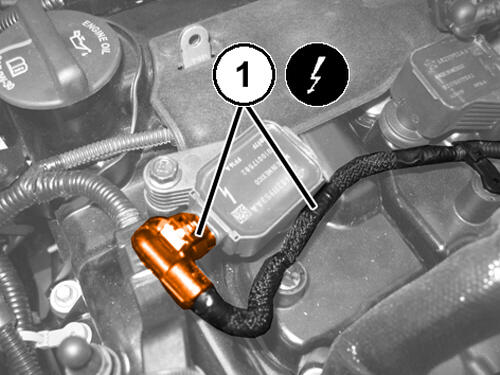
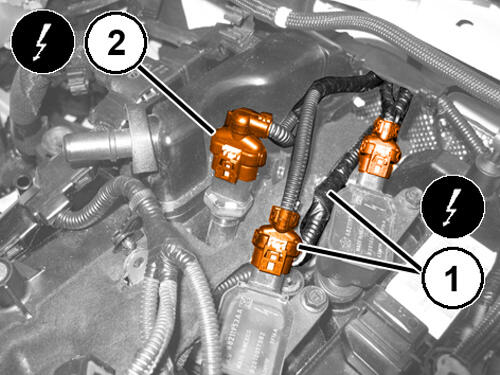
- Release the wiring and disconnect the wire harness connection (1) of cylinder 1 ignition coil.
- Release the wiring and disconnect the wire harness connection (1) of cylinder 2 ignition coil.
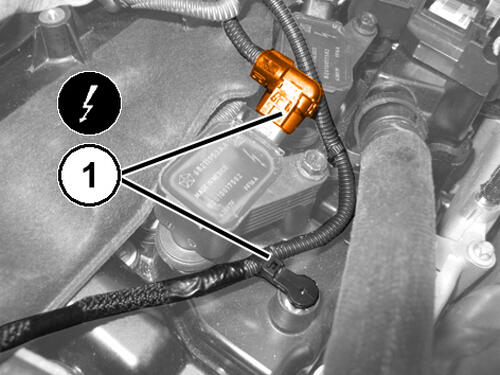
- Release the wiring and disconnect the wire harness connection (1) of cylinders 3 - 4 ignition coils.
- Disconnect the wire harness connection (2) of the fuel pressure sensor on the fuel rail.
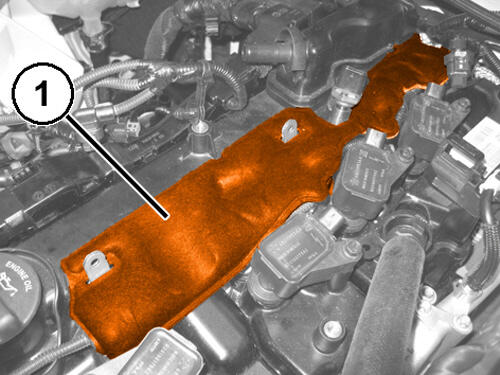
- Remove the soundproofing panel (1).
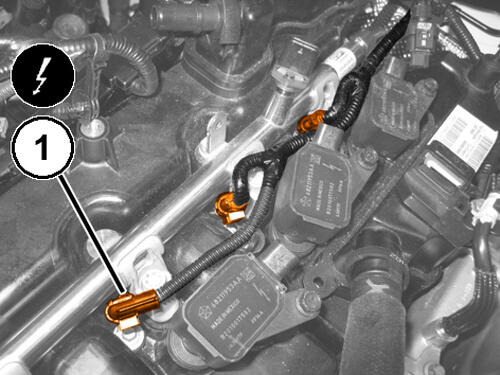
- Disconnect the wire harness connections (1) to the cylinder 2 - 3 - 4 fuel injectors.
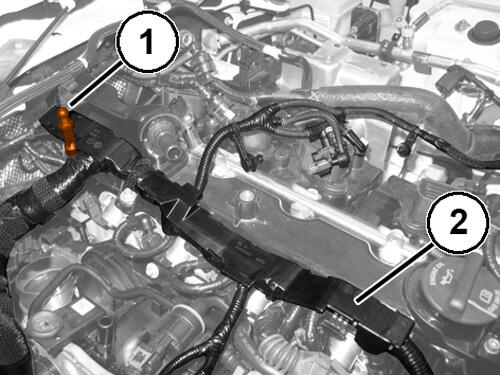
- Remove the engine cover retaining pin (1).
- Release the wire harness (2) and position it aside.
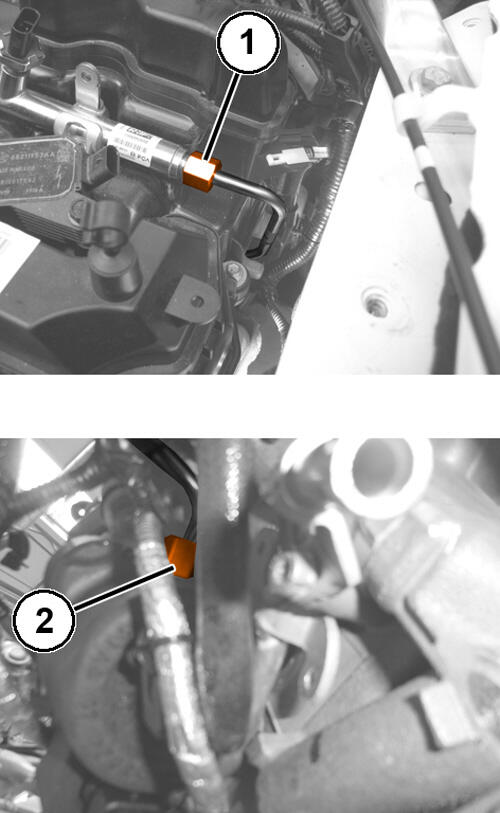
- Remove the high pressure fuel supply pipe fitting (1) from the fuel rail.
- Remove the high pressure fuel supply pipe fitting (2) from the high pressure fuel pump.
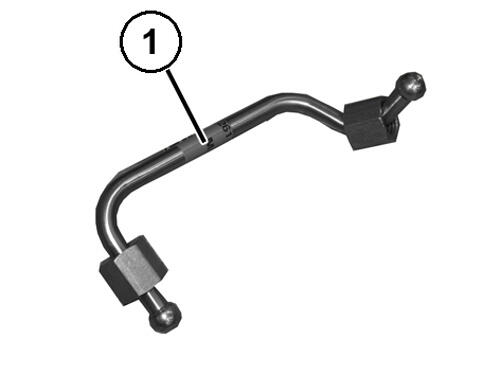
- Remove and DISCARD the high pressure fuel supply pipe (1).
INSTALLATION
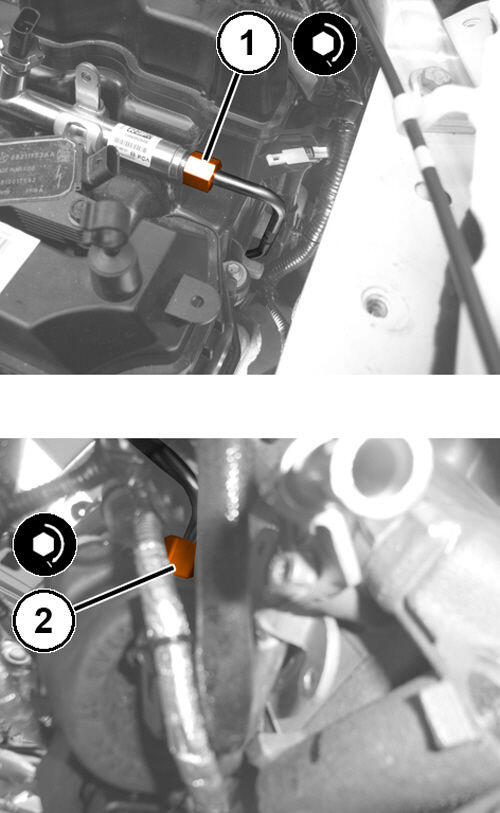
- Install the NEW high pressure fuel supply pipe from the high pressure pump to the fuel rail.
- Using the (special tool #2025508140, Wrench, Fuel Line 17mm), tighten the fuel rail fitting (1) and the pressure pump fitting (2) to the proper specification. Refer to TORQUE SPECIFICATIONS
.NOTE:
Using an offset torque adapter can affect the actual torque applied to the fittings depending on the length and angle of the adapter relative to the torque wrench.
Install the engine wire harness in position.
- Install and securely tighten the engine cover retaining pin.
- Connect the wire harness connections to the cylinder 2 - 3 - 4 fuel injectors.
- Place the soundproofing panel back in position.
- Connect the wire harness connection of the fuel pressure sensor on the fuel rail.
- Connect the wire harness connections of cylinder 1 - 2 - 3 - 4 ignition coils and engage the wiring in its retaining clips.
- Install the degassing pipe and close the respective retaining clips.
- Connect the upper oxygen sensor wire harness connection.
- Install the turbocharger air outlet pipe to throttle body. Refer to COOLER AND HOSES, CHARGE AIR, REMOVAL AND INSTALLATION .
- Install the cowl panel. Refer to COVER, COWL PANEL, REMOVAL AND INSTALLATION .
- Install the hood. Refer to HOOD, REMOVAL AND INSTALLATION .
- Connect the negative battery cable.
- Check the high pressure fuel system for leaks. Refer to DIAGNOSIS AND TESTING .