Draining And Filling The Turbocharger Cooling System
CAUTION:
If customer returned the vehicle with coolant lower than the minimum fill line, all 4 O-rings at the turbo to oil and coolant tubes must be replaced.
- Remove the engine belly pan. Refer to BELLY PAN, ENGINE, REMOVAL AND INSTALLATION
.WARNING:
Hot, pressurized coolant can cause injury by scalding.
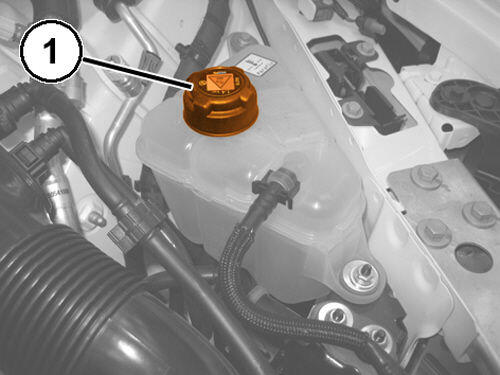
- With the engine cold, remove the turbocharger cooling system reservoir cap (1).
- Position a suitable container for collecting the coolant.
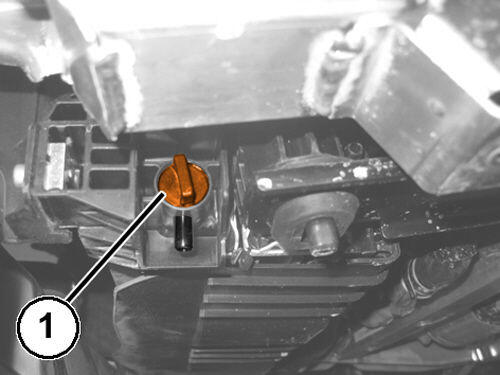
- Open the turbocharger cooling system radiator drain plug (1).
- When the radiator is completely drained, close the plug.
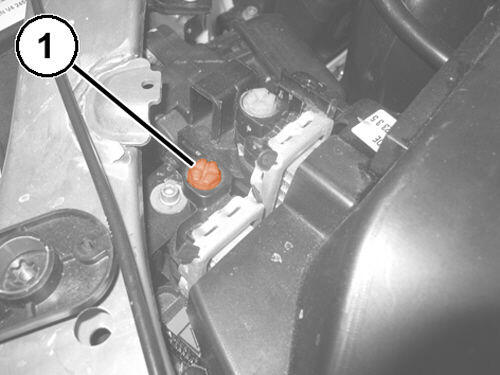
- Open the bleed screw (1) on the turbocharger cooling system radiator.
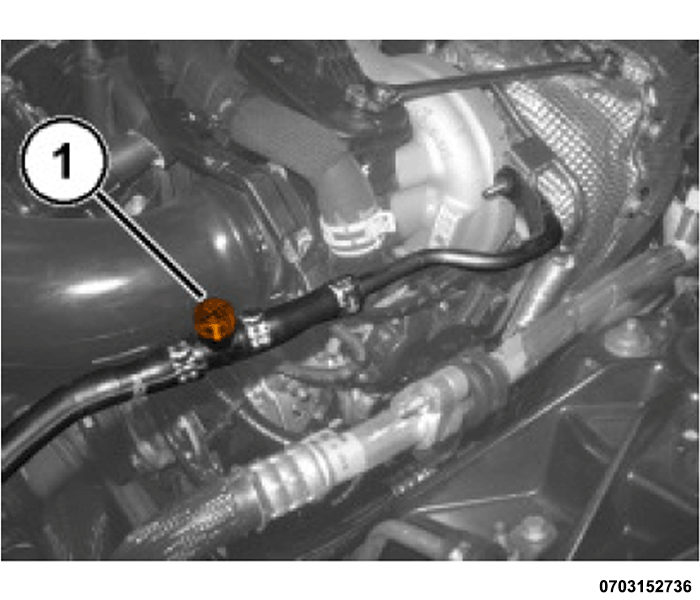
- Open bleed valve on the engine coolant outlet pipe from the turbo outlet pipe front the turbo charger and keep it open.
- Pour in the prescribed coolant until fluid is coming out of the bleed screw and tighten the bleed screw. Refer to CAPACITIES AND RECOMMENDED FLUIDS, SPECIFICATIONS .
- When refilling is complete, the coolant level will be flush with the filler.
- Install the turbocharger cooling system reservoir cap.
- Connect the diagnosis equipment to the vehicle diagnosis socket, activate the electric pump at 75% of its power and let it run for about 10 minutes. Then change the solenoid valve position to 3-way and in the meantime continue to bleed air with the electric water pump activated to 75% for 5 more minutes.
- If there is a noticeable drop in level in the supply reservoir during this stage, switch off electric pump, open the cap very carefully and top up the fluid to the MAX level. Then close the cap fully and complete bleeding the air from the system, keeping the electric pump powered at 75%.
- With the pump powered, slowly unscrew the radiator bleed screw until coolant comes out, then retighten. Repeat for the Turbo line bleed screw. (1)
- Then switch off the power to the electric pump.
- Install the engine belly pan. Refer to BELLY PAN, ENGINE, REMOVAL AND INSTALLATION .