Removal And Installation
REMOVAL
- Disconnect and isolate the negative battery cable.
- Remove the belly pan. Refer to BELLY PAN, ENGINE, REMOVAL AND INSTALLATION or BELLY PAN, REAR, REMOVAL AND INSTALLATION or BELLY PAN, REAR SUSPENSION, REMOVAL AND INSTALLATION or BELLY PAN, SIDE, REMOVAL AND INSTALLATION .
- Remove the air cleaner body. Refer to BODY, AIR CLEANER, REMOVAL AND INSTALLATION .
- Remove the turbocharger air inlet tube. Refer to BODY, AIR CLEANER, REMOVAL AND INSTALLATION .
- Remove the A/C condenser. Refer to CONDENSER, A/C, REMOVAL AND INSTALLATION .
- Drain the engine cooling system. Refer to DRAINING AND FILLING THE ENGINE COOLING SYSTEM .
- Drain the turbocharger cooling system. Refer to DRAINING AND FILLING THE TURBOCHARGER COOLING SYSTEM
.
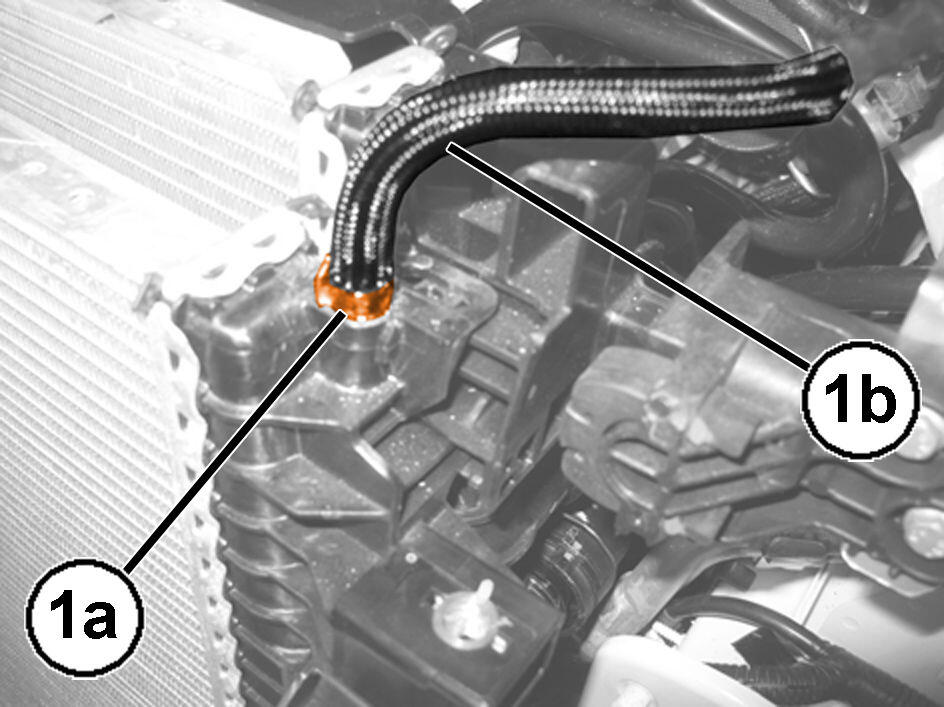
- Loosen the hose clip (1a) and disconnect the degassing pipe (1b) from the turbocharger air cooling system radiator.
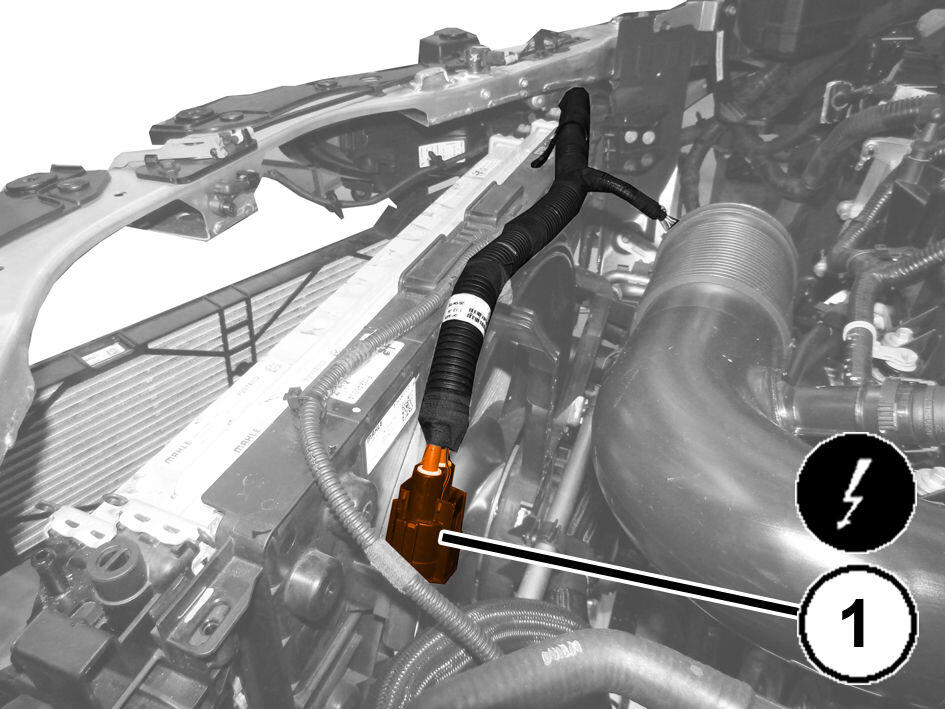
- Disconnect the electrical connection for the fan and release the wiring from the retaining clips on the radiator.
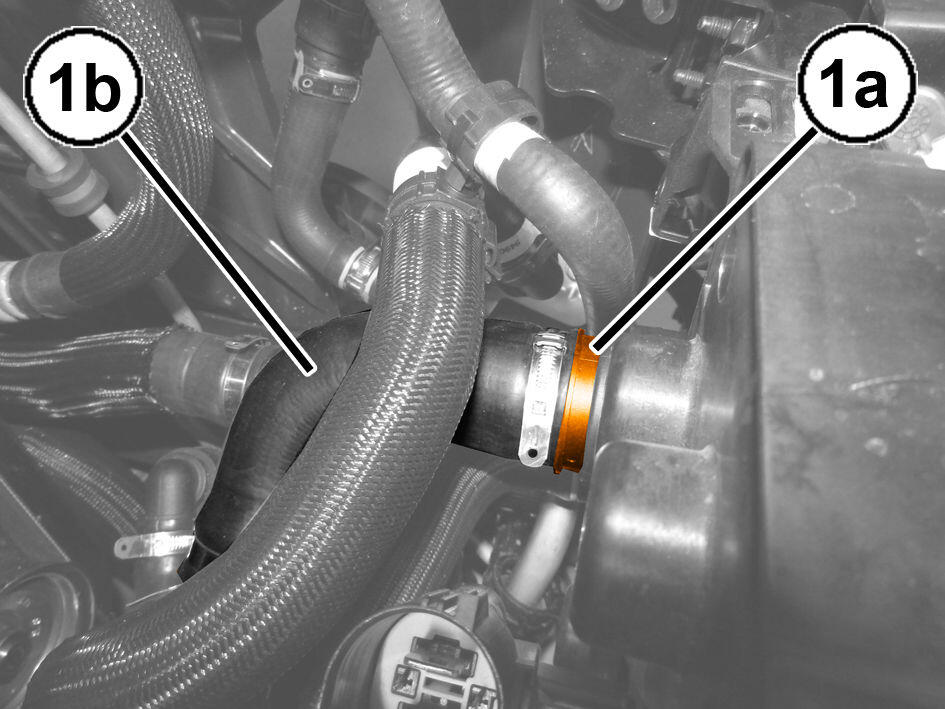
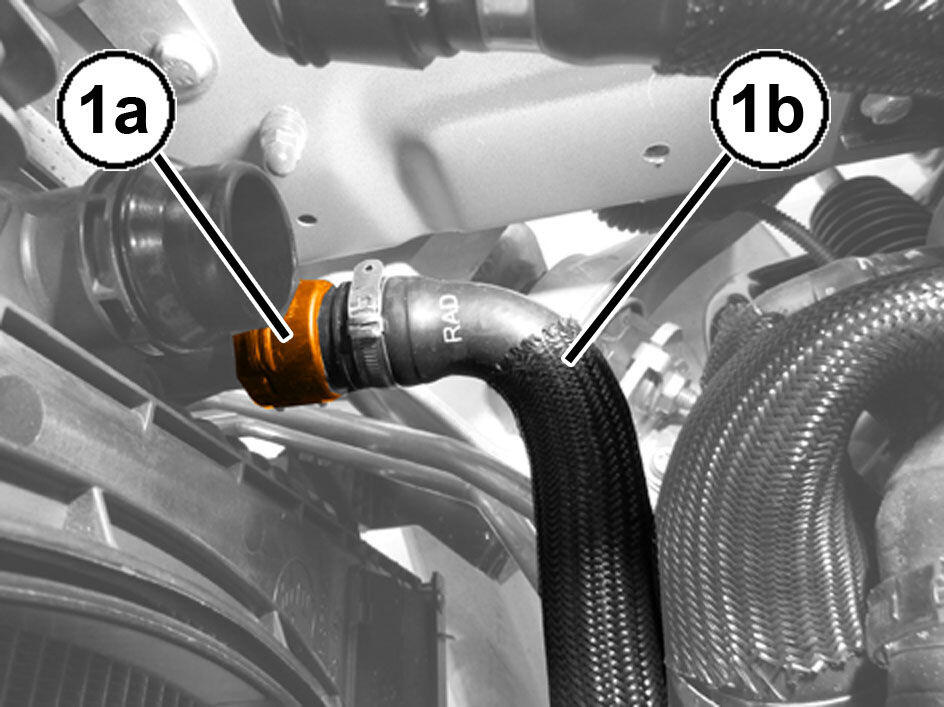
- Disconnect the quick coupling (1a) of the coolant supply pipe to the radiator. (1b).
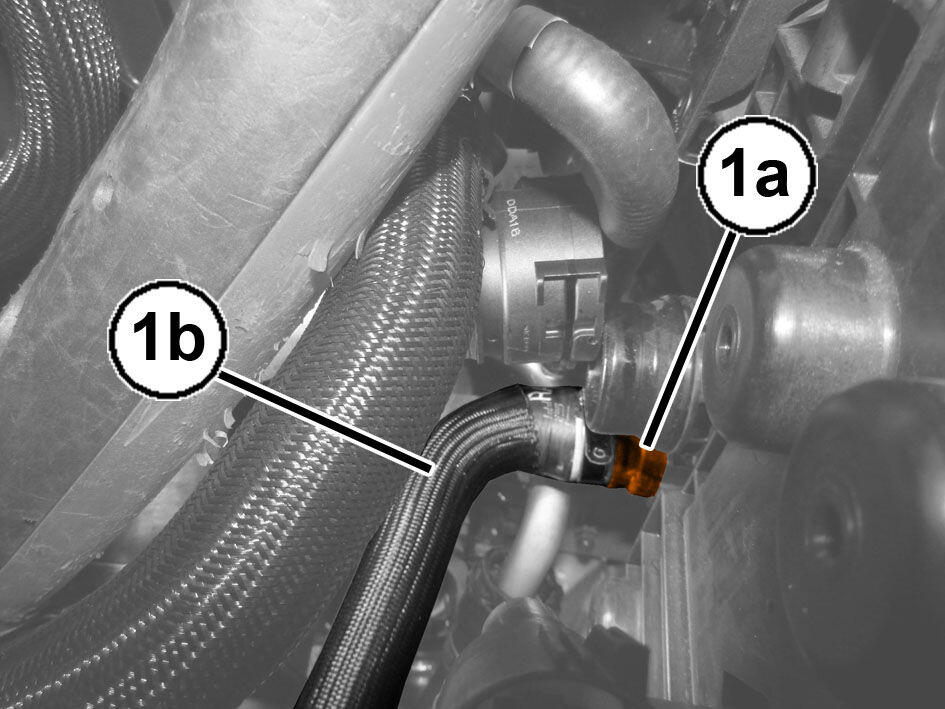
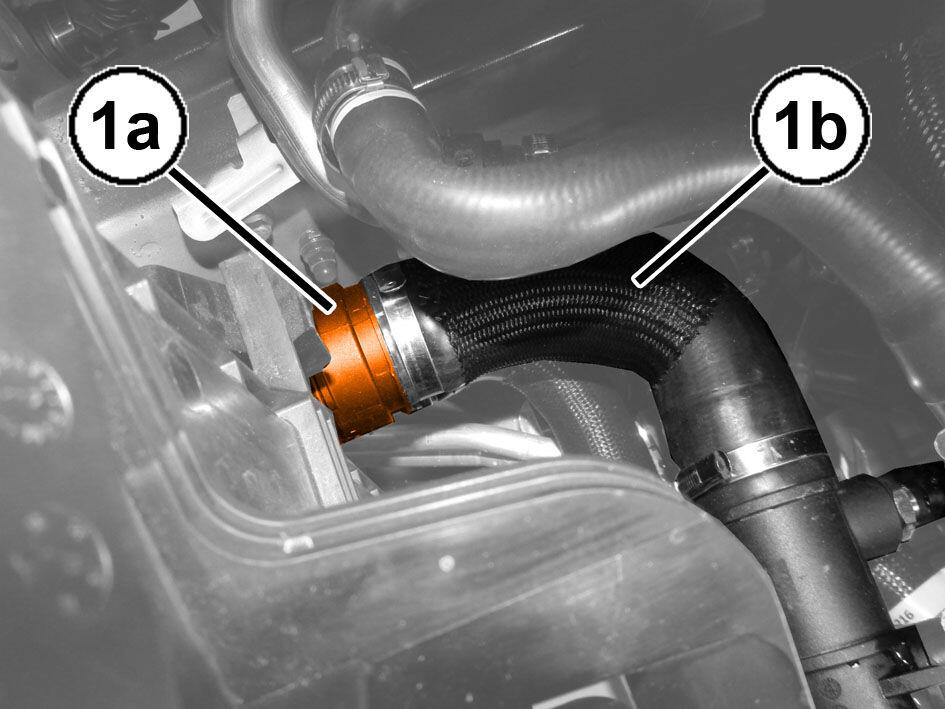
- Disconnect the quick coupling (1a) for the coolant supply pipe to the turbocharger air cooling system radiator (1b).
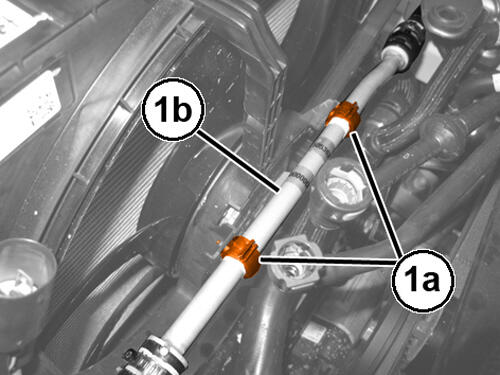
- Release the clips (1a) and radiator coolant inlet tube (1b).
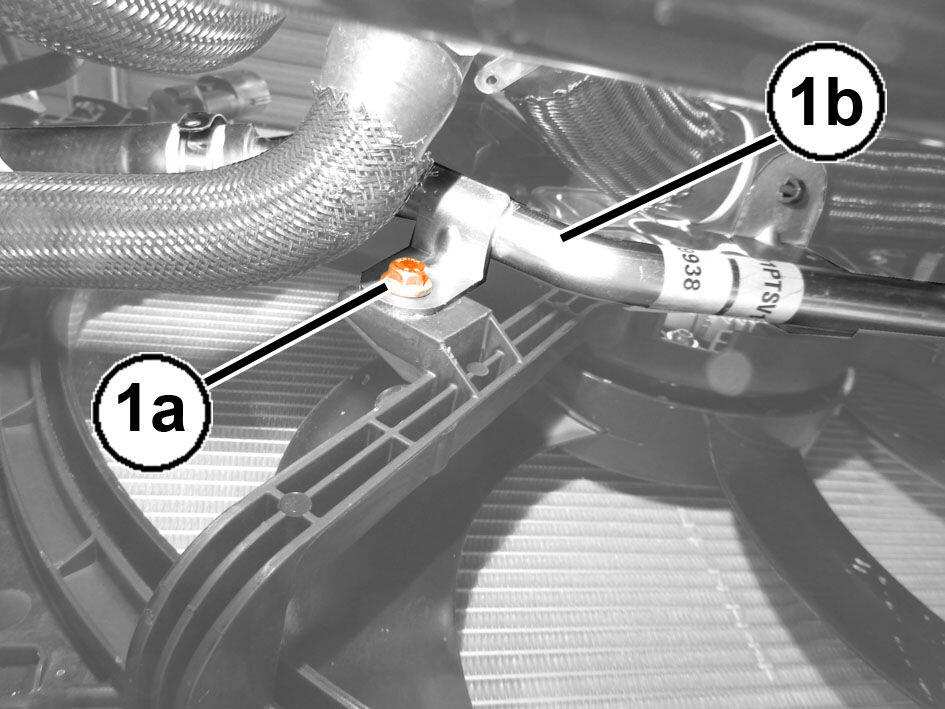
- Remove the screw (1a) securing the outlet pipe from the turbocharger air cooling system radiator (1b).
- Open the quick coupling (1a) and disconnect the coolant outlet pipe from the radiator (1b).
- Open the quick coupling (1a) and disconnect the coolant outlet pipe from the turbocharger air cooling system radiator (1b).
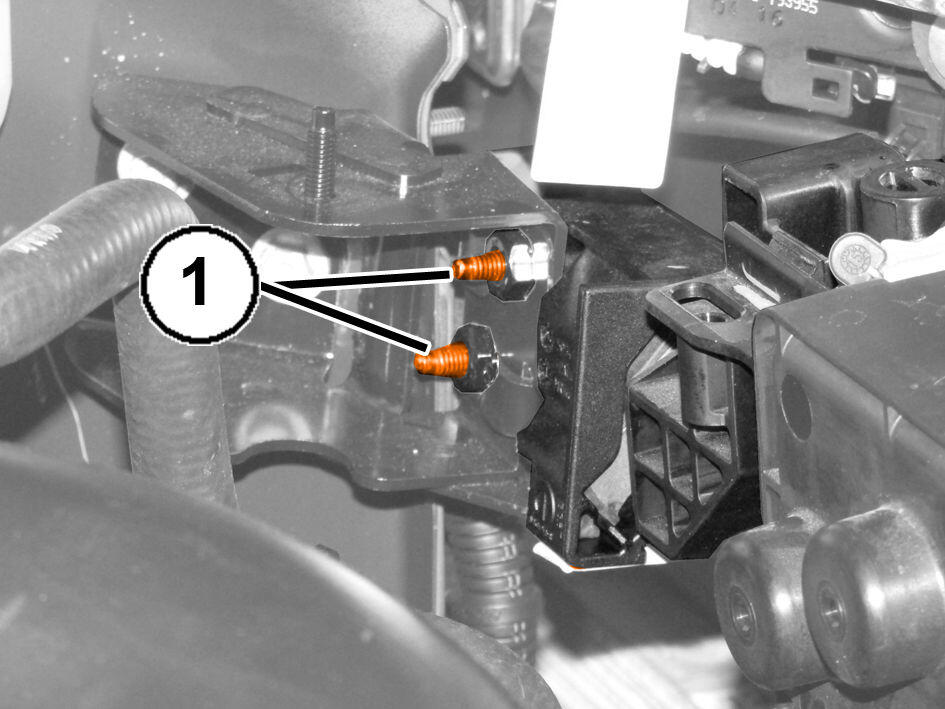
- Remove the retaining screws of the radiator support flexible mountings.
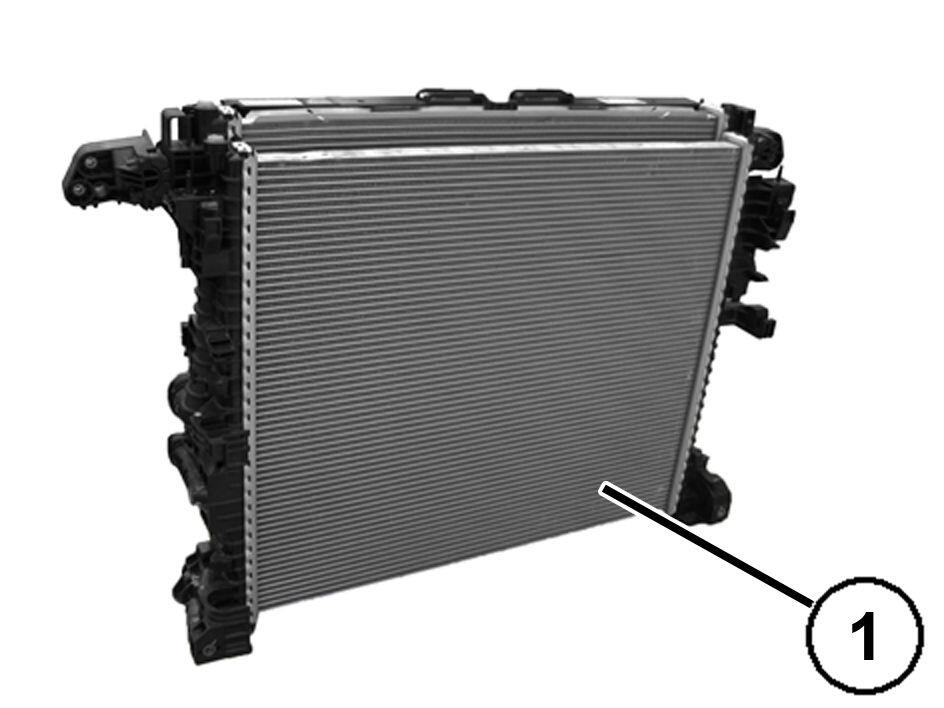
- Remove the engine cooling radiator.
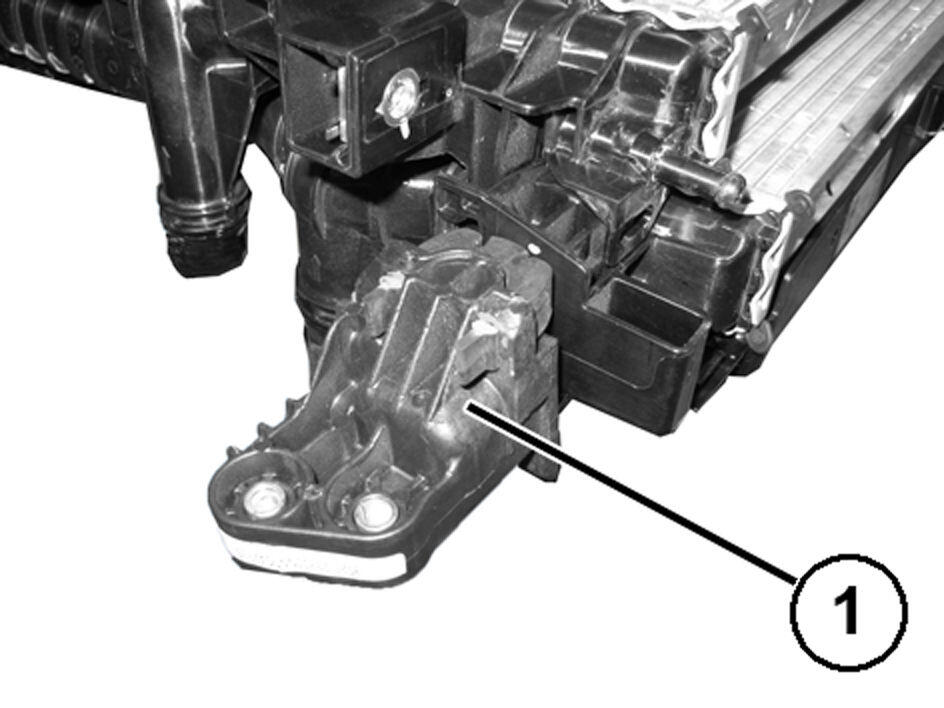
- Remove the radiator support flexible mounts.
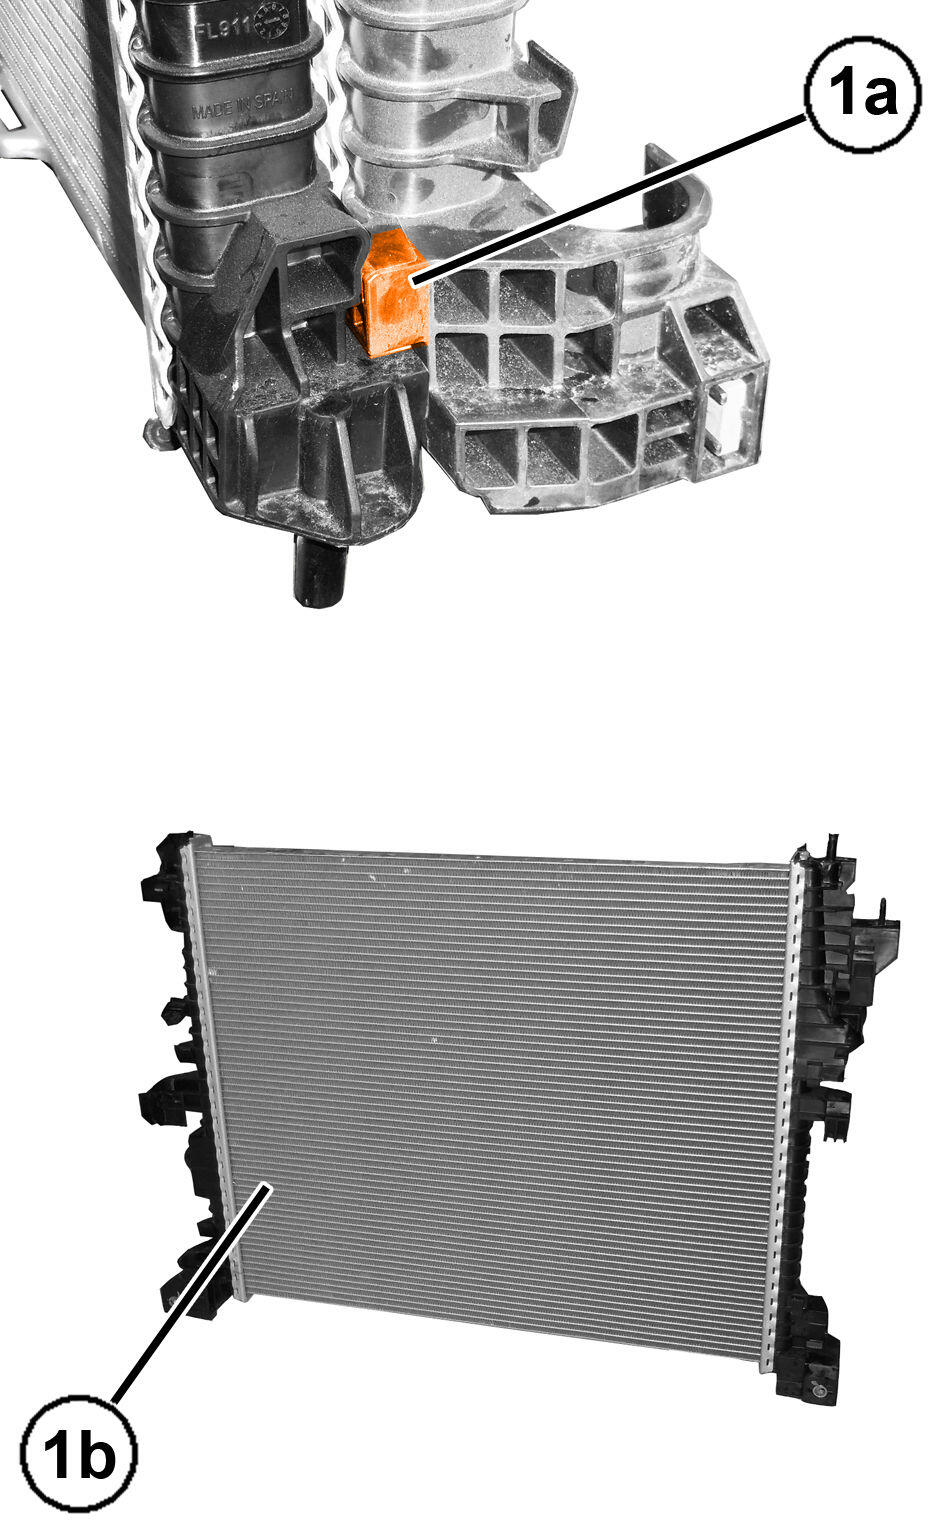
- Release the retaining clips and remove the turbocharger air cooling system radiator.
- Release the lower retaining clips (1a) and remove the turbocharger air cooling system radiator (1b).
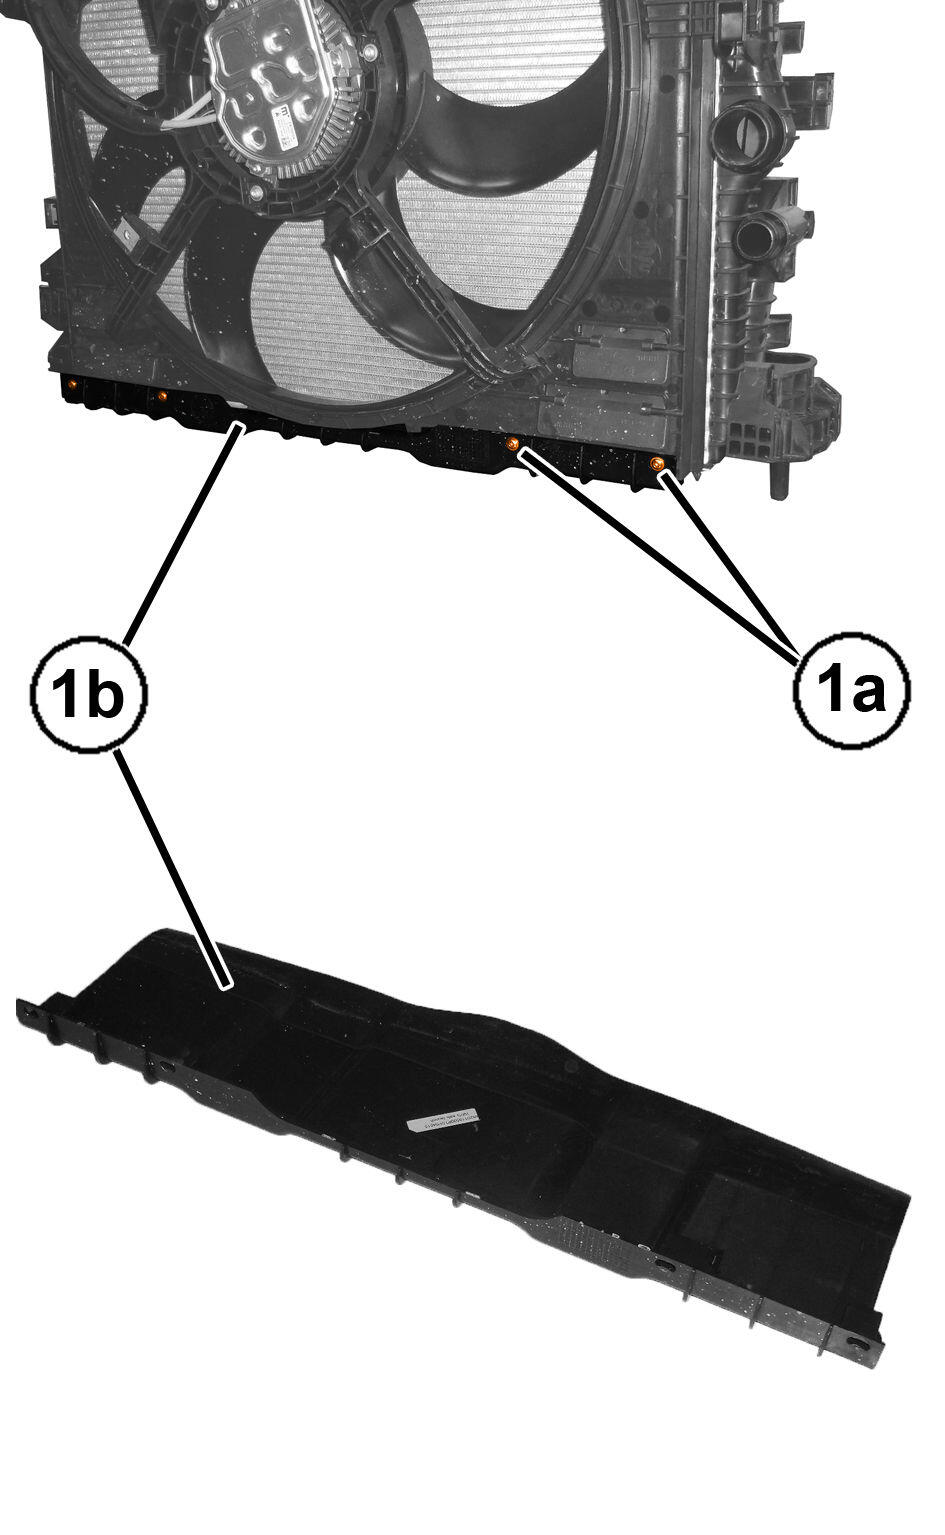
- Remove the screws (1a) and remove the lower air duct (1b).
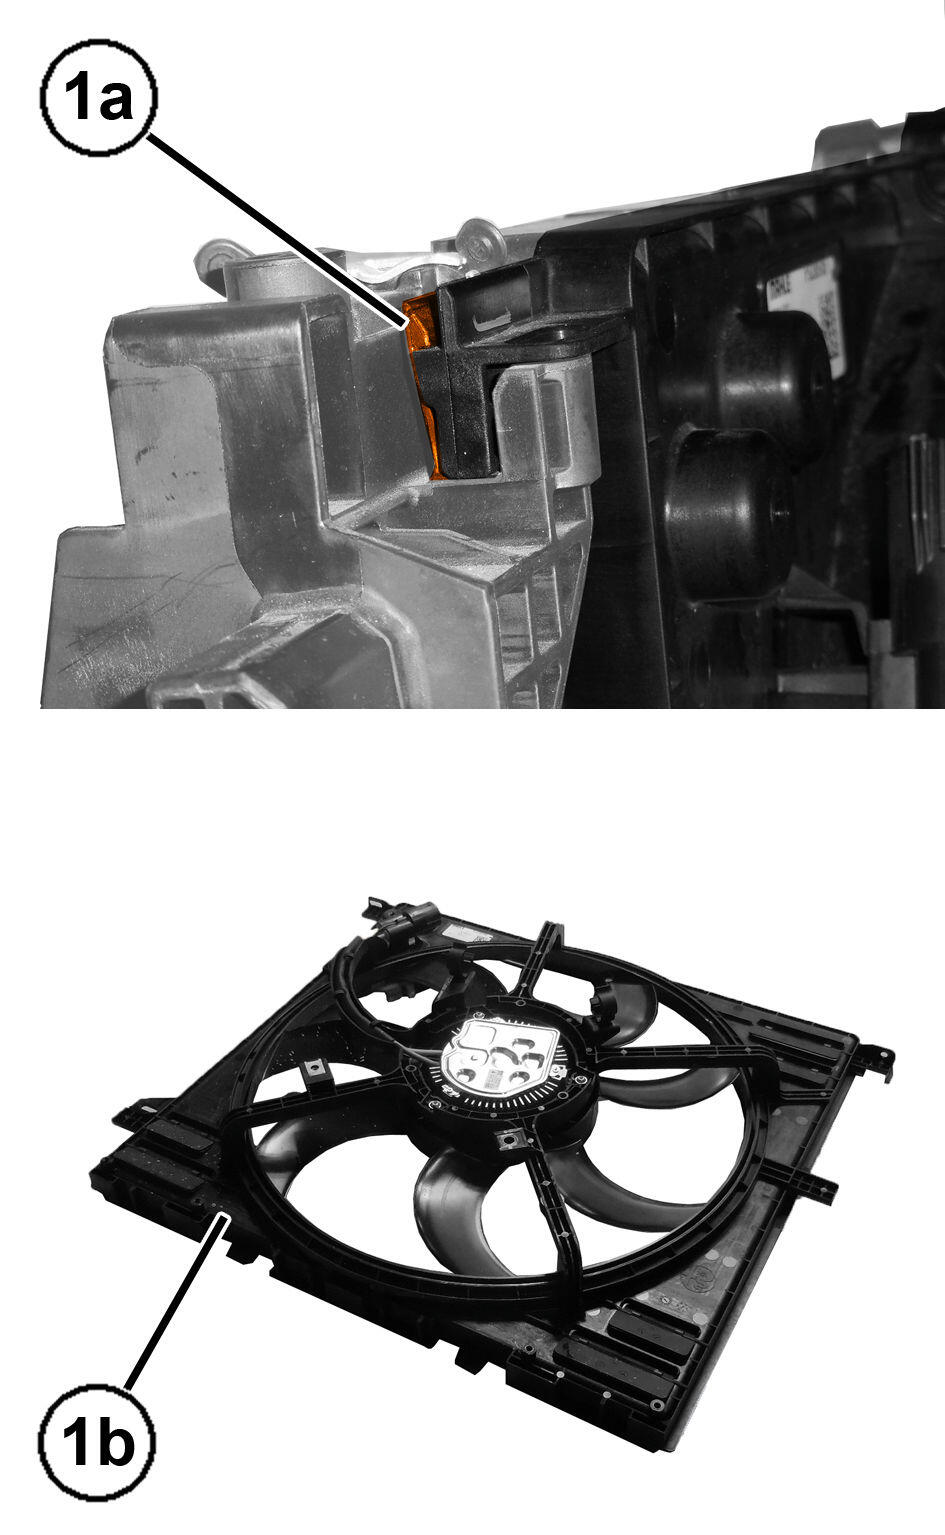
- Release the clamps (1a) and remove the fan (1b) from the engine cooling radiator.
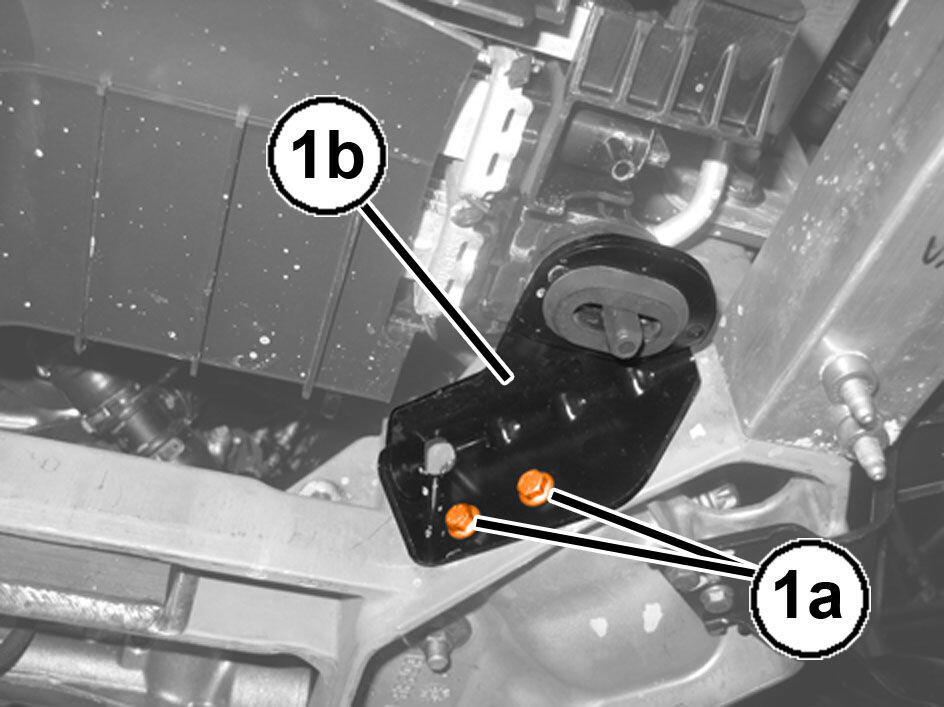
- If necessary, remove the lower radiator mount bolts and mount
INSTALLATION
- If removed, install the radiator mount and securely tighten the bolts.
- Position the fan on the engine cooling radiator and secure the clamps.
- Install the lower air duct and securely tighten the screw.
- Install the turbocharger air cooling system radiator and secure the lower retaining clips.
- Install the turbocharger air cooling system radiator and secure the retaining clips.
- Install the radiator support flexible mounts.
- Install the engine cooling radiator.
- Install the radiator support flexible mountings and securely tighten the retaining screws.
- Install the coolant outlet pipe to the turbocharger air cooling system and secure the quick coupling.
- Install the coolant outlet pipe to the radiator and secure the quick coupling.
- Install the outlet pipe from the turbocharger air cooling system radiator and securely tighten the screw.
- Install the cold air intake.
- Install the radiator coolant inlet tube and secure the clips.
- Connect the quick coupling for the coolant supply pipe to the turbocharger air cooling system radiator.
- Connect the quick coupling of the coolant supply pipe to the radiator.
- Connect the electrical connection for the fan and the wiring retaining clips on the radiator.
- Loosen the hose clip and Install the degassing pipe and hose clip to the turbocharger air cooling system radiator.
- Install the A/C condenser. Refer to CONDENSER, A/C, REMOVAL AND INSTALLATION .
- Install the turbocharger air inlet tube. Refer to BODY, AIR CLEANER, REMOVAL AND INSTALLATION .
- Install the air cleaner body. Refer to BODY, AIR CLEANER, REMOVAL AND INSTALLATION .
- Connect the negative battery cable.
- Fill the engine cooling system. Refer to DRAINING AND FILLING THE ENGINE COOLING SYSTEM .
- Fill the turbocharger cooling system. Refer to DRAINING AND FILLING THE TURBOCHARGER COOLING SYSTEM .
- Install the belly pan. Refer to BELLY PAN, ENGINE, REMOVAL AND INSTALLATION or BELLY PAN, REAR, REMOVAL AND INSTALLATION or BELLY PAN, REAR SUSPENSION, REMOVAL AND INSTALLATION or BELLY PAN, SIDE, REMOVAL AND INSTALLATION .
- Remove the support and lower the vehicle.
NOTE:
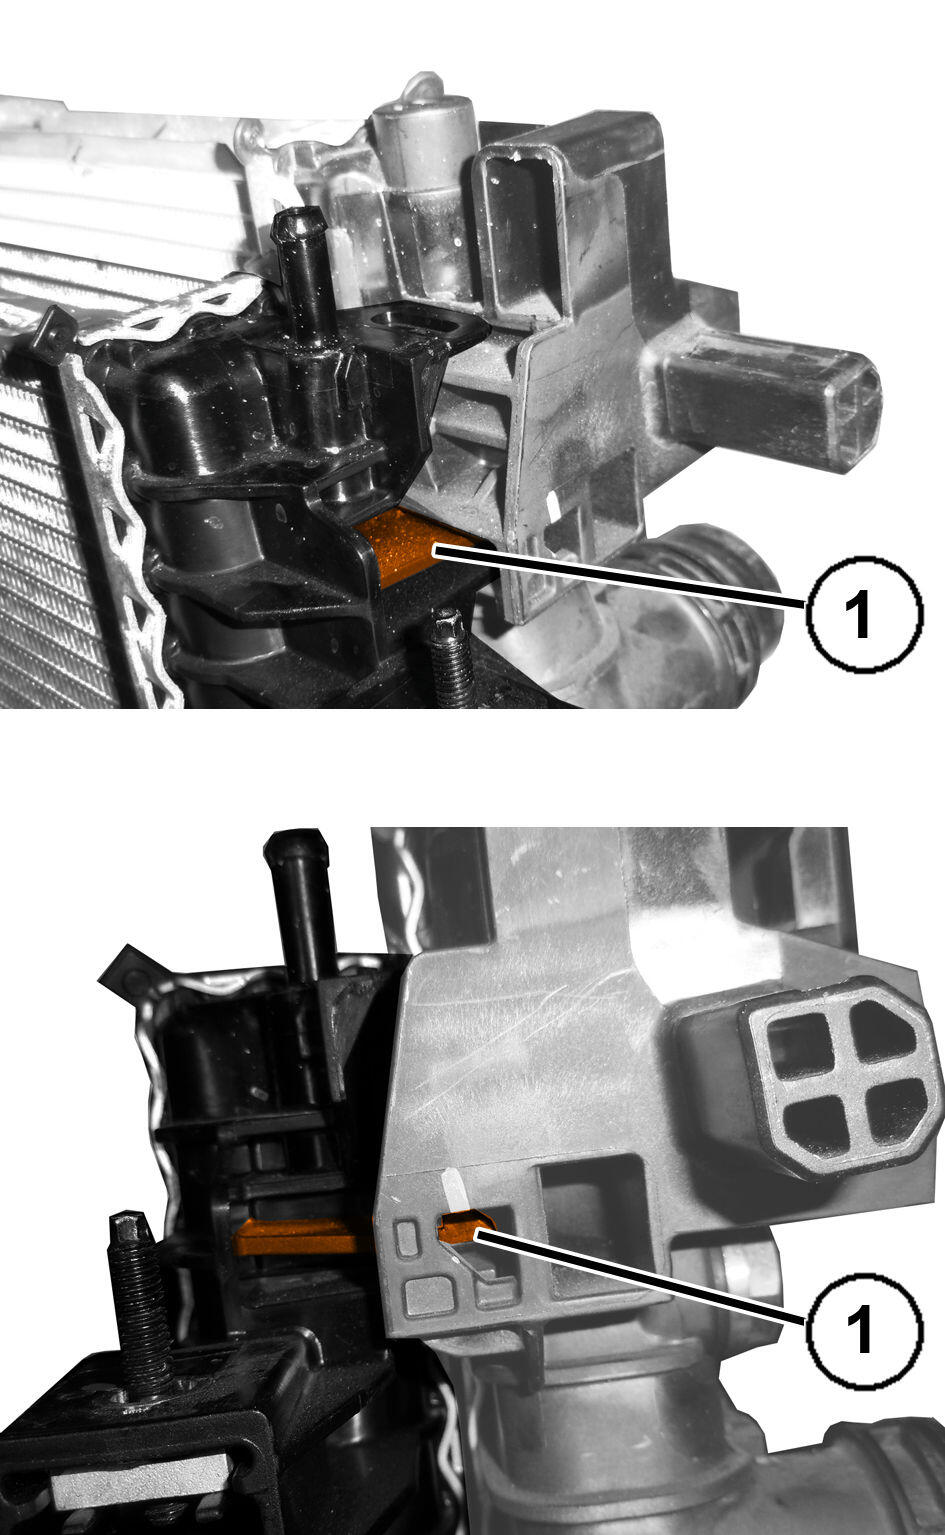
Check that there is a gap of 9 mm between the mounting bracket and the radiator.