Removal And Installation: 2.9L
REMOVAL
- Disconnect and isolate the negative battery cable.
- Remove the engine mount bracket. Refer to INSULATOR, ENGINE MOUNT, REAR (TRANSMISISON), REMOVAL AND INSTALLATION
.
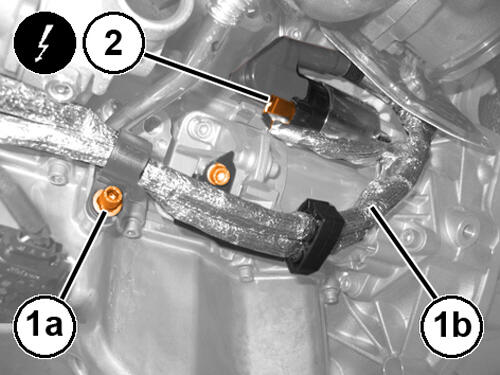
- Remove the wiring harness screws (1a) and position the wiring harness (1b) aside.
- Disconnect the starter motor wiring harness connection (2).
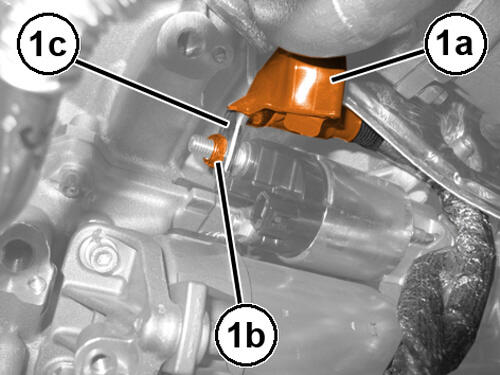
- Remove the starter motor B+ cable cover (1a).
- Remove the starter motor B+ cable retaining nut (1b).
- Disconnect the B+ cable from the starter motor.
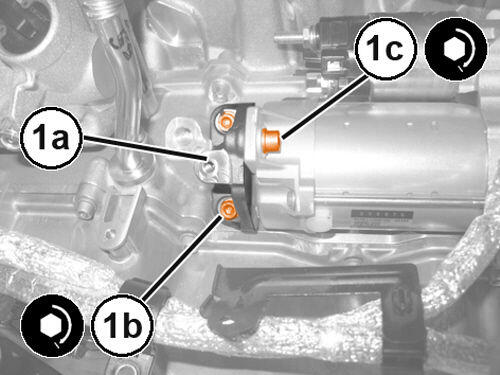
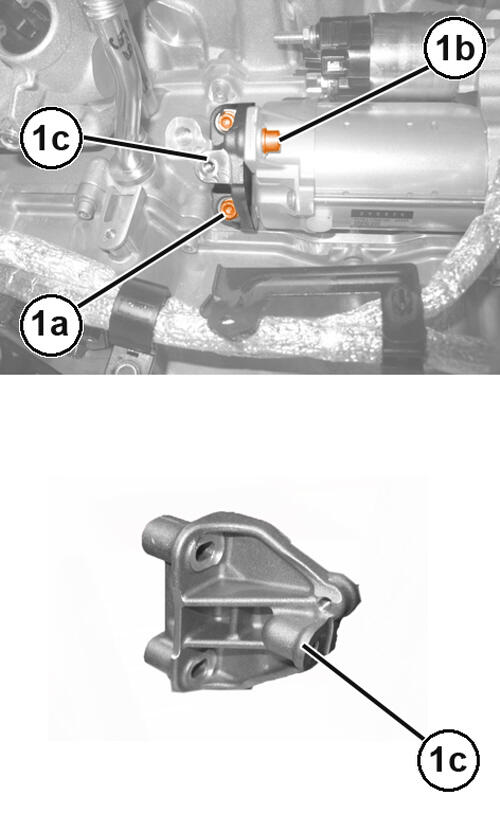
- Remove the starter motor support bracket (1c) bolts (1a and 1b).
- Remove the starter motor support bracket (1c).
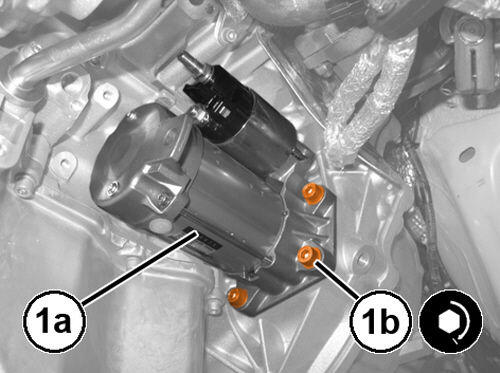
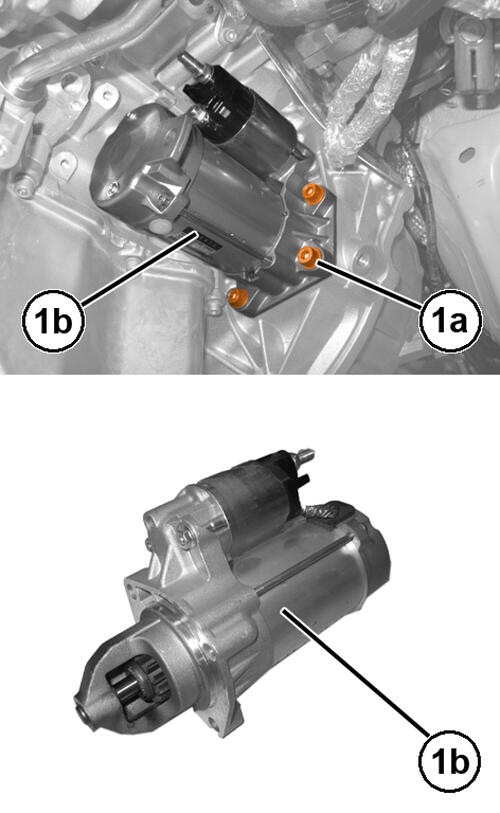
- Remove the starter motor bolts (1a).
- Remove the starter motor (1b) from the timing cover.
INSTALLATION
- Inspect the starter motor and wiring connector integrity.
- Position the starter motor (1a) to the timing cover.
- Install and tighten the starter bolts (1b) to the proper specification. Refer to TECHNICAL SPECIFICATIONS .
- Position the starter motor support bracket (1a) for installation to the starter motor.
- Tighten the starter motor support bracket bolts (1b and 1c) to the proper specification. Refer to TECHNICAL SPECIFICATIONS .
- Connect the starter motor B+ cable and secure to the starter motor.
- Install the starter motor B+ cable protection cover.
- Connect the starter motor wiring harness connector (2).
- Position the wiring harness back into the bracket and secure (1a).
- Install the engine mount bracket
Refer to INSULATOR, ENGINE MOUNT, REAR (TRANSMISISON), REMOVAL AND INSTALLATION .
- Connect the negative battery cable.