Battery To PDC
REMOVAL
- Disconnect and isolate the negative battery cable.
- Remove the rear belly pan. Refer to BELLY PAN, REAR SUSPENSION, REMOVAL AND INSTALLATION .
- Remove the right side front lamp unit. Refer to UNIT, FRONT LAMP, REMOVAL AND INSTALLATION
.
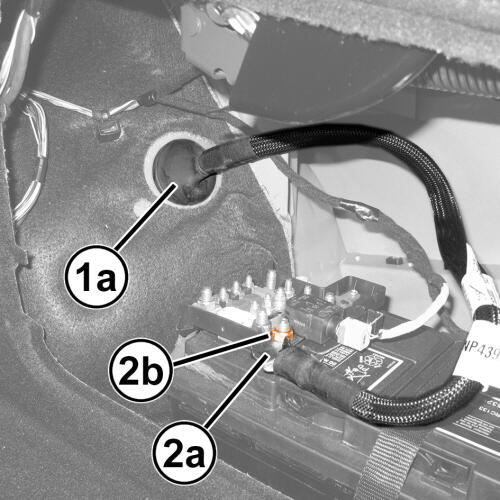
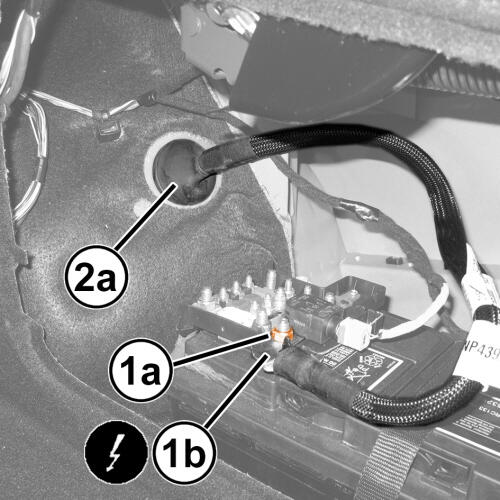
- On the battery, loosen the nut (1a) and remove the terminal (1b).
- Remove the bulkhead seal (2a) from the bulkhead.
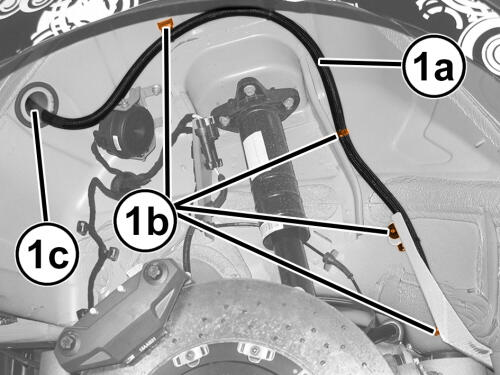
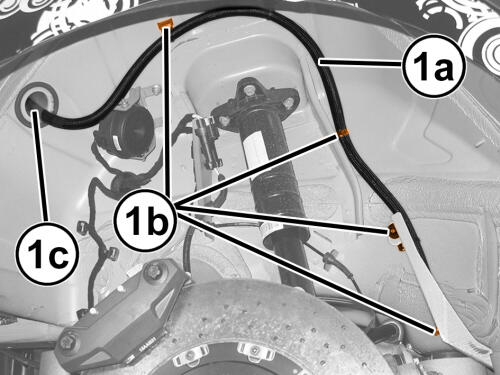
- Release the battery cable (1a) from the cable retaining clips (1b) in the right rear wheel arch.
- Release the bulkhead (1c) seal.
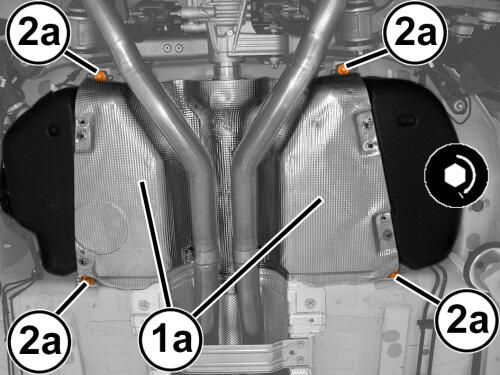
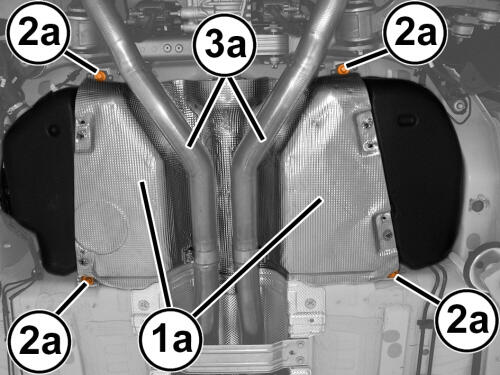
- Position a suitable hydraulic lift with suitable brackets under the fuel tank (1a).
- Remove the four screws (2a) securing the fuel tank (1a).
- Using the hydraulic lift, lower the fuel tank (1a) with support brackets until it rests on the exhaust pipes.
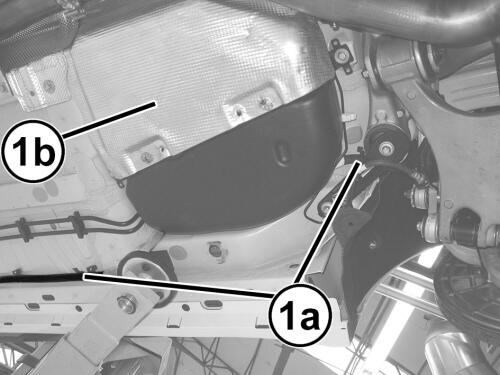
- Release the cable retainers (1a) in the fuel tank area (1b).
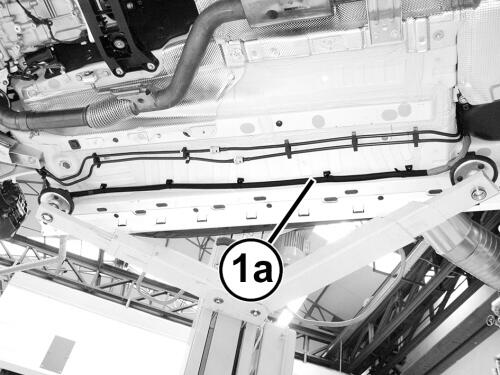
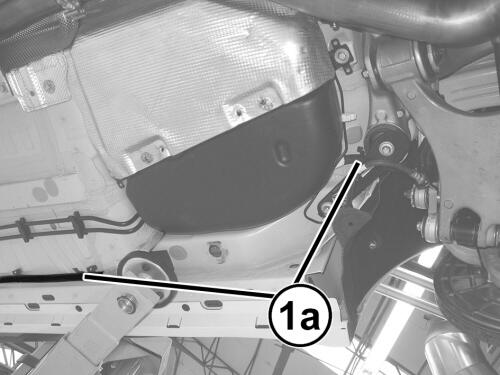
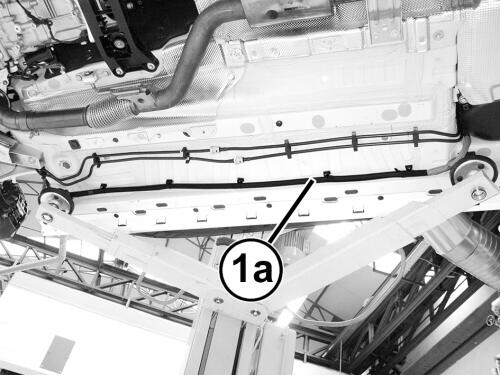
- Release the cable retainers (1a) in the underbody area.
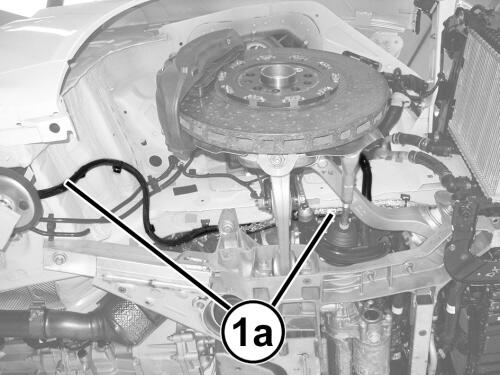
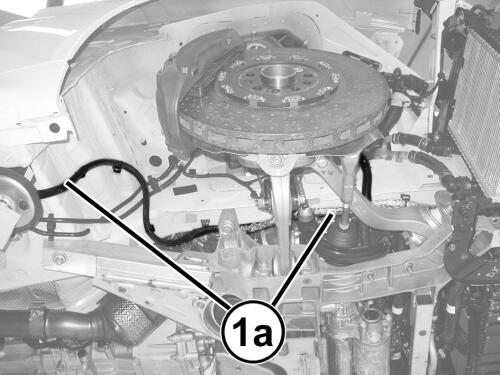
- Release the cable retainers (1a) in the right front wheel arch area.
- Lower the vehicle.
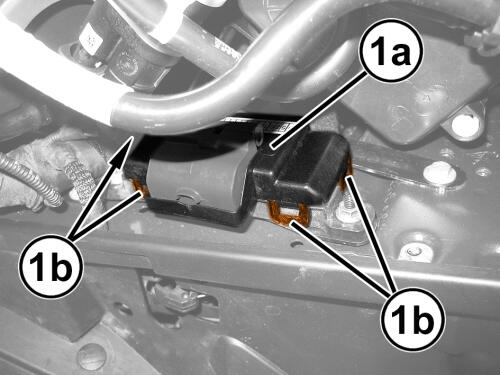
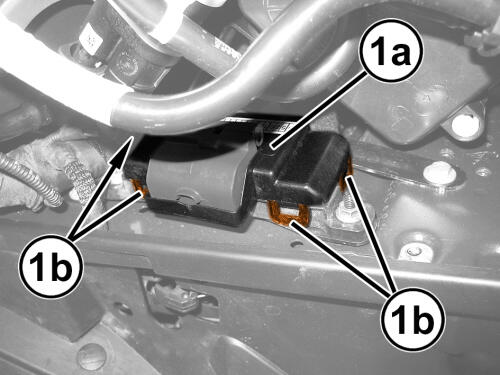
- Remove the Power Distribution Center (PDC) cover (1a) by releasing the four retainers (1b) on the right side of the engine compartment.
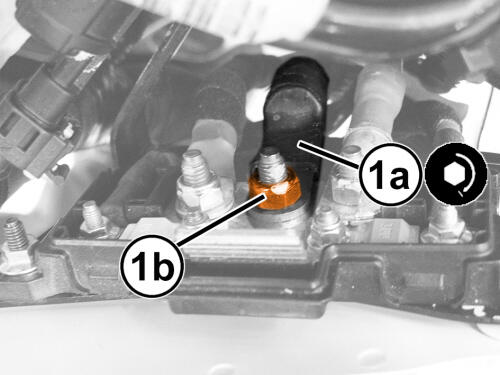
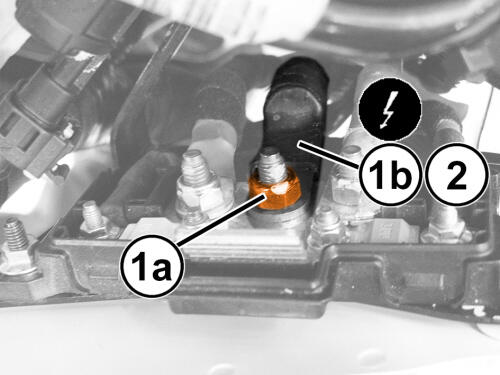
- Remove the nut (1a) and the cable (1b) from the PDC.
INSTALLATION
- Inspect the cable from the battery to the battery terminal fuse for damage and that the individual wires are correctly fastened to the connections. If necessary, carry out appropriate continuity tests.
- Position the cable (1a) on the PDC and tighten the nut (1b) to the proper specification. Refer to TECHNICAL SPECIFICATIONS .
- Position the PDC cover (1a) and attach all four retainers (1b).
- Install the cable in the retainers (1a) located in the right front wheel arch area.
- 1. Install the cable in the retainers (1a) located in the underbody area.
- Install the cable in the retainers (1a) located in the fuel tank area.
- Using the hydraulic lift with suitable brackets, lift the fuel tank (1a) with the support brackets until it is in aligned.
- Fasten the screws (2a) securing the fuel tank (1a) and tighten them to the. Refer to TECHNICAL SPECIFICATIONS .
- Remove the hydraulic lift.
- Install the cable (1a) in the retainers (1b) located in the right rear wheel arch.
- Install the bulkhead seal (1c).
- Install the cable bulkhead seal (1a).
- 2. On the battery, connect the cable terminal (2a) and then tighten the nut (2b) to the. Refer to TECHNICAL SPECIFICATIONS .
- Refer to UNIT, FRONT LAMP, REMOVAL AND INSTALLATION .
- Install the rear belly pan. Refer to BELLY PAN, REAR SUSPENSION, REMOVAL AND INSTALLATION .
- Connect the negative battery cable.