Removal And Installation: Removal
- Disconnect and isolate the negative battery cable.
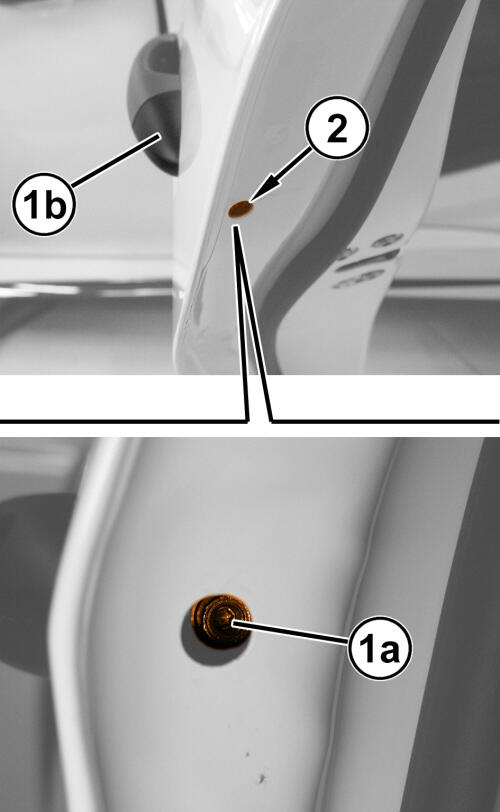
- Release the rubber cover (1a) on the rear side of the door.
- Turn the internal screws (2a) counter clockwise until the exterior handle block (2b) is released.
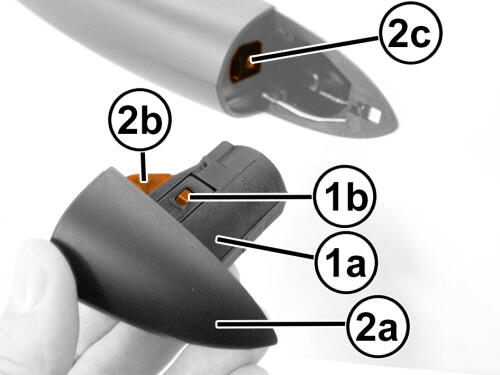
- Remove the block (1a), initially also moving the handle (1b) to release the part (1c) from its seat (1d).
- If necessary, release the two opposing retainers (2a) and remove the trim (2b).
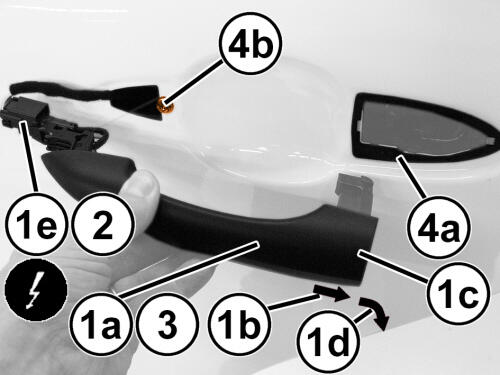
- Remove the exterior handle (1a) pulling it backwards in the direction of the arrow (1b), then turn the rear part (1c) toward the outside in the direction of the arrow (1d). Finally, extract the terminal with the wire harness connections (1e).
- Disconnect the wire harness connector (1e).
- Remove the exterior handle (1a).
- If necessary, remove the seal (4a) by releasing its retainers, after loosening the interior handle mounting screw (4b).
INSTALLATION
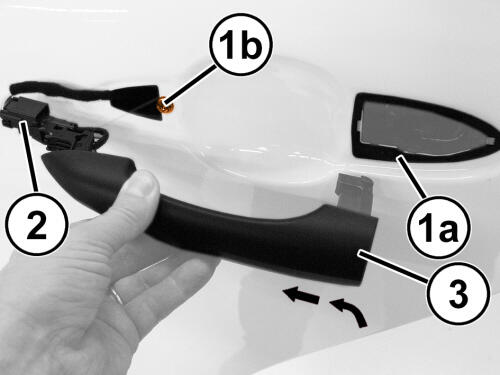
- If removed, position the seal (1a) and engage its retainers, then tighten the interior handle mounting screws (1b).
- Connect the wire harness connector (2) for the exterior handle.
- Insert the exterior handle (3) in place and push forwards until it is in the correct position.
- If removed, place the trim (1a) in position and engage the opposing retainers (1b).
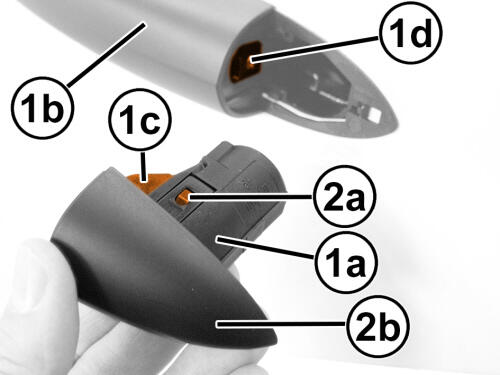
- Insert the block (2a) in the door, making the part (2b) of the handle engage in its seat (2c).
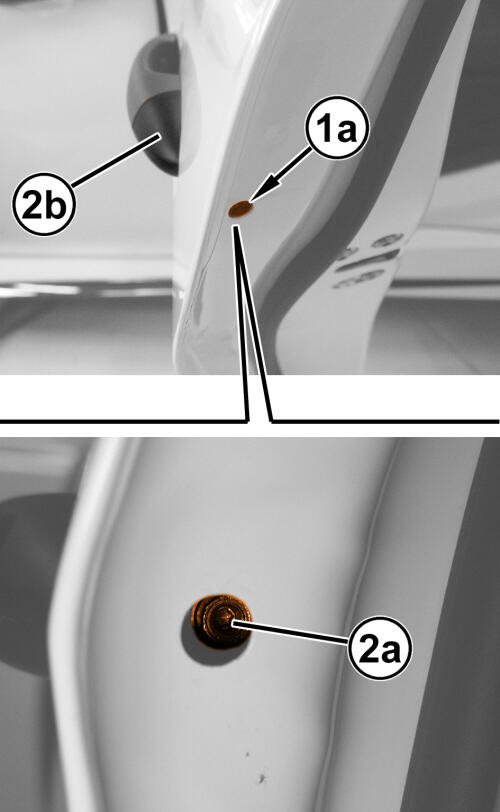
- Tighten the internal screw (1a) securing the block (1b).
- Install the rubber cover (2).
- Connect the negative battery cable.