Removal And Installation: Removal
WARNING:
Disable the airbag system before attempting any component diagnosis or service of the front seats, when equipped with front seat air bags. Disconnect and isolate the negative battery (ground) cable, then wait two minutes for the airbag system capacitor to discharge before performing further diagnosis or service. This is the only sure way to disable the airbag system. Failure to follow these instructions may result in accidental airbag deployment and possible serious or fatal injury.
- Remove the seat from the vehicle. Refer to SEAT, FRONT, REMOVAL AND INSTALLATION .
- Remove the seat side shields. Refer to SIDE SHIELDS, SEAT CUSHION, FRONT, REMOVAL AND INSTALLATION .
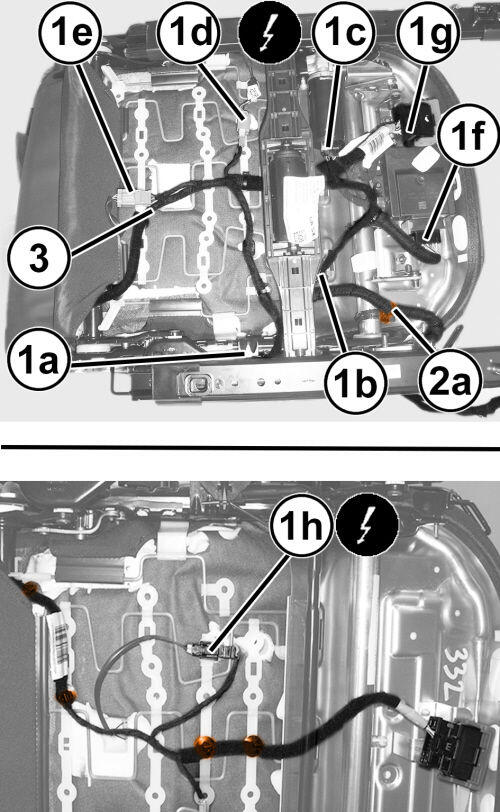
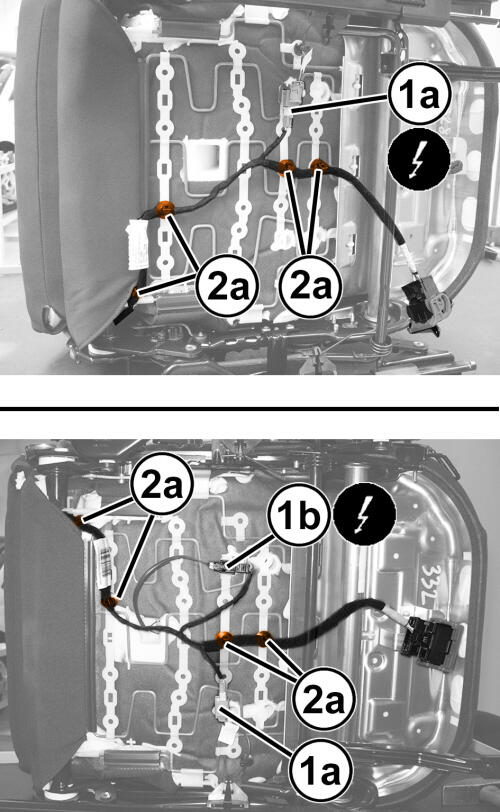
- From under the seat disconnect the wire harness connector (1a).
- From under the seat disconnect the wire harness connector (1b), on the passenger seat only.
- Unclip the wire harness (2a) from the seat.
- On power seats disconnect the wire harness connectors (1a, 1b, 1c, 1d, 1e, 1f, 1g) as necessary.
- Disconnect the wire harness connector (1h), on the passenger seat only.
- Unclip the wire harness (2a) from the seat.NOTE:
Manual seat shown in illustration, power seat is similar.
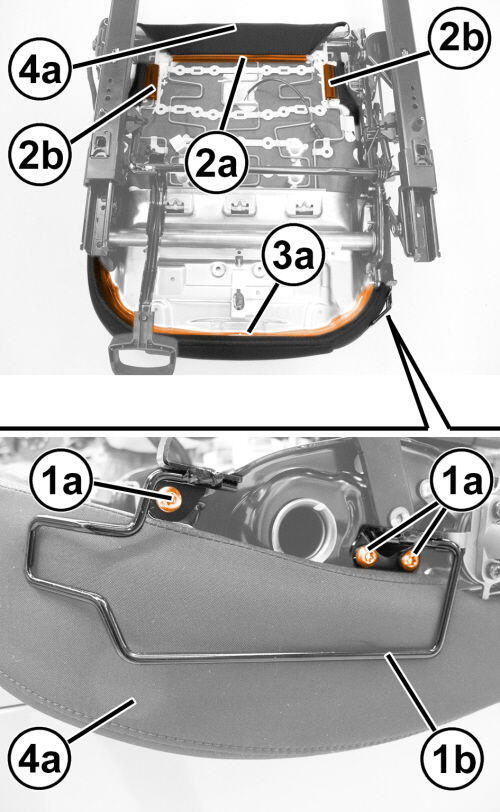
- Release the J-clips (2a) at the rear of the seat cushion trim (4a).
- Remove the bolts (1a) and the side shield support bracket (1b).
- Route the wire harness free, and ready for removal with the seat back.
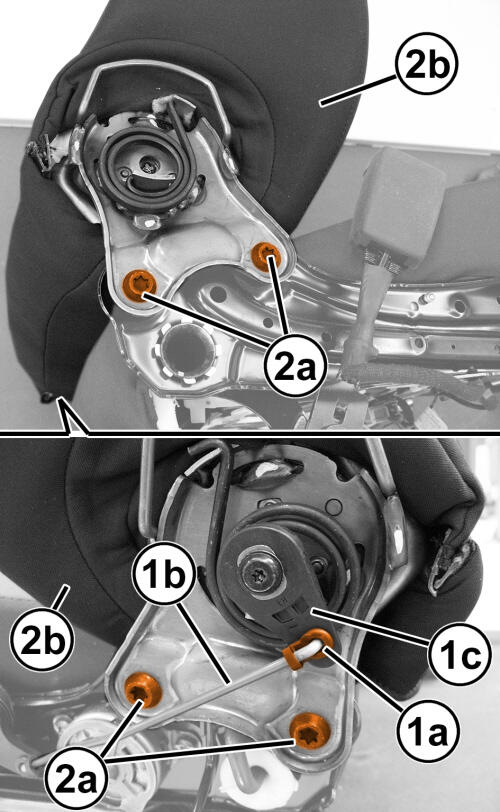
- Working on the seat's outside, release the retainer (1a) and disconnect the rod (1b).NOTE:
If working on a power seat, there is no rod to disconnect.
- Remove the bolts (2a) on each side of the seat and remove the seat back (2b).