Removal And Installation: Installation
To avoid serious or fatal injury on vehicles equipped with airbags, disable the Supplemental Restraint System (SRS) before attempting any steering wheel, steering column, airbag, Occupant Classification System (OCS), seat belt tensioner, impact sensor or instrument panel component diagnosis or service. Disconnect and isolate the battery negative (ground) cable, then wait two minutes for the system capacitor to discharge before performing further diagnosis or service. This is the only sure way to disable the SRS. Failure to follow these instructions may result in accidental airbag deployment.
To avoid serious or fatal injury when removing a deployed airbag, rubber gloves, eye protection, and a long-sleeved shirt should be worn. There may be deposits on the airbag unit and other interior surfaces. In large doses, these deposits may cause irritation to the skin and eyes.
To avoid serious or fatal injury, use extreme care to prevent any foreign material from entering the passenger airbag, or becoming entrapped between the passenger airbag cushion and the instrument panel top pad. Failure to observe this warning could result in occupant injuries upon airbag deployment.
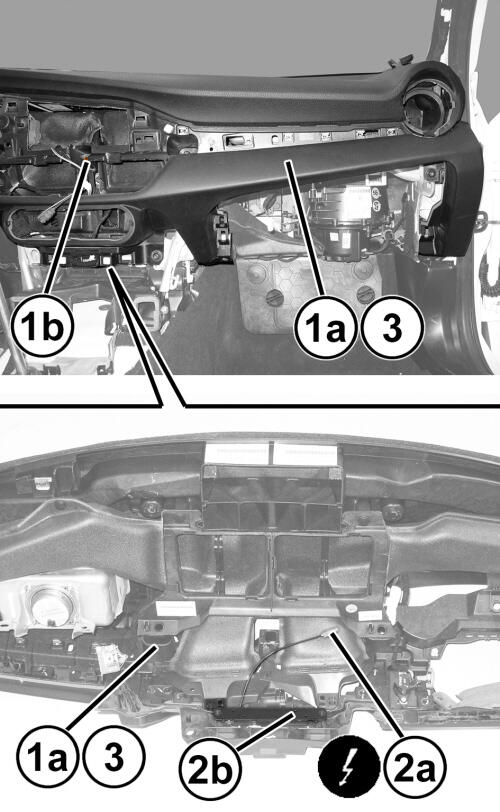
- Connect the bluetooth wire harness connector (2a).
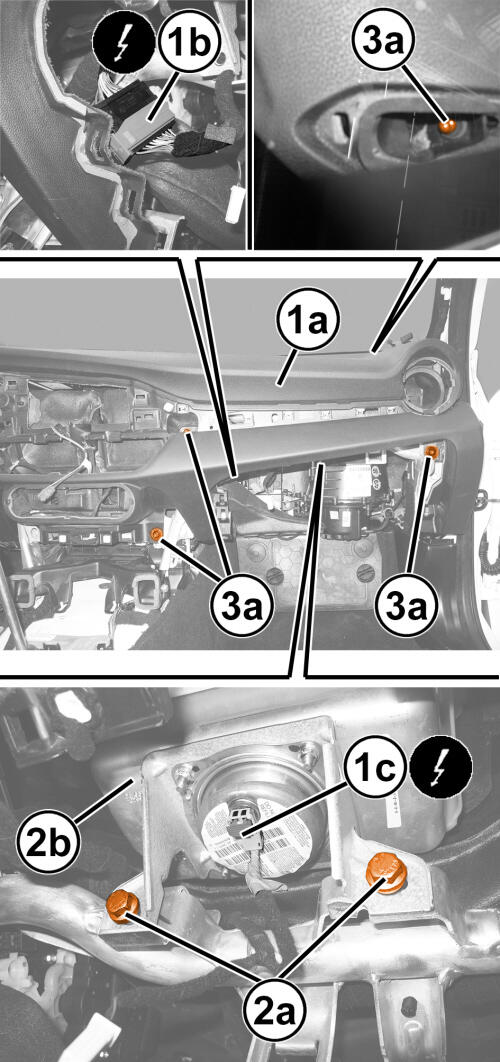
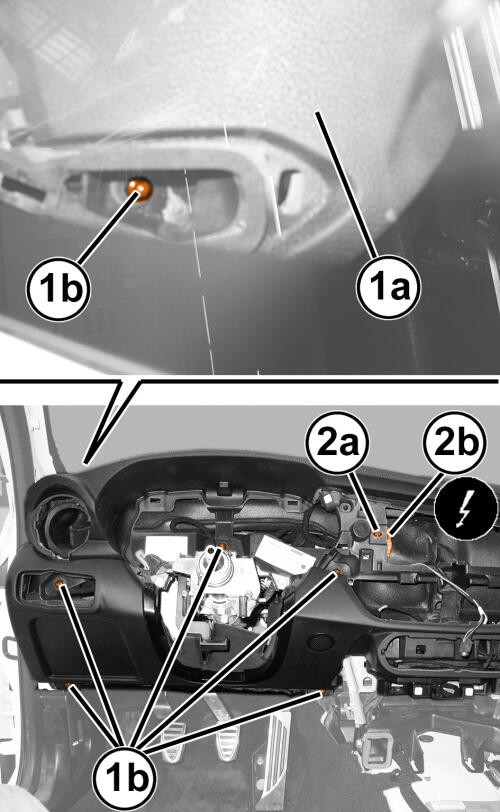
- Carefully position the instrument panel cover (1a) onto the instrument panel carrier guide pin (1b).
- Route the wire harness through the instrument panel cover as necessary.
- Install the two passenger airbag bolts (2a) and tighten to the proper specification. Refer to TECHNICAL SPECIFICATIONS .
- Connect the passenger airbag wire harness connectors (1c).
- Install the screws (3a) and tighten securely.
- Connect the wire harness connectors (1b).
- Connect the wire harness connector (2b) and clip it to the instrument panel cover at the location (2a).
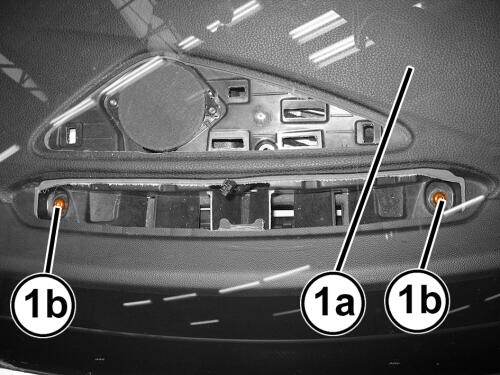
- Install the screws (1b) and tighten securely.
- Install the screws (1b) located under the defroster grill and tighten securely.
- Install the radio. Refer to DISPLAY, RADIO, REMOVAL AND INSTALLATION .
- Install the instrument cluster. Refer to REMOVAL AND INSTALLATION .
- Install the steering column. Refer to COLUMN, REMOVAL AND INSTALLATION .
- Install the steering wheel and the multifunction switch. Refer to SWITCH, MULTIFUNCTION, REMOVAL AND INSTALLATION .
- Install the headlamp switch. Refer to SWITCH, HEADLAMP, REMOVAL AND INSTALLATION .
- Install the A/C and Heater controls. Refer to CONTROL, A/C AND HEATER, REMOVAL AND INSTALLATION .
- Install the center air outlet and left side air outlet. Refer to OUTLET, AIR, REMOVAL AND INSTALLATION .
- Install the instrument panel center trim. Refer to PANEL, INSTRUMENT PANEL TRIM, CENTER, REMOVAL AND INSTALLATION .
- Install the floor console. Refer to CONSOLE, FLOOR, REMOVAL AND INSTALLATION .
- Install the glove box. Refer to GLOVE BOX, INSTRUMENT PANEL, REMOVAL AND INSTALLATION .
- Install the left silencer panel. Refer to PANEL, SILENCER, REMOVAL AND INSTALLATION .
- Install the A-pillar trim panels. Refer to PANEL, A-PILLAR TRIM, REMOVAL AND INSTALLATION .
- Install the front tweeter speakers. Refer to SPEAKER, REMOVAL AND INSTALLATION .
- Install the defroster grill. Refer to GRILLE, DEFROSTER, REMOVAL AND INSTALLATION .
- Do not reconnect the negative cable to the battery at this time. The Supplemental Restraint System (SRS) Verification Test procedure should be performed following service of any SRS component. Refer to STANDARD PROCEDURE .