With Sunroof: Removal
NOTE:
In the event the headliner is damaged or creased during removal, it will need to be replaced with a new headliner.
Use clean gloves or make sure your hands are clean before removing the headliner.
- Disconnect and isolate the negative battery cable.
- Remove the right front door. Refer to DOOR, REMOVAL AND INSTALLATION .
- Remove the front seats. Refer to SEAT, FRONT, REMOVAL AND INSTALLATION .
- Remove the floor console. Refer to CONSOLE, FLOOR, REMOVAL AND INSTALLATION .
- Remove the A-pillar trim panels. Refer to PANEL, A-PILLAR TRIM, REMOVAL AND INSTALLATION .
- Remove the visors and supports. Refer to VISOR, REMOVAL AND INSTALLATION .
- Remove the overhead console. Refer to CONSOLE, OVERHEAD, REMOVAL AND INSTALLATION .
- Remove the Upper B-pillar trim panels. Refer to PANEL, B-PILLAR TRIM, UPPER, REMOVAL AND INSTALLATION .
- Remove the C-pillar trim panels. Refer to PANEL, C-PILLAR TRIM, REMOVAL AND INSTALLATION Refer to, PANEL, C-PILLAR TRIM, LOWER, REMOVAL AND INSTALLATION .
- Remove the rear shelf panel. Refer to PANEL, REAR SHELF, REMOVAL AND INSTALLATION .
- Disconnect the wire harness connector on the rear shelf.
- Remove the grab handles. Refer to HANDLE, GRAB, REMOVAL AND INSTALLATION .
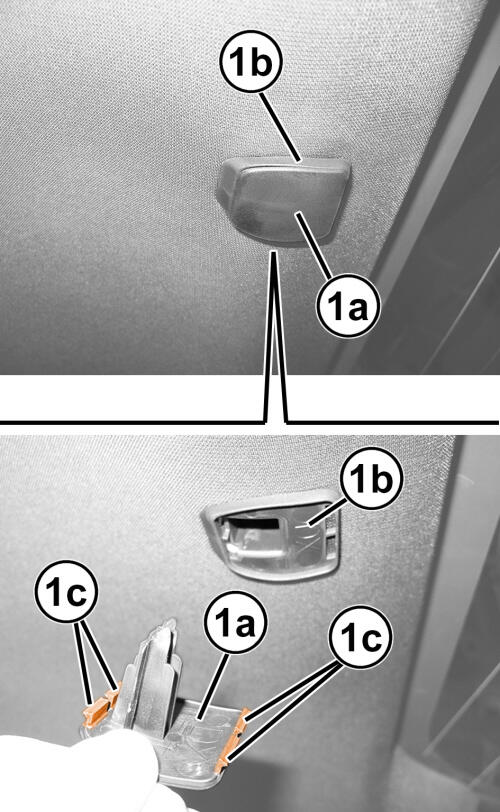
- At the rear of the headliner, remove the two covers (1a) by releasing the retainers (1c).
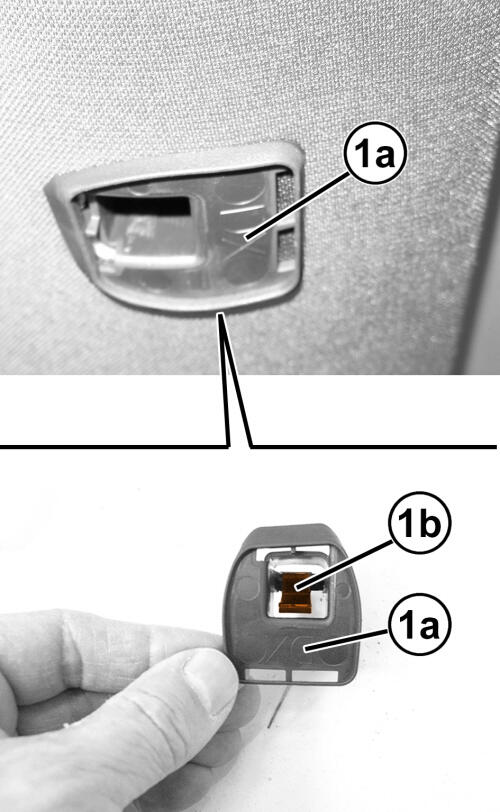
- Release the inner retainer (1b) and remove the two supports (1a) from the headliner.
- Loosen the door seals at all four door openings, where they meet the headliner.
- Release the hook and loop fasteners around the sunroof openings, and slightly lower the headliner.
- Disconnect the wire harness connector from the sunroof motor harness.
- Disconnect the wire harness connectors at the front headliner speakers.
- Disconnect the wire harness connector from the rearview mirror.
- With the help of an assistant, carefully lower the headliner and remove it through the right front door opening.