Removal And Installation
REMOVAL
- Remove the rear door scuff plate. Refer to PANEL, B-PILLAR TRIM, LOWER, REMOVAL AND INSTALLATION .
- Remove the rear seat bolster. Refer to BOLSTER, SEAT, REMOVAL AND INSTALLATION .
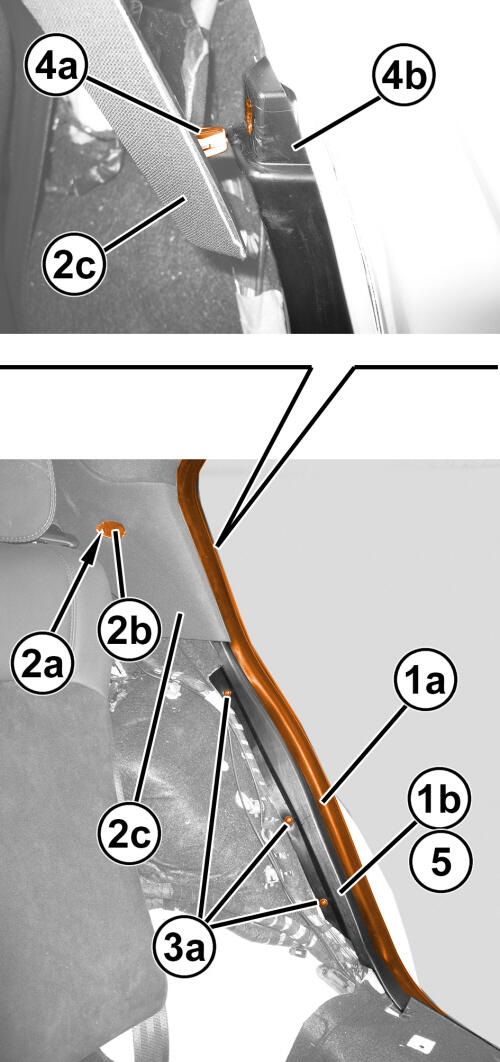
- Release the door housing seal (1a) in the area of the lower trim panel connector (1b).
- Release the cover (2a) then remove the screw (2b) fastening the edge (2c) of the upper C-pillar trim panel.
- Remove the bolts (3a) securing the lower trim panel connection (1b).
- Slightly move the edge (2c) and release its inner retainer (4a) from the upper end (4b) of the lower trim panel connector.
- Remove the lower trim panel connector (1b).
INSTALLATION
- Check that the lower trim panel connector is not damaged.
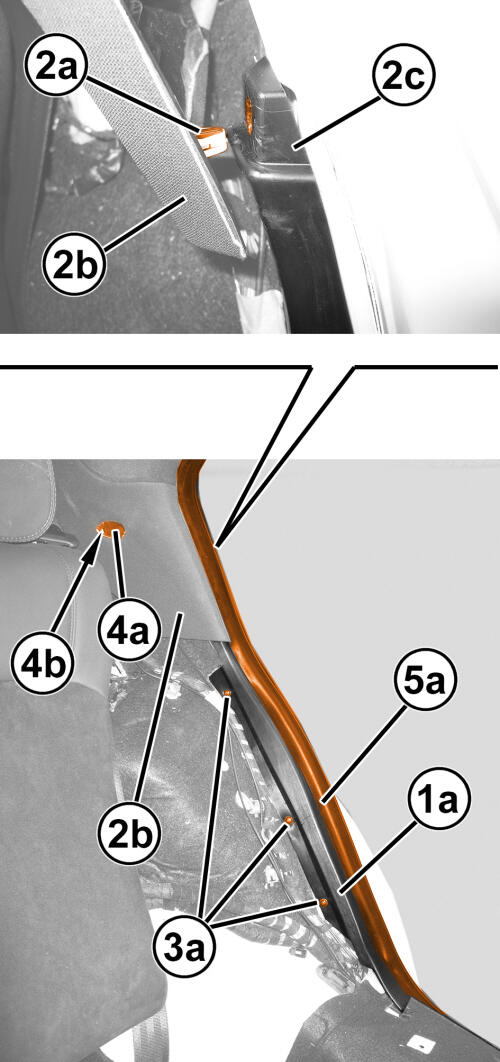
- Position the lower trim panel connector (1a).
- Engage the inner retainer (2a) of the C-pillar trim panel (2b) on the upper end (2c) of the lower trim panel connector.
- Install the bolts (3a) securing the lower trim panel connector (1a).
- Install the C-pillar trim panel (2b) retaining screw (4a). Engage the cover in its housing (4b).
- Engage the door housing seal (5a).
- Install the rear seat bolster. Refer to BOLSTER, SEAT, REMOVAL AND INSTALLATION .
- Install the rear door scuff plate. Refer to PANEL, B-PILLAR TRIM, LOWER, REMOVAL AND INSTALLATION .