Removal And Installation: Removal
- Remove the window switches. Refer to SWITCH, POWER WINDOW, REMOVAL AND INSTALLATION .
- Remove the trim panel reflector. Refer to PANEL, DOOR TRIM, REMOVAL AND INSTALLATION Refer to, PANEL, DOOR TRIM, UPPER, REMOVAL AND INSTALLATION Refer to, PANEL, DOOR TRIM, REFLECTOR, REMOVAL AND INSTALLATION .
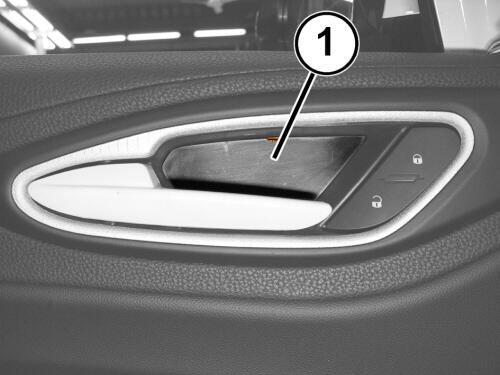
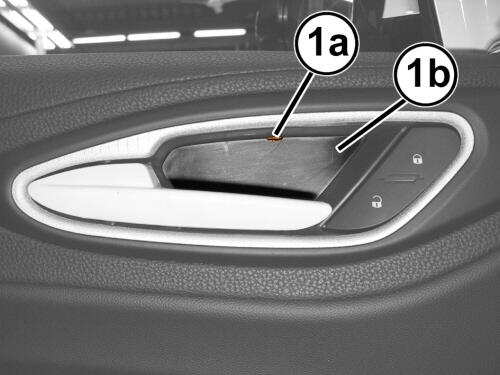
- Working in the interior handle compartment, insert a small bladed screwdriver into the opening (1a), then release and remove the trim (1b).
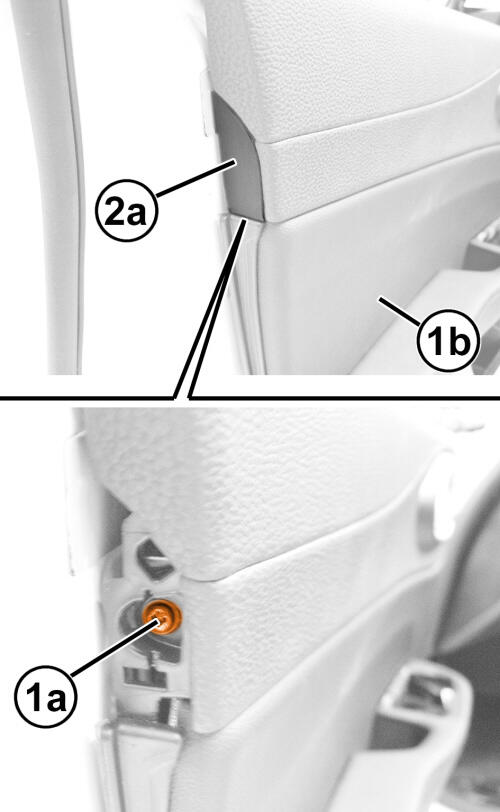
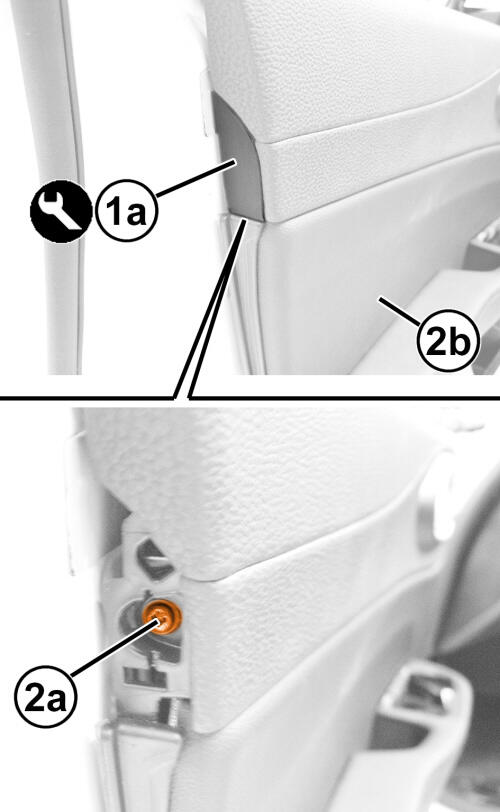
- Working on the rear side of the door, release the trim (1a) and remove it using the trim stick.
- Remove the screw (2a) for the inner panel (2b).
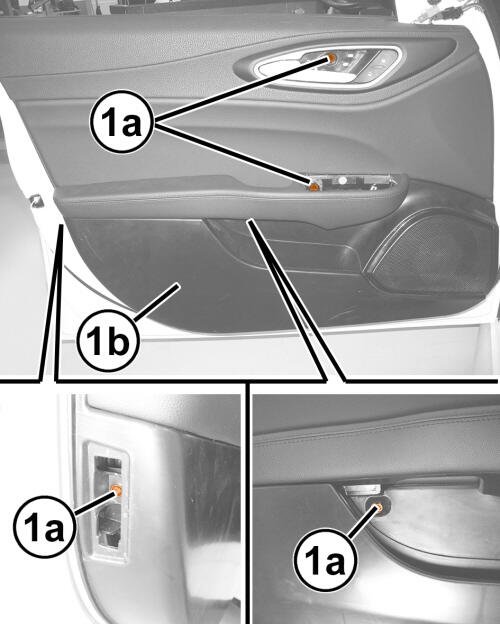
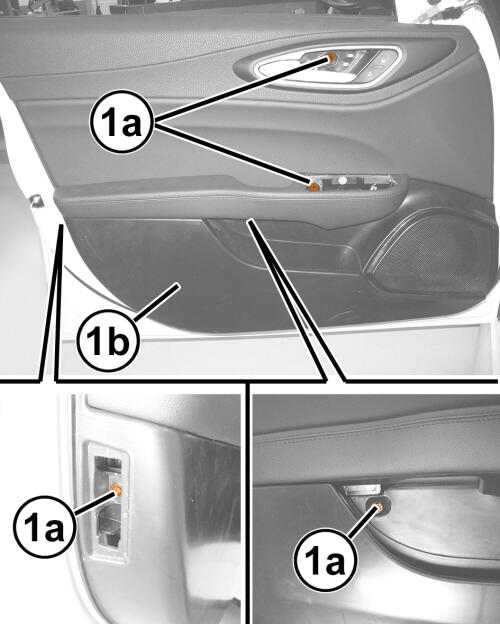
- Remove the screws (1a) for the inner panel (1b).
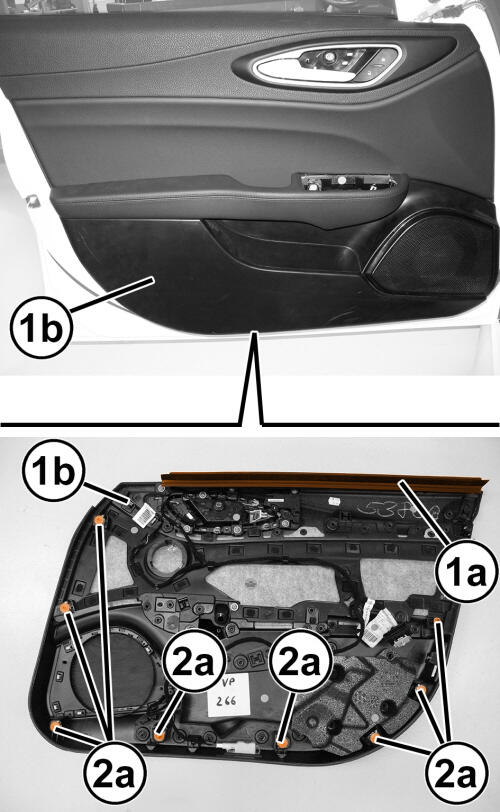
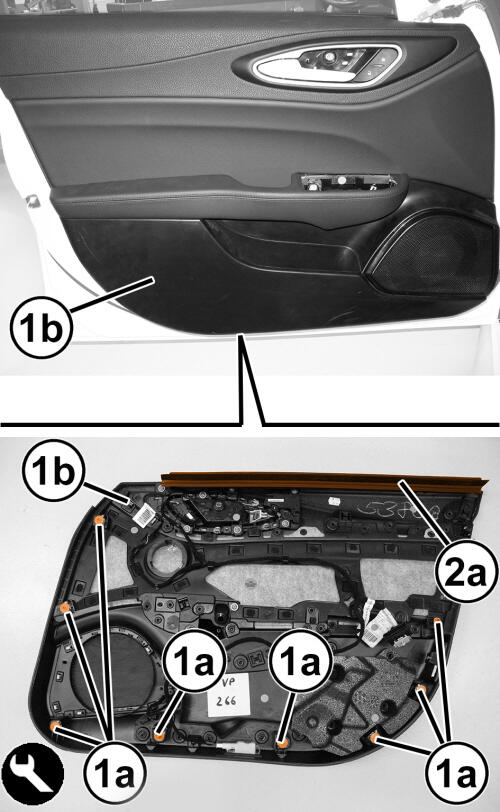
- Release the internal retainers (1a) from the inner panel (1b) with trim stick and slightly disconnect the internal panel from the door frame.
- Lift up the inner panel (1b) slightly to release its inner belt molding (2a) from the door frame's upper profile.
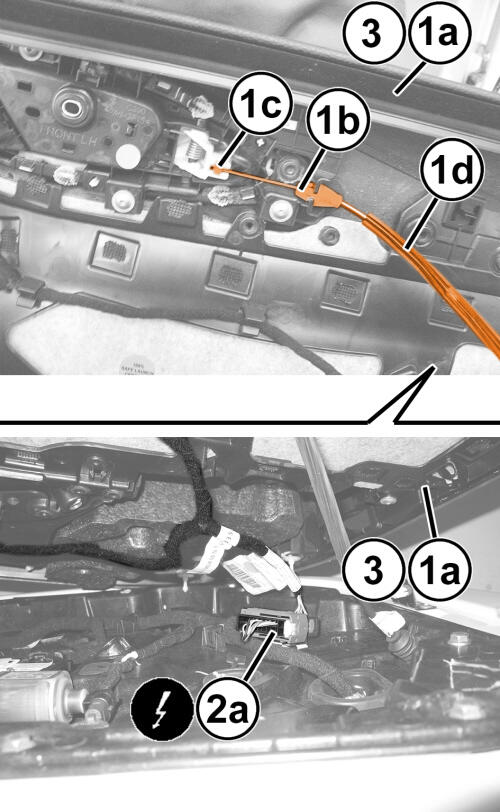
- Working inside the inner panel (1a), release the retainer (1b), then the terminal retainer (1c) of the door lock control cable (1d).
- Disconnect the wire harness connector (2a) for the inner panel wiring.
- Retrieve the inner panel (1a) and release it from the cable to the electric window switches.
INSTALLATION
- Position the inner panel (1a) and engage it with the cable to the electric window switches.
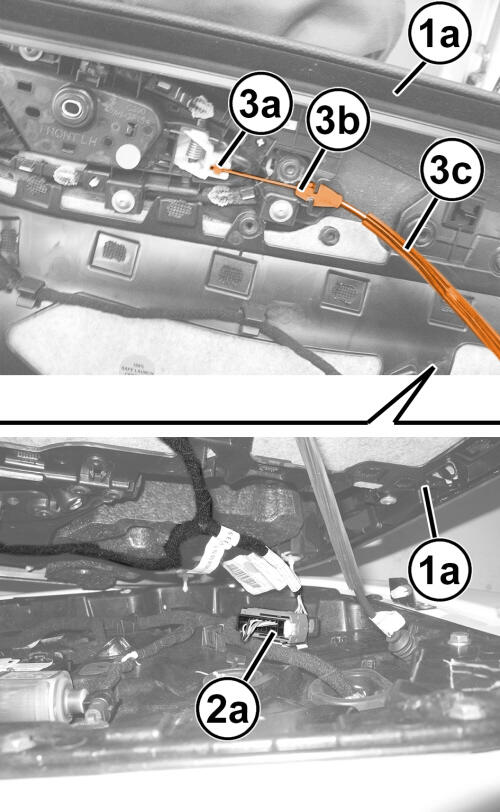
- Connect the inner panel wiring wire harness connector (2a).
- Engage the terminal retainer (3a) then the retainer (3b) for the door lock cable (3c).
- Engage the inner belt molding (1a) of the inner panel (1b) on the door frame's upper profile.
- Place the upper inner panel (1b) on the door frame and engage the inner retainers (2a).
- Tighten the screws (1a) for the inner panel (1b).
- Tighten the screw (1a) for the inner panel (1b).
- Fit the trim (2a).
- Engage the interior handle trim.
- Install the trim panel reflector. Refer to PANEL, DOOR TRIM, REMOVAL AND INSTALLATION Refer to, PANEL, DOOR TRIM, UPPER, REMOVAL AND INSTALLATION Refer to, PANEL, DOOR TRIM, REFLECTOR, REMOVAL AND INSTALLATION .
- Install the window switches. Refer to SWITCH, POWER WINDOW, REMOVAL AND INSTALLATION .
- Connect the negative battery cable.