Removal And Installation: Removal
- Disconnect and isolate the negative battery cable.
- Remove the front fascia. Refer to FASCIA, FRONT, REMOVAL AND INSTALLATION .
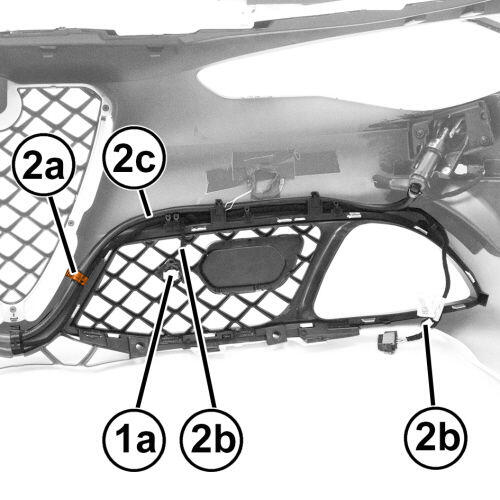
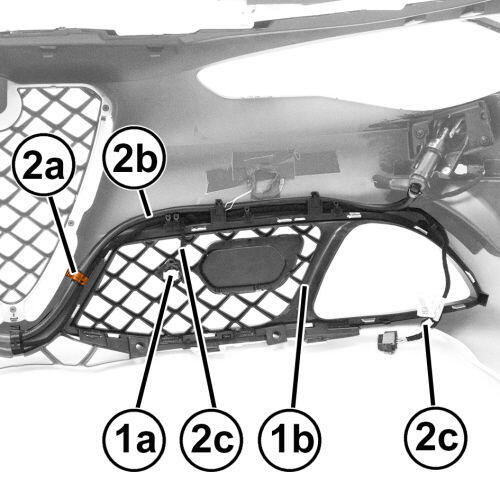
- Remove the obstacle detection sensor (1a) from the grille (1b) to be removed.
- In the area of the grille (1b) to be removed, release the headlight washer pipe (2b) and the obstacle detection sensor wiring (2c) from the various retainers (2a) and move them out of the way.
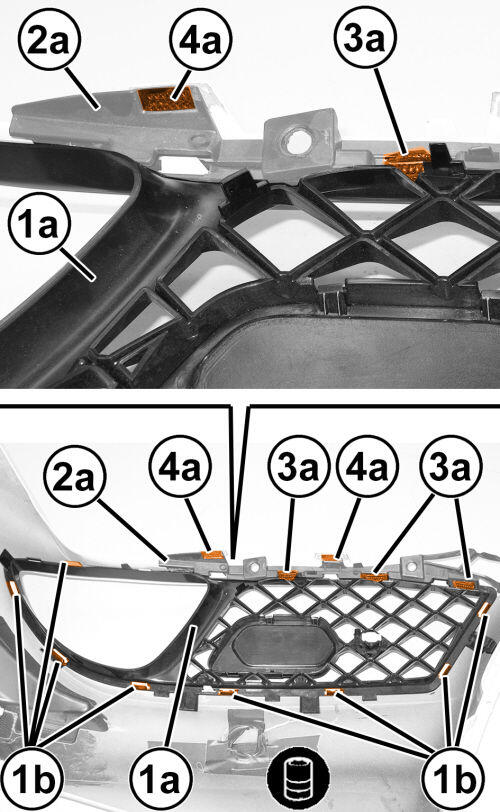
- Using a suitable tool, remove the riveting (1a) from the lower grille retaining lugs on the bumper (1b). If the grille must be reused, take care not to damage it.
- Also remove the welds (2a) that join the lower guard (2b) to the bumper. If the bumper and the lower grille must be reused, take care not to damage them.
- Free the grille (1b) from the remaining perimeter retainers (3a) and remove it.
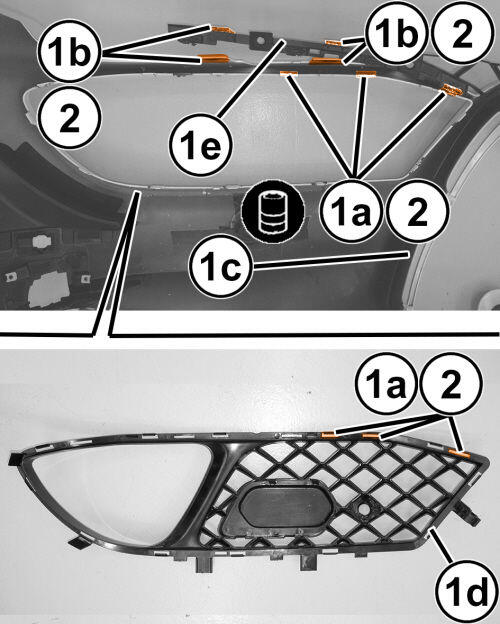
INSTALLATION
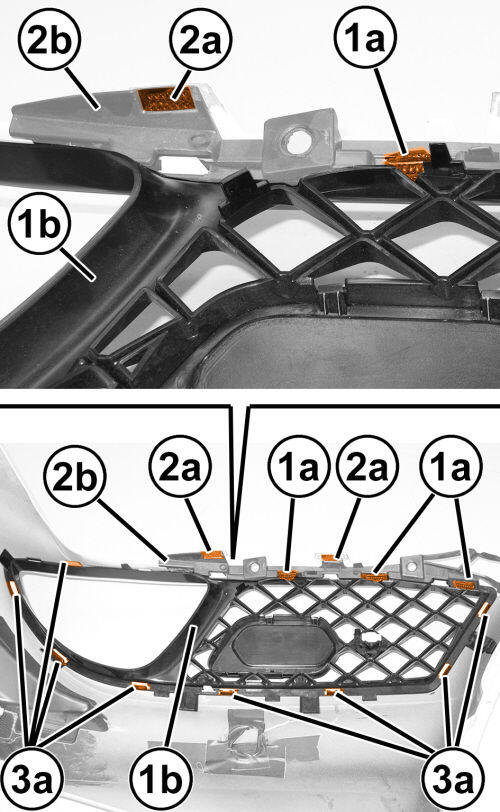
- Thoroughly clean the riveted areas (1a) and the welded areas (1b) on the bumpers (1c), on the grille (1d) and the lower guard (1e). Remove the traces of riveting and welding residues.
- Clean areas (1a), (1b) and (1c) with heptane.
- Apply ANCORAL Primer 0343 to areas (1a), (1b) and (1c) in preparation for the subsequent gluing.
- Position the grille (1a) and engage it with the perimeter retainers (1b).
- Position the lower guard (2a).
- Engage the lugs (3a) with the grille.
- Using the silicone-free adhesive SIMSON ISR 70-05, glue:
- the bumper lugs (3a) to the grille (1a)
- the areas (4a) of the lower guard (2a) to the bumper.
- Remove any glue residues.
- Let the glue dry for at least 4 hours after its application.
- Refit the obstacle detection sensor (1a) on the grille (1b).
- Refit and engage the obstacle detector wiring (2b) and the headlight washer pipe (2c) with the various retainers (2a).
- Install the front fascia. Refer to FASCIA, FRONT, REMOVAL AND INSTALLATION .
- Connect the negative battery cable.
- After fitting and adjusting the front bumper, use the diagnosis equipment to perform the active aerodynamic system self-learning procedure. The system will stop with the spoiler in the raised position, then check the distance between the spoiler and the bumper using the appropriate gauges. If the result is negative, check for foreign bodies between the mobile wing and the fixed parts, check for any actuator errors, adjust the actuator position values, fix the faults and clear any errors. Repeat the self-learning procedure and the check between the spoiler and bumper. If the distance is still out of specification, the bumper must be adjusted again.