Removal - Rear
BADGE
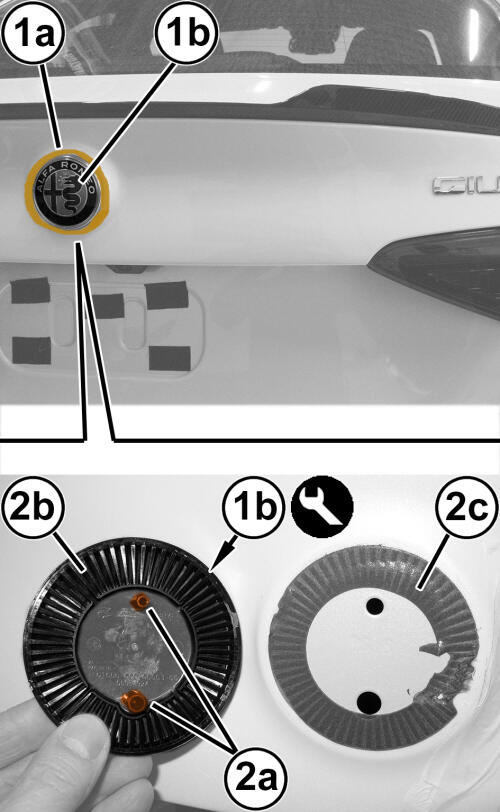
- Apply a double layer of adhesive tape around the edges (1a) of the nameplate (1b).NOTE:
The purpose of the adhesive tape will be to protect the edge (1a) when the nameplate is removed.
- Remove the badge (1b) by releasing the locating pins (2a) and the adhesive (2b) bonding it to the surface (2c), using a trim stick or equivalent.NOTE:
If necessary, gently heat the badge and the surrounding panel with a heat lamp or gun to make it easier to release the adhesive.
NAMEPLATE
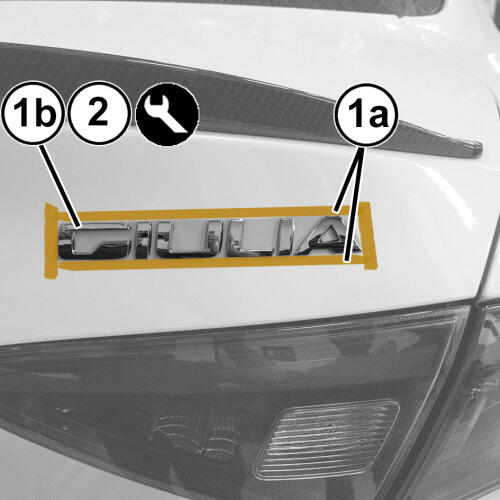
- Apply a double layer of adhesive tape (1a) around the edges of the nameplate (1b).NOTE:
The purpose of the adhesive tape will be to protect the body when the nameplate is removed and act as a template for applying the new nameplate.
- Remove the nameplate (1b) releasing the adhesive bonding it to the paintwork, using the trim tool.NOTE:
If necessary, gently heat the nameplate and the surrounding metal using with a heat lamp or gun to make it easier to release the adhesive.
NOTE:
If ambient temperatures are below 21° C (70° F), warm the badges and body panel with a heat lamp or gun to assure proper adhesion.
INSTALLATION
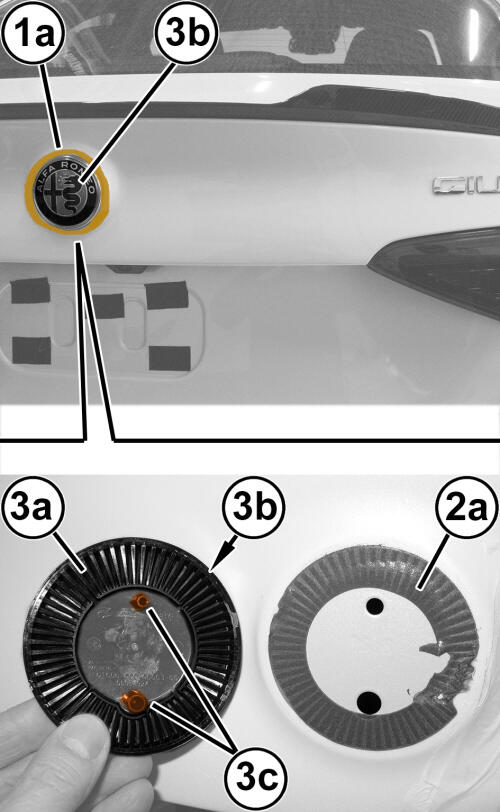
- Remove the adhesive tape (1a) used for protection from the edge.
- Remove all adhesive residues and carefully clean and degrease the area (2a) with heptane.
- Remove the protective film for the adhesive surface (3a) of the new nameplate (3b), then immediately position the nameplate into position (2a) engaging the locators (3c); seating the adhesive surface by hand.
- Leave the adhesive tape (1a) applied during removal; it will be used for subsequent positioning of the nameplate.
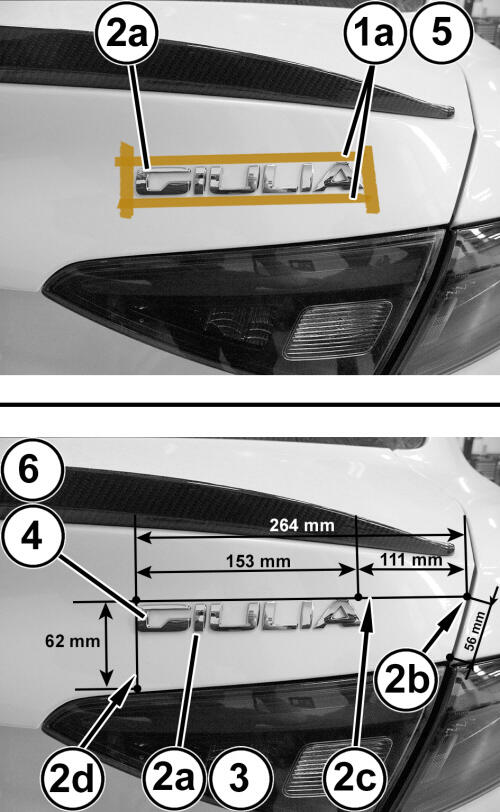
- If the nameplate (2a) were not present (and have not therefore been removed), refer to the locating measurements shown in illustration, operating as shown below:
- refer to the body profiles shown in illustration starting and from point (2b) trace the line (2c) when at a distance of 264 mm its perpendicular line (2d) measures 62 mm.
- Remove all adhesive residues and carefully clean and degrease with heptane the location of the new nameplate (2a).
- Remove the film protecting the adhesive surface of the new nameplate (2a), then immediately position the nameplate on the body. Seat the nameplate fully using hand pressure.NOTE:
Do not touch the adhesive surface of the nameplate during assembly.
- If present, remove the adhesive tape (1a).
- Remove the spacer of the various letters of the nameplate.
- Apply pressure on the nameplate again to guarantee that the air bubbles are completely removed so that the adhesive adheres correctly to the body.