Sunroof Front Panel: Installation
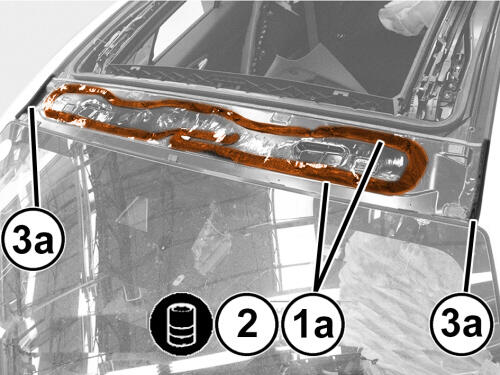
- Using suitable tool, cut and level the bead of sealant (1a) in the panel housing leaving a thickness of between 0.25 and 1 mm (.010 -.040 inch), taking care not to scratch the paint. The thickness of the sealant remaining in the housing will act as a support for the new bonding.
- Thoroughly clean the panel housing using compressed air and thoroughly degrease with heptane. When bonding more than 60 minutes after the bead of sealant has been cut and levelled, it is necessary to treat the surface of the sealant with a special activating product and wait for 15 minutes before bonding the new panel. On the sunroof frame use activator for PUR before bonding.
- Inspect the seals (3a) and replace if necessary.
- If necessary, touch up the paint.
- Install the front sunroof glass. Refer to GLASS, SUNROOF, FRONT, REMOVAL AND INSTALLATION Refer to, GLASS, SUNROOF, REAR, REMOVAL AND INSTALLATION .
- Close the front sunroof glass fully.
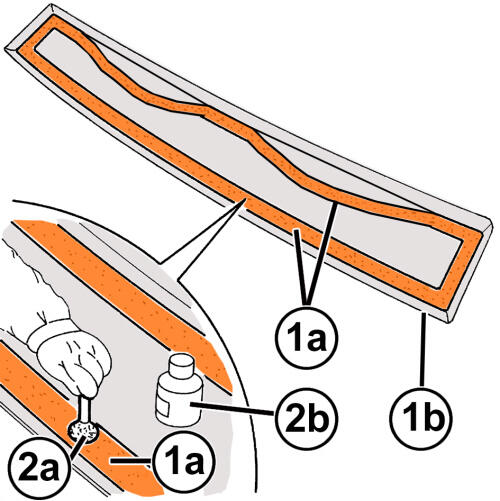
- Degrease the bonding surface (1a) of the new panel (1b) with hepthane.
- Apply the glass adhesion primer to the bonding surface using (1a) using the wick (2a) supplied in the kit.NOTE:
Wait for about 15 minutes before continuing with the next operation to allow the adhesion primer thinner to evaporate.
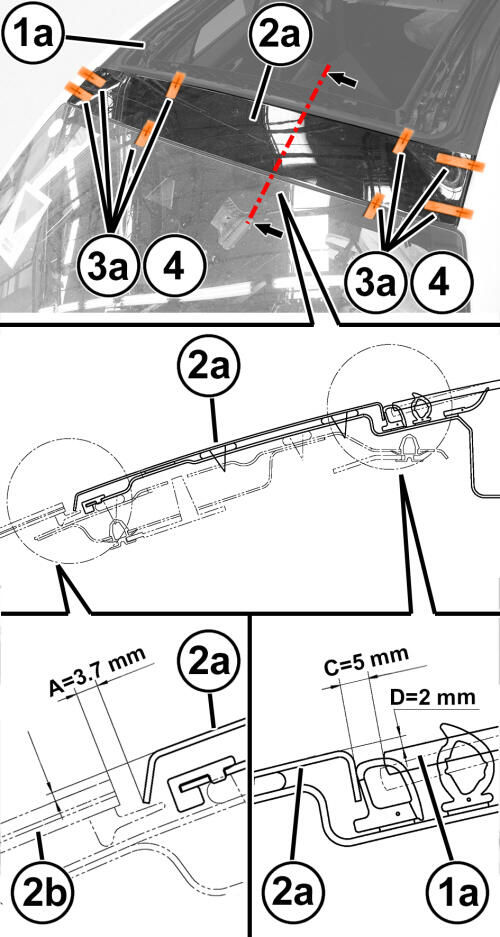
- Test fit the front panel (2a) and position it at dimensions (A and B) with respect to the windshield (2b) and at dimensions (C and D) with respect to the sunroof (1a). Also center the panel (2a) with respect to the side structure.
- When the panel has been positioned, use strips of adhesive tape (3a) to mark the position of the panel with respect to its housing
- Cut the strips of adhesive tape (3a) along the perimeter of the panel (2a) and remove it.
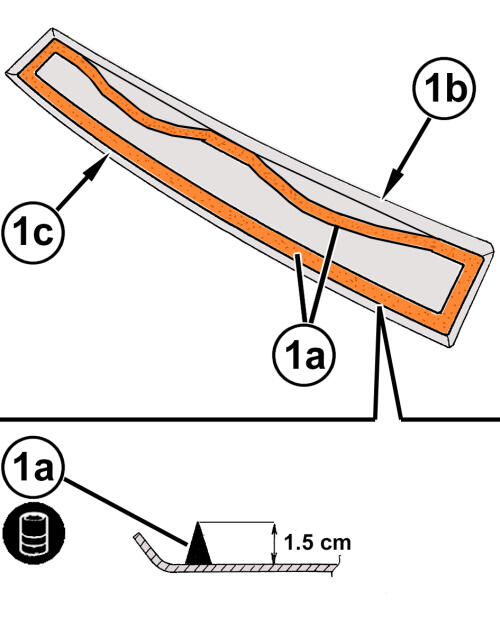
- Use a pneumatic gun to apply a bead of sealant (1a) along the bonding surface of the panel (1b) as evenly as possible.NOTE:
Start from the front center (1c) and proceed along the perimeter of the panel without interruption. On reaching the start of the bead, overlay the it by a few centimeters.
- With the help of a second operator, position the panel (1a) in position immediately after applying the sealant and let it bed in, respecting the dimensions given in the test fitting stage
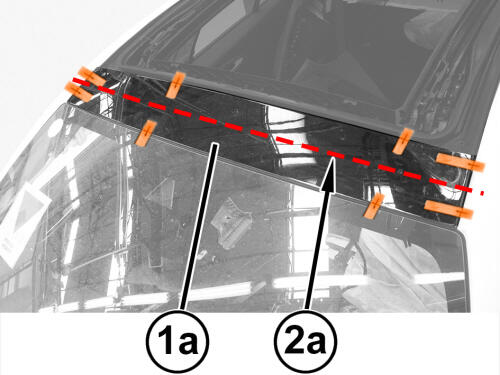
- If necessary, position a belt (2a) as shown in illustration and tension it so that it applies even pressure over the whole panel (1a), to ensure that the window, sealant and sun roof frame are coupled correctly.
- Wait for the length of time prescribed by the supplier of the adhesive.
- Install a new front sunroof seal.
- Install the front seats. Refer to SEAT, FRONT, REMOVAL AND INSTALLATION .