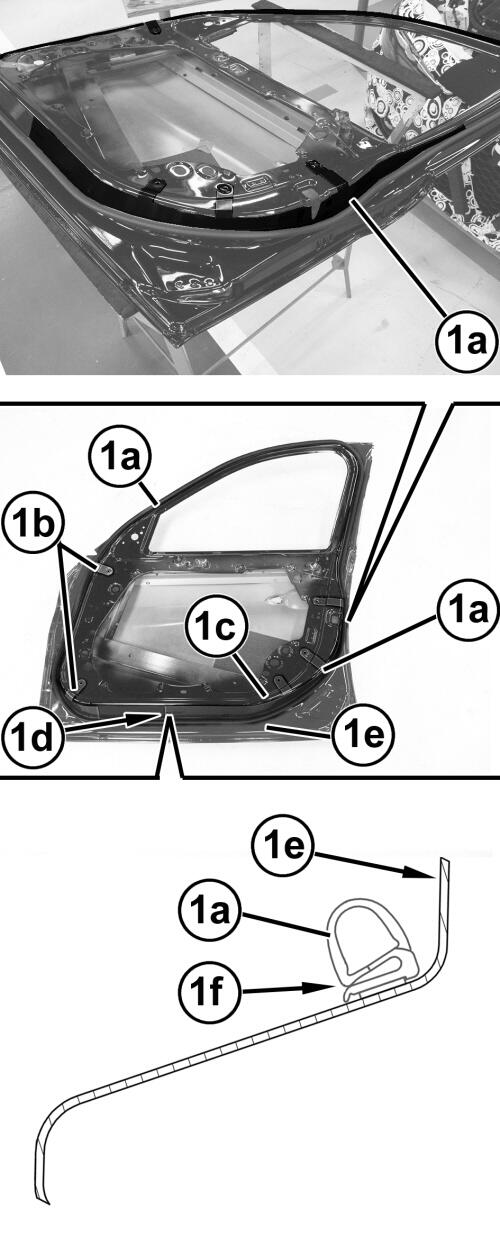
Removal And Installation: Removal
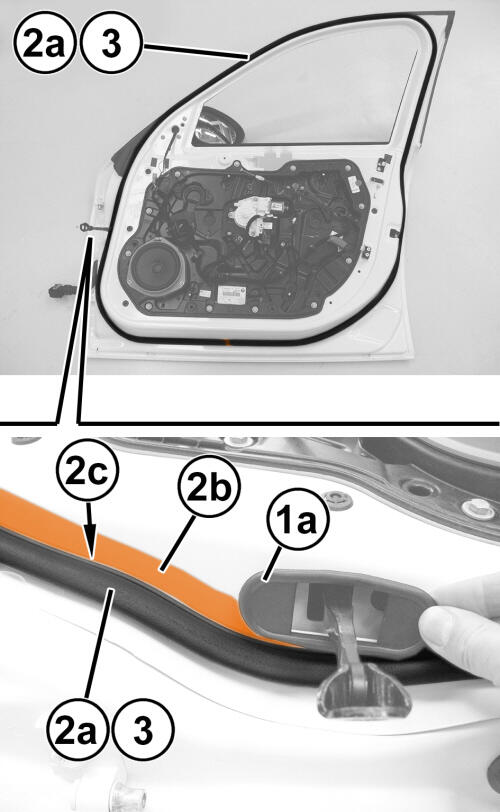
- Remove the upper trim panel. Refer to PANEL, DOOR TRIM, UPPER, REMOVAL AND INSTALLATION .
- Remove the door. Refer to DOOR, REMOVAL AND INSTALLATION .
- Release and remove the seal (1a) of the side door opening check.
- Before removing the door seal (2a), mark its position by applying adhesive tape (2b) along the entire inner perimeter (2c).
- Remove the seal (2a) by releasing its adhesive surface.NOTE:
The removed seal (2a) cannot be reused.
NOTE:
The door housing seal must be install at an ambient temperature above 18 - 20°C (64 - 68°F).
The reattachment procedure is applicable for a door on which the seal (which works as reference) was already present before detachment. See the procedure in the following parameters for reattaching the seal on a door without seal (painted door etc.).
Installation - Door With Seal
- Remove any traces of glue and then degrease the surface of the door on which the new seal will be glued with heptane.
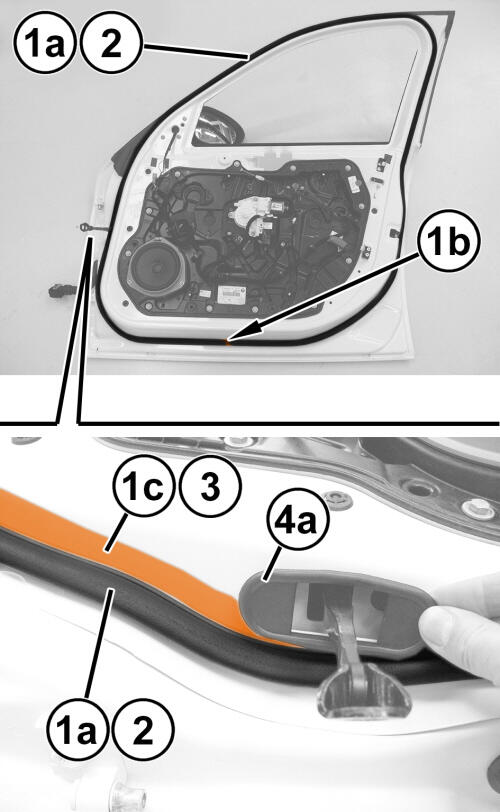
- Apply the new door seal (1a) positioning the joint (1b) in the lower central zone, as shown in illustration. Apply the seal (1a) by gradually removing the protective lining on its adhesive part; carefully respect the position marked by the adhesive tape (1c) during detachment.
- After gluing the seal, apply manual pressure uniformly along the entire seal (1a) to make sure it adheres perfectly.
- Remove the reference adhesive tape (1c).
- Engage the seal (4a) of the side door opening limiter in its housing.
- Install the door,
Refer to DOOR, REMOVAL AND INSTALLATION .
- Install the upper trim panel. Refer to PANEL, DOOR TRIM, REMOVAL AND INSTALLATION Refer to, PANEL, DOOR TRIM, UPPER, REMOVAL AND INSTALLATION Refer to, PANEL, DOOR TRIM, REFLECTOR, REMOVAL AND INSTALLATION .
- Connect the negative battery cable.
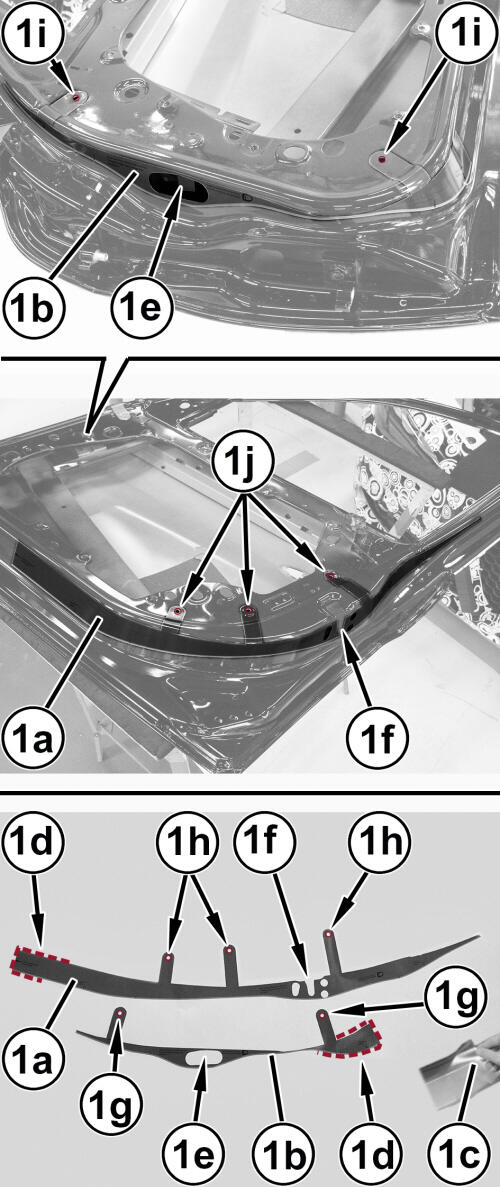
This door housing seal reattachment procedure applied to doors without seal (repainted door etc.) where the adhesive table with the seal position reference could not be applied.
Installation - Door Without Seal
- Clean and degrease with heptane the entire surface of the door on which the new seal will be glued.
- To applied the seal correctly on the door, apply two self-adhesive reference templates (1a) and (1b) (provided with the spare seal); the templates must be applied in the front zone and the rear zone of the door proceeding as shown below:
- Cut the templates (1a) and (1b) eliminating the protective lining (1c) in excess and leaving only a small peripheral edge (1d) of a few millimeters;
- Spray an adhesive positioning liquid on the template application zones (to be able to detach/attach the templates easily during positioning);
- Start by positioning the templates in the central zones (1e) and (1f) after having partially detached the adhesive protection lining;
- Position the holes (1g) and (1h) of the templates on the holes (1i) and (1j) of the door frame, and then gradually complete the positioning of the templates (1a) and (1b) making it adhere to the door frame without folds and without stretching;
- Carefully position the templates to prevent incorrect door housing seal positioning.
- Apply the new door housing seal (1a) proceed as described below:
- In the areas of the templates (1b) and (1c), clean the entire surface of the door on which the new door housing seal will be applied to eliminate the residues of liquid for adhesive positioning;
- position the joint (1d) of the seal in the lower zone at the end of the template (1c), as shown in illustration;
- gradually apply the door housing seal (1a) positioning it flush with the shoulder (1e) of the door, as shown in illustration, except for the zones of the templates (1b) and (1c), which must be aligned with the templates themselves;
- the opening (1f) of the door housing seal must face towards the inside of the vehicle;
- apply the seal (1a) by gradually removing the protecting lining from its adhesive zone.
- After gluing the door housing seal, apply manual pressure uniformly along the entire door housing seal (1a) to make sure it adheres perfectly.
- Remove the templates (1b) and (1c). In the areas of the templates (1b) and (1c), clean the door surface to eliminate the residues of adhesive positioning liquid.
- Engage the seal of the side door opening limiter in its housing.
- Install the door,
Refer to DOOR, REMOVAL AND INSTALLATION .
- Install the upper trim panel. Refer to PANEL, DOOR TRIM, REMOVAL AND INSTALLATION Refer to, PANEL, DOOR TRIM, UPPER, REMOVAL AND INSTALLATION Refer to, PANEL, DOOR TRIM, REFLECTOR, REMOVAL AND INSTALLATION .
- Connect the negative battery cable.