Removal And Installation: Removal
- Remove the appropriate tire and wheel assembly. Refer to REMOVAL AND INSTALLATION .
- Remove the valve core from the valve stem and deflate the tire.NOTE:
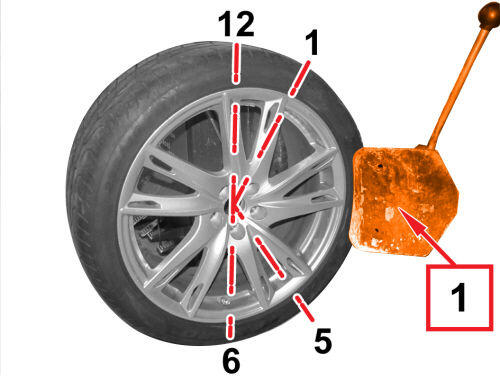
The distance between the blade of the hydraulic arm and the sensor must always be greater than 80 mm.
- Break the tire bead down with the Tire Pressure Monitor (TPM) sensor pointing at the 6 o'clock position and work from 1 o'clock to 5 o'clock.
- Continue to remove the tire bead working clockwise around the wheel so that the sensor never enters the tool operating area
- Repeat the above steps on the inner side of the wheel.
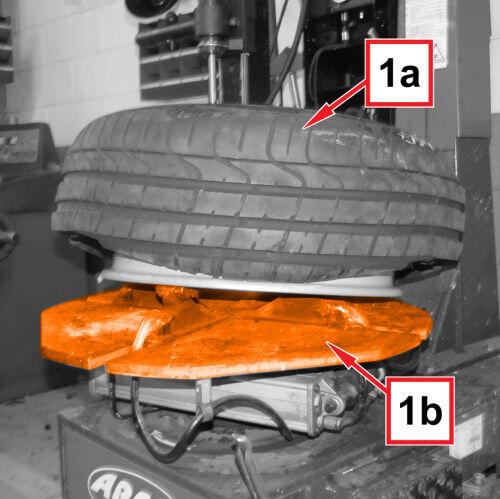
- Position the wheel (1a) on the tool chuck (1b), taking care not to attach the rim in the sector where the sensor is located.NOTE:
The distance between the blade of the hydraulic arm and the sensor must always be greater than 80 mm.
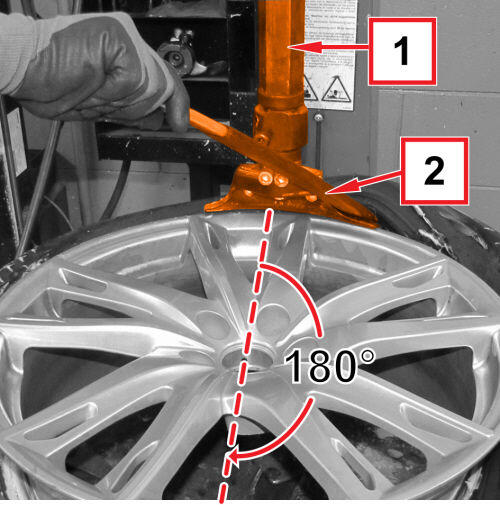
- Lower the hydraulic arm (1) to the edge of the rim, ensuring that the sensor is at 180° (6 o'clock) in relation to the hydraulic arm.
- Pry the tire out of the rim with an appropriate lever.
- Turn the wheel to pry the tire bead off of the rim.NOTE:
The distance between the blade of the hydraulic arm and the sensor must always be greater than 80 mm.
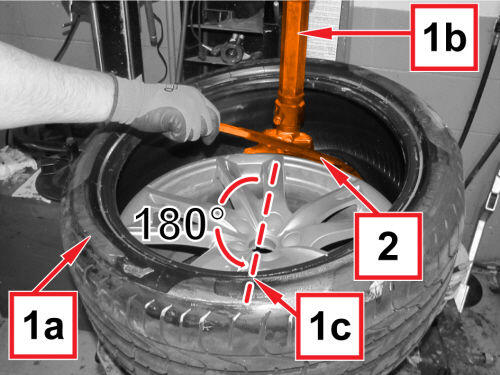
- Lift the tire (1a) from the rim, lower the hydraulic arm (1b) on the inner edge with the sensor (1c) at 180° (6 o'clock) in relation to the hydraulic arm.
- Pry the tire out of the rim with an appropriate lever, turning the wheel.
- Remove the tire from the rim.NOTE:
Always replace the mounting nut with a NEW one.
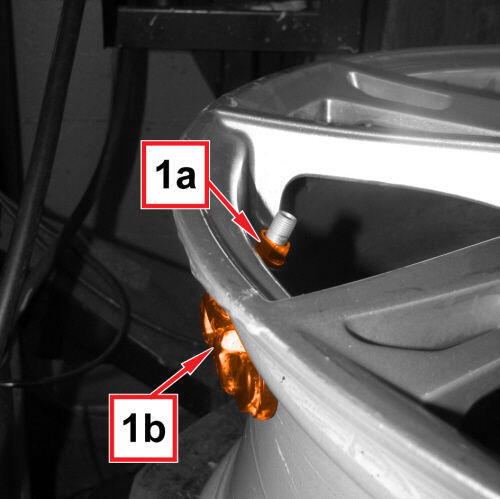
- Remove and DISCARD the sensor mounting nut (1a) securing the sensor (1b) to the rim and remove it.