Sunroof Assembly: Removal
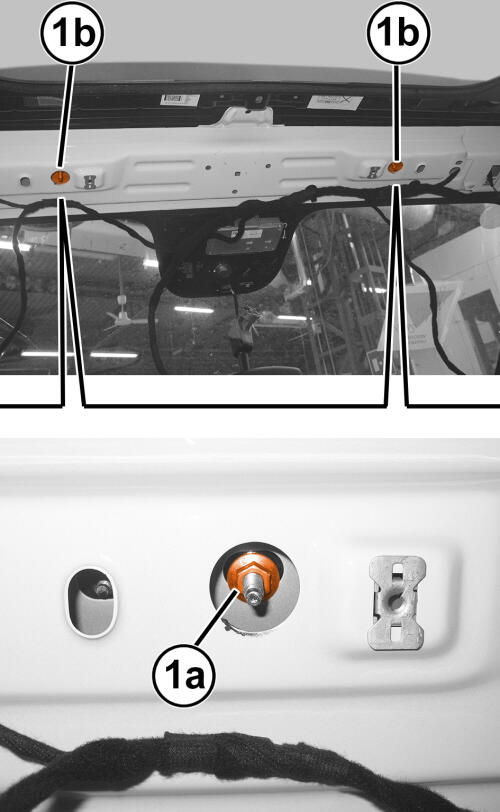
- Remove the headliner. Refer to HEADLINER, REMOVAL AND INSTALLATION .
- Remove the front sunroof panel. Refer to SUNROOF, DUAL PANE, REMOVAL AND INSTALLATION .
- Remove the rear sunroof glass. Refer to GLASS, SUNROOF, FRONT, REMOVAL AND INSTALLATION Refer to, GLASS, SUNROOF, REAR, REMOVAL AND INSTALLATION .
- Remove the wind deflector. Refer to DEFLECTOR, WIND, REMOVAL AND INSTALLATION .
- Remove the sunroof drain channel. Refer to CHANNEL, SUNROOF DRAIN, REMOVAL AND INSTALLATION .
- Remove the sunroof guide. Refer to GUIDE, SUNROOF, GLASS, REMOVAL AND INSTALLATION .
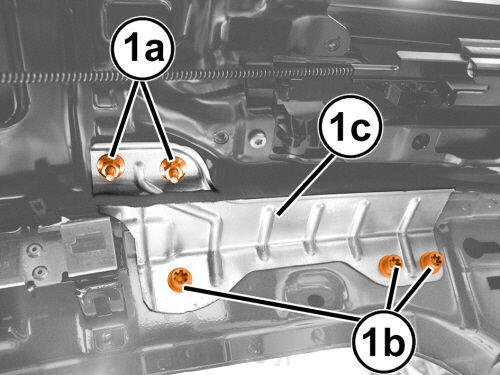
- Locate the two openings (1b) at the rear of the roof and remove the nuts (1a).
- Remove the nuts (1a) and bolts (1b), then remove the supports brackets (1c).
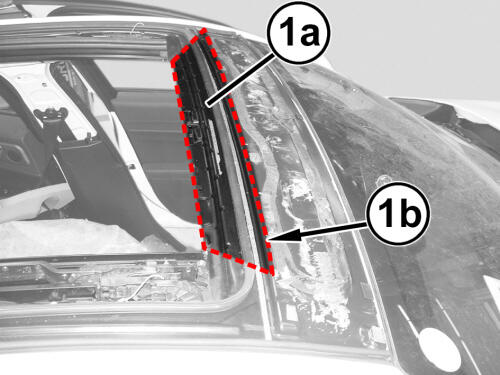
- Using an appropriate cutting tool, cut along the dotted-line (1b) and remove the front section of the sunroof frame (1a).
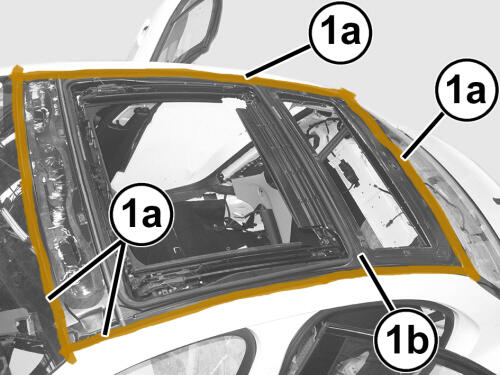
- Protect the vehicles interior trim.
Apply two layers of adhesive tape (1a) around the perimeter of the sunroof to protect the seals (1b), glass, and body panels.
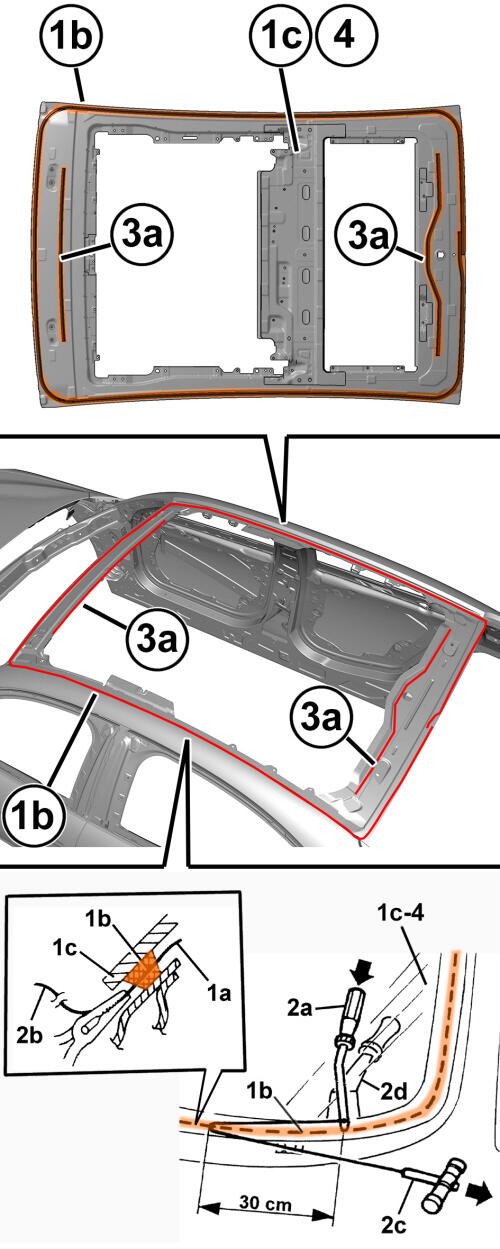
NOTE:The bead of sealant on the sun roof frame can be cut using piano wire. To cut with a vibrating cutter, an adequate cutter is required, as well as an appropriate choice of blades in accordance with the cutting areas and any obstructions present.
- Using a vibration cutter with a suitable blade, follow the cutting lines (1b and 3a) and remove the sunroof (1c).
- To remove using piano wire, cut a length of piano wire of about 80 cm (20 inches), then use pliers to feed one end (1a) of the wire through the sealant bead (1b) securing the sunroof frame to the body.
- Fasten one end of the wire to the special retaining tool (2a) located inside the vehicle. Fasten one end (2b) of the wire to the traction handle (2c) located outside the vehicle.
- The operator inside the vehicle should keep the end of the tool (2a) on the bead of sealant (1b) about 30 cm (12 inches) from the point where the wire passes through. Outside the car, the other operator must pull the handle (2c) following the edge of the sunroof frame and cut the sealant bead. Use a wide tool (2d) to protect the inner parts of the vehicle. Repeat the operation in sections of about 30 cm (12 inches) until the bead of sealant is completely cut.
- After cutting the whole bead of sealant, remove the sunroof frame with the aid of an assistant.NOTE:
When the sunroof frame has been removed it cannot be reused. If necessary, remove the parts that can be reused (see the relevant procedures).