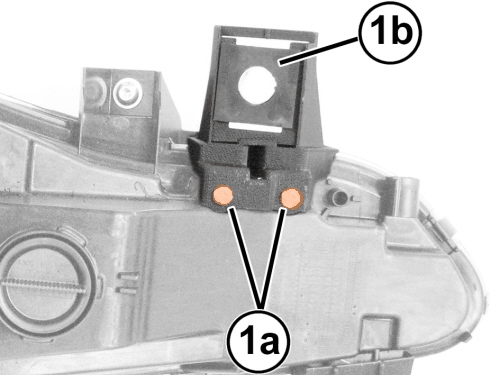
Front Lamp Unit Bracket: Replacement
The identification number of the bracket kit for the front lamp unit with Bi-Xenon lamps is different from that of the kit for the front lamp unit with halogen lamps. The following procedure is applicable to both kits.
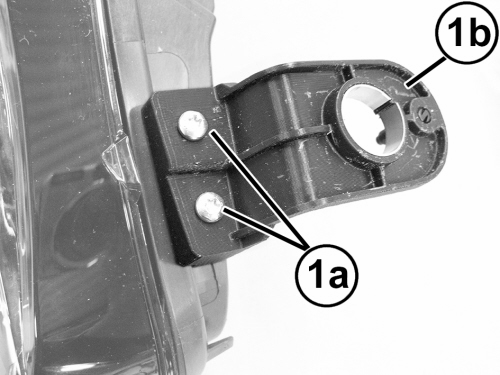
The following front lamp unit attachment brackets can be replaced: (the right front lamp unit is shown, the left will be symmetrically opposite).
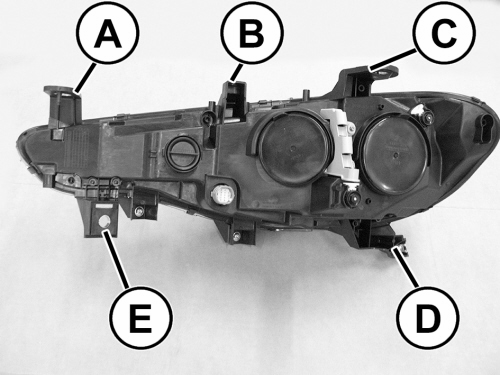
- Inner upper bracket (A)
- Center upper bracket (B)
- Outer upper bracket (C)
- Outer lower bracket (D)
- Inner lower bracket (E)
Removal - Internal Upper Bracket
- Remove the appropriate side front lamp unit. Refer to UNIT, FRONT LAMP, REMOVAL AND INSTALLATION .NOTE:
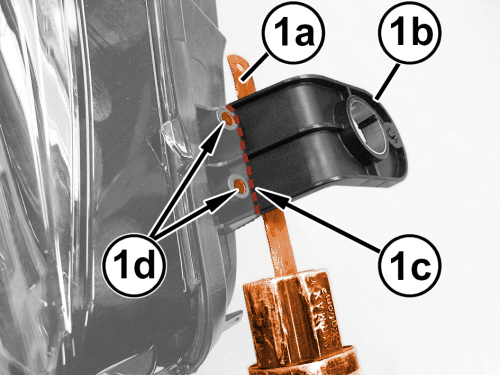
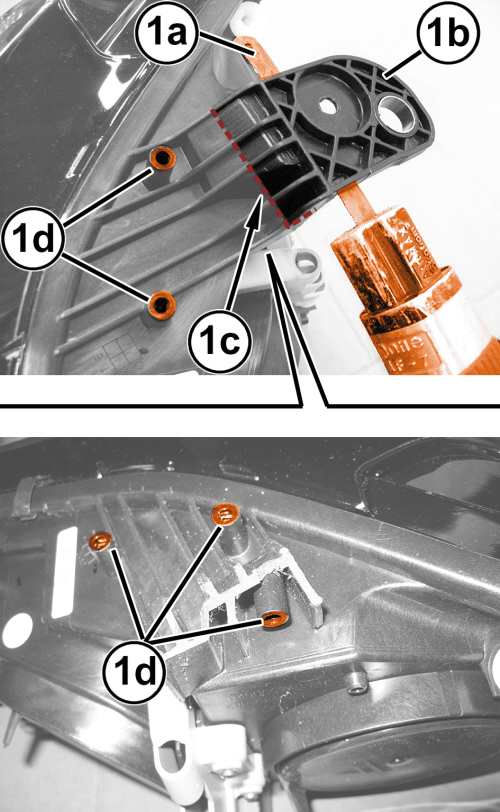
Take care not to damage the seats (1d) for attaching the new bracket.
- Use a saw (1a) to remove the damaged bracket (1b) along the lines (1c) shown in the illustration.
Installation - Internal Upper Bracket
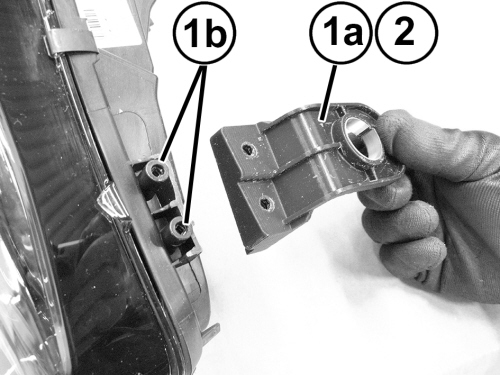
- Grind away the remaining parts of the removed bracket as required to allow the new bracket (1a) to engage correctly with the seats (1b) on the front lamp unit.
- Position the new bracket (1a) to the seats (1b) on the front lamp unit.
- Install the fasteners (1a) and securely tighten them joining the bracket (1b) to the front lamp unit
- Install the front lamp unit. Refer to UNIT, FRONT LAMP, REMOVAL AND INSTALLATION .
Removal - Center Upper Bracket
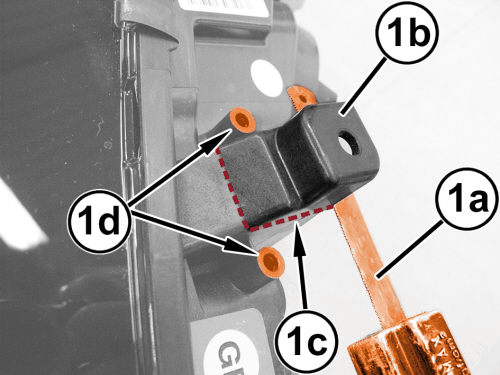
- Remove the appropriate side front lamp unit. Refer to UNIT, FRONT LAMP, REMOVAL AND INSTALLATION .NOTE:
Take care not to damage the seats (1d) for attaching the new bracket.
- Use a saw (1a) to cut the damaged bracket (1b), following the broken line (1c) shown in the illustration.
Installation - Center Upper Bracket
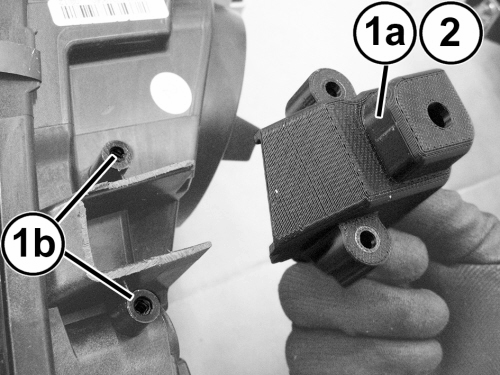
- Grind away the remaining parts of the removed bracket as required to allow the new bracket (1a) to engage correctly with the seats (1b) on the front lamp unit.
- Position the new bracket (1a) to the seats (1b) on the front lamp unit.
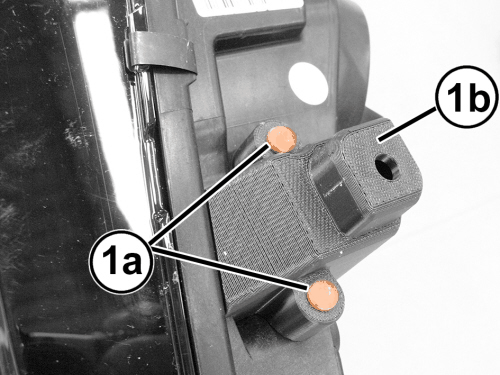
- Install the fasteners (1a) and securely tighten them joining the bracket (1b) to the front lamp unit
- Install the front lamp unit. Refer to UNIT, FRONT LAMP, REMOVAL AND INSTALLATION .
Removal - Outer Upper Bracket
- Remove the appropriate side front lamp unit. Refer to UNIT, FRONT LAMP, REMOVAL AND INSTALLATION .NOTE:
Take care not to damage the seats (1d) for attaching the new bracket.
- Use a saw (1a) to cut the damaged bracket (1b), following the broken line (1c) shown in the illustration.
Installation - Outer Upper Bracket
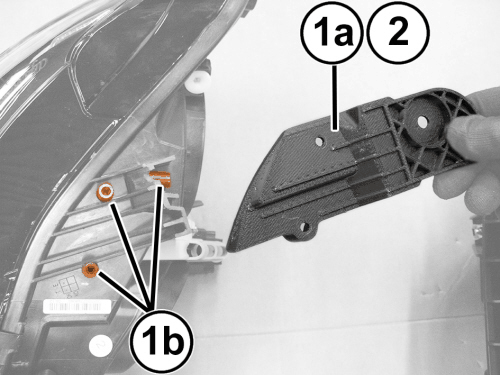
- Grind away the remaining parts of the removed bracket as required to allow the new bracket (1a) to engage correctly with the seats (1b) on the front lamp unit.
- Position the new bracket (1a) to the seats (1b) on the front lamp unit.
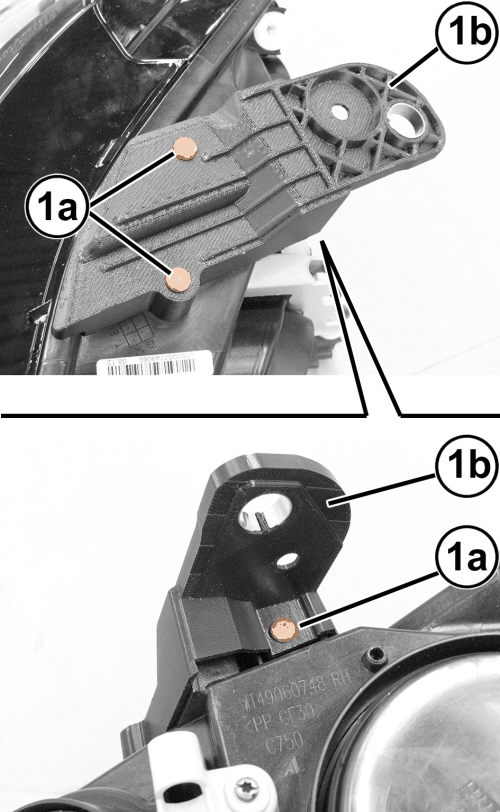
- Install the fasteners (1a) and securely tighten them joining the bracket (1b) to the front lamp unit
- Install the front lamp unit. Refer to UNIT, FRONT LAMP, REMOVAL AND INSTALLATION .
Removal - Outer Lower Bracket
- Remove the appropriate side front lamp unit. Refer to UNIT, FRONT LAMP, REMOVAL AND INSTALLATION .NOTE:
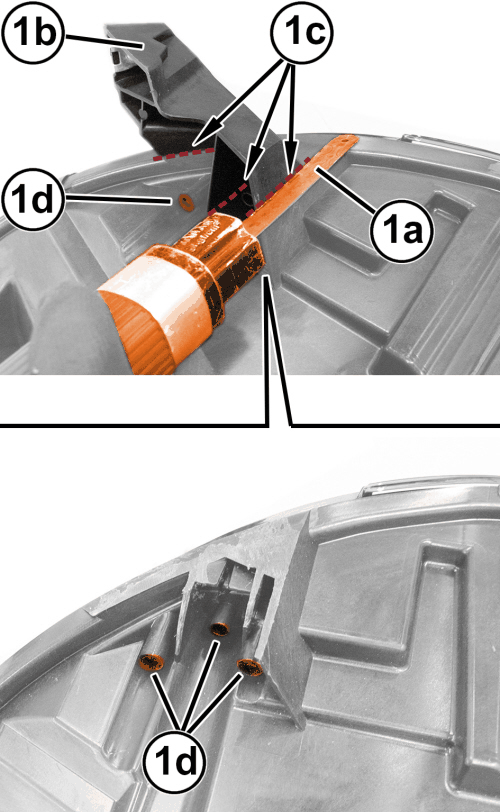
Take care not to damage the seats (1d) for attaching the new bracket.
- Use a saw (1a) to cut the damaged bracket (1b), following the broken line (1c) shown in the illustration.
Installation - Outer Lower Bracket
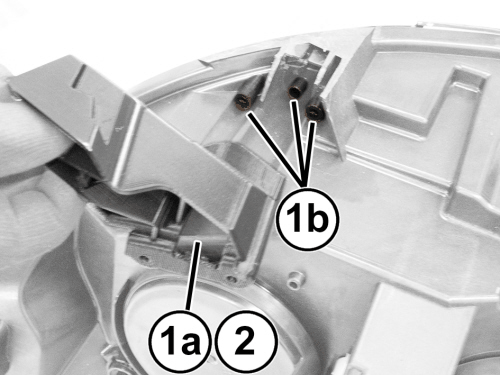
- Grind away the remaining parts of the removed bracket as required to allow the new bracket (1a) to engage correctly with the seats (1b) on the front lamp unit.
- Position the new bracket (1a) to the seats (1b) on the front lamp unit.
- Install the fasteners (1a) and securely tighten them joining the bracket (1b) to the front lamp unit
- Install the front lamp unit. Refer to UNIT, FRONT LAMP, REMOVAL AND INSTALLATION .
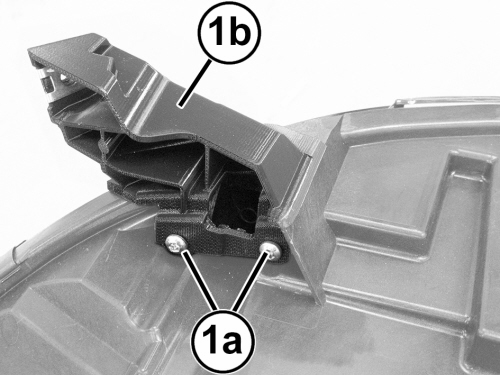
Removal - Inner Lower Bracket
- Remove the appropriate side front lamp unit. Refer to UNIT, FRONT LAMP, REMOVAL AND INSTALLATION .NOTE:
Take care not to damage the seats (1d) for attaching the new bracket.
- Use a saw (1a) to cut the damaged bracket (1b), following the broken line (1c) shown in the illustration.
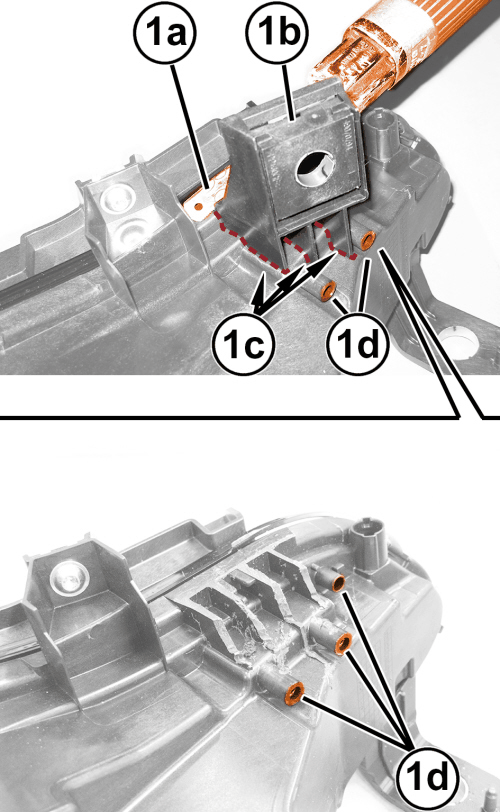
Installation - Inner Lower Bracket
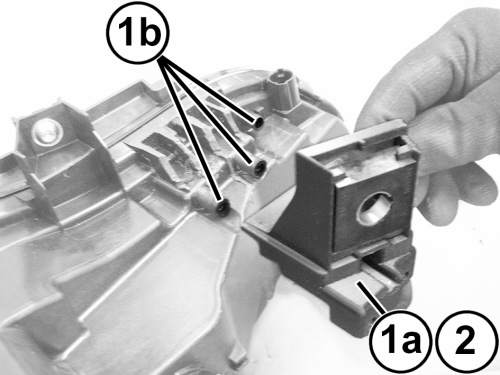
- Grind away the remaining parts of the removed bracket as required to allow the new bracket (1a) to engage correctly with the seats (1b) on the front lamp unit.
- Position the new bracket (1a) to the seats (1b) on the front lamp unit.
- Install the fasteners (1a) and securely tighten them joining the bracket (1b) to the front lamp unit
- Install the front lamp unit. Refer to UNIT, FRONT LAMP, REMOVAL AND INSTALLATION .