Left Air Inlet Connector To Turbocharger
WARNING: This page is about a different variant/trim than selected.
REMOVAL
- Disconnect and isolate the negative battery cable.
- Remove the engine cover. Refer to COVER, ENGINE, REMOVAL AND INSTALLATION .
- Drain the cooling system. Refer to DRAINING AND FILLING THE ENGINE COOLING SYSTEM .
- Recover the A/C refrigerant. Refer to PLUMBING, STANDARD PROCEDURE .
- Remove the left air inlet tube to the turbocharger. Refer to COOLER AND HOSES, CHARGE AIR, REMOVAL AND INSTALLATION .
- Remove the belly pan. Refer to BELLY PAN, ENGINE, REMOVAL AND INSTALLATION or BELLY PAN, REAR, REMOVAL AND INSTALLATION or BELLY PAN, REAR SUSPENSION, REMOVAL AND INSTALLATION or BELLY PAN, SIDE, REMOVAL AND INSTALLATION .
- Remove the left front wheel house splash shield. Refer to SHIELD, SPLASH, FRONT WHEELHOUSE, REMOVAL AND INSTALLATION
.
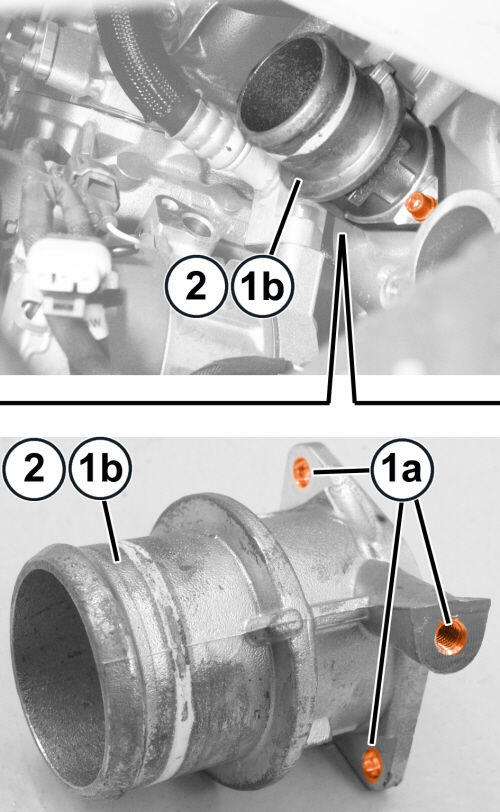
- Working from the front left wheel compartment, remove the three bolts (1a) and the left turbocharger air inlet connector (1b).
- Remove the air inlet connector (1b) gasket.
INSTALLATION
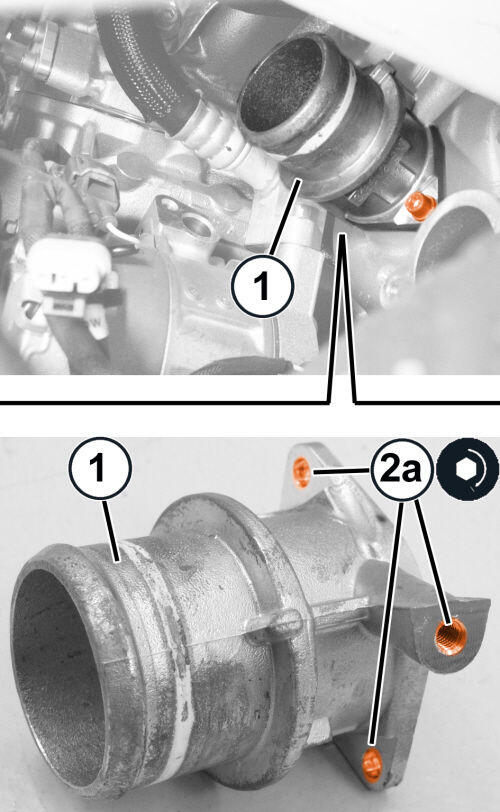
- Check that the left turbocharger air inlet connector (1) not damaged.
- Using a NEW gasket, install the air inlet connector (1) and tighten the three bolts (2a) to the proper specification. Refer to TURBOCHARGER .
- Install the left front wheel house splash shield. Refer to SHIELD, SPLASH, FRONT WHEELHOUSE, REMOVAL AND INSTALLATION .
- Install the belly pan. Refer to BELLY PAN, ENGINE, REMOVAL AND INSTALLATION or BELLY PAN, REAR, REMOVAL AND INSTALLATION or BELLY PAN, REAR SUSPENSION, REMOVAL AND INSTALLATION or BELLY PAN, SIDE, REMOVAL AND INSTALLATION .
- Install the left air inlet tube to the turbocharger. Refer to COOLER AND HOSES, CHARGE AIR, REMOVAL AND INSTALLATION .
- Evacuate and charge the A/C system. Refer to PLUMBING, STANDARD PROCEDURE .
- Fill the cooling system. Refer to DRAINING AND FILLING THE ENGINE COOLING SYSTEM .
- Install the engine cover. Refer to COVER, ENGINE, REMOVAL AND INSTALLATION .
- Connect the negative battery cable.