Removal And Installation 2.9L
REMOVAL
- Disconnect and isolate the negative battery cable. Refer to CABLES, BATTERY, REMOVAL AND INSTALLATION .
- Raise and support the vehicle. Refer to HOISTING, STANDARD PROCEDURE .
- Remove the lower rear fascia. Refer to FASCIA, REAR, REMOVAL AND INSTALLATION .
- Remove the rear exhaust. Refer to MUFFLER, EXHAUST, REMOVAL AND INSTALLATION .
- Remove the rear heat shield. Refer to SHIELD, HEAT, REMOVAL AND INSTALLATION
.NOTE:
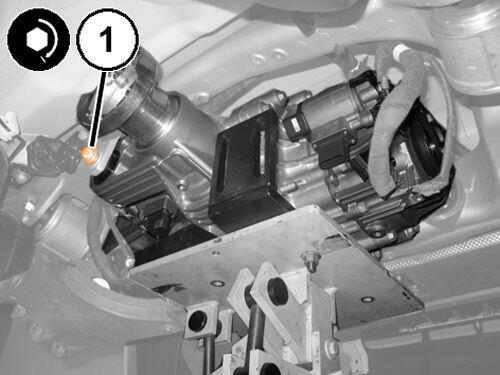
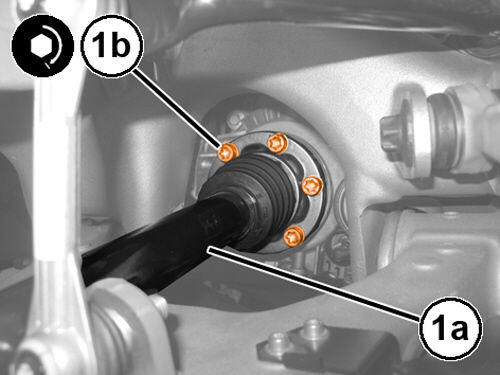
Index mark the drive shaft for installation purposes.
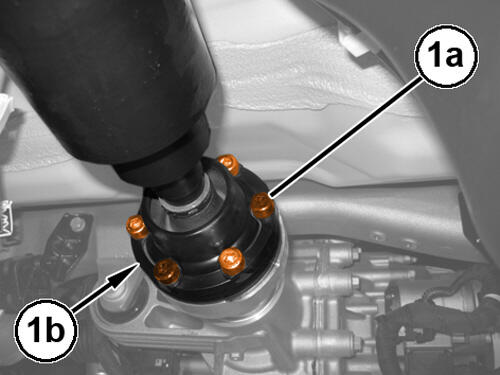
- Remove and discard the drive shaft bolts (1a) and shims (1b), position the drive shaft aside and support the drive shaft.
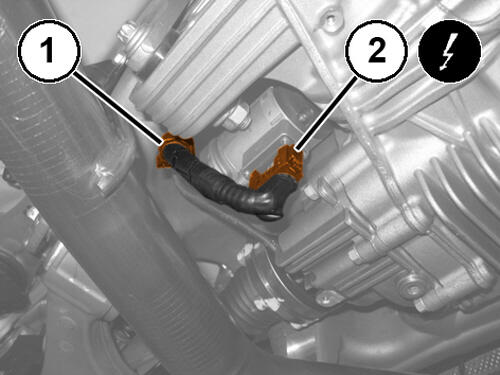
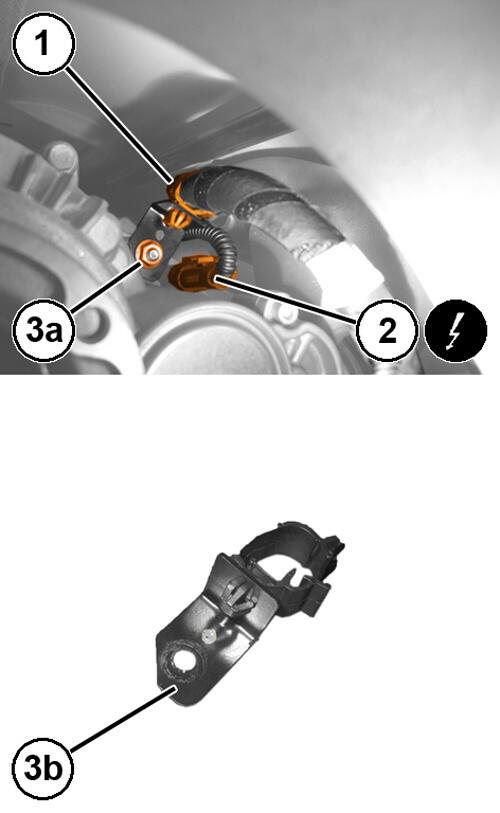
- Disconnect the axle shaft actuator wire harness connector (2) and release the wire harness clip (1).
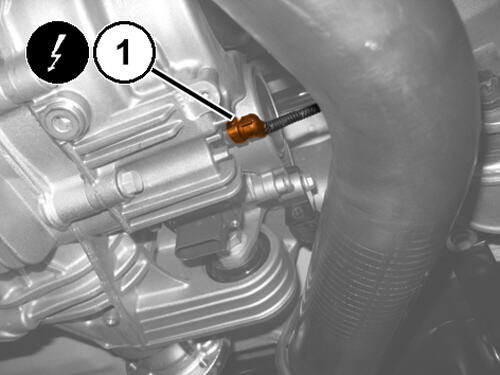
- Disconnect the RDU oil temperature sensor wire harness connector (1).
- Remove the wire harness bracket nut (3a) and position aside the wire harness (1, 2).
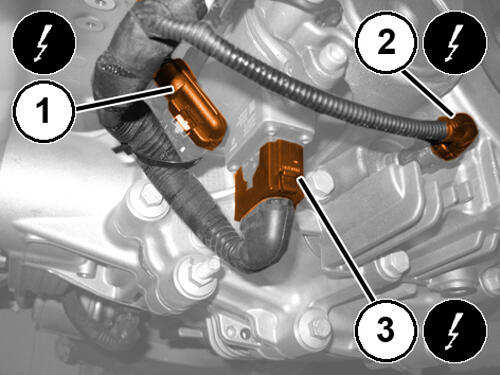
- Disconnect the axle shaft actuator wire harness connector (3) and release the wire harness clip (1).
- Disconnect the left differential oil temperature sensor wire harness connector (2).
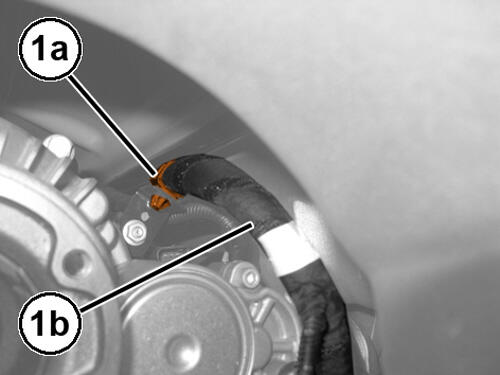
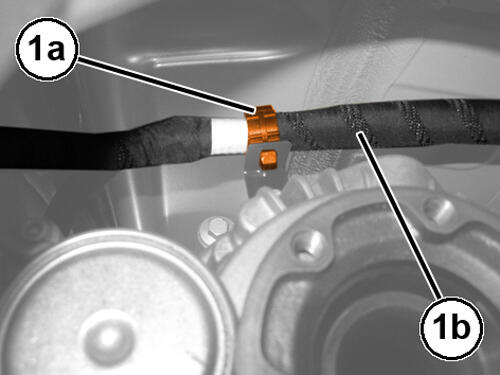
- Open the clips (1a) and release the wiring (1b) right side from the differential unit.
- Open the clip (1a) and release the wiring (1b) left side from the differential unit.NOTE:
Index mark the half shaft on both the RH side and the LH side for installation purposes.
- Remove the LH and RH rear half shaft bolts (1b) and position aside the half shafts (1b).
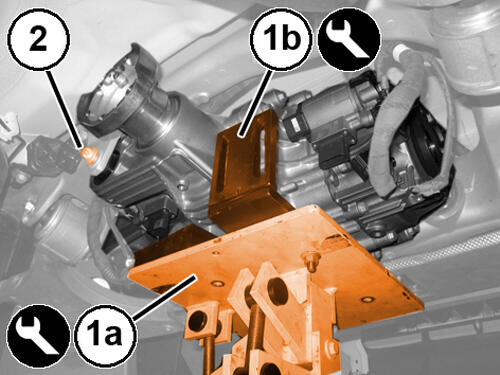
- Support the RDU with a jack stand (1a).
- Remove the RDU front mount bolt and nut (2).
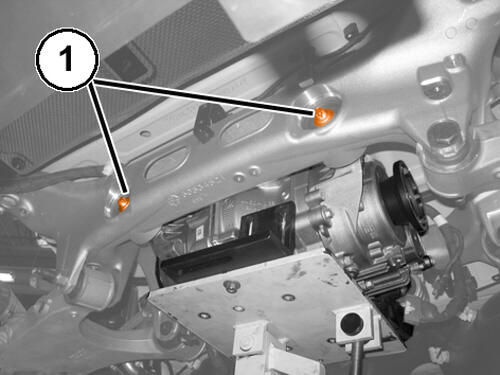
- Remove the RDU rear mount bolts (1).
- Remove the RDU (1) from the vehicle.
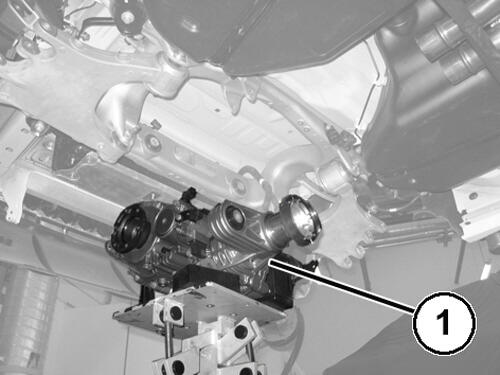
INSTALLATION
- Position the RDU (1) in the vehicle.
- Install the rear RDU mount bolts (1) and tighten to the proper specification. Refer to TORQUE SPECIFICATIONS
.
- Install the RDU front mount bolt and nut (1) and tighten to the proper specification. Refer to TORQUE SPECIFICATIONS
.NOTE:
Align the index mark the half shaft on both the RH side and the LH side made during removal.
- Install the LH and RH half shaft bolts (1b) and tighten to the proper specification. Refer to TORQUE SPECIFICATIONS
.
- Connect the axle shaft actuator wire harness connector (3) and latch the wire harness clip (1).
- Connect the wire harness connector to the left differential oil temperature sensor (2).
- Position the wiring harness in place (1b) and latch the wiring harness clip (1a).
- Position the wiring harness in place (1b) and latch the wiring harness clip (1a).
- Connect the axle shaft actuator wire harness connector (2) and latch the clip (1).
- Connect the RDU oil temperature sensor wire harness connector (1).
- Install the wire harness bracket and nut (3a) and tighten to the proper specification. Refer to TORQUE SPECIFICATIONS .
- Install the rear heat shield. Refer to SHIELD, HEAT, REMOVAL AND INSTALLATION
.NOTE:
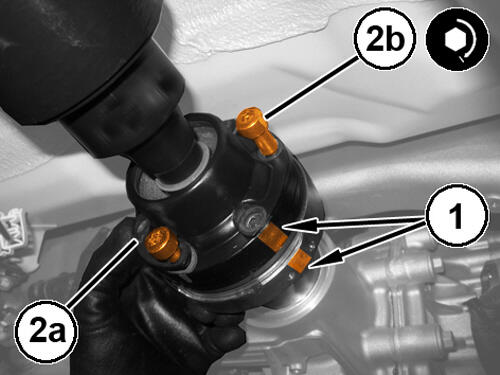
Align the index mark (1) made during removal.
- Install the NEW rear drive shaft shims (2a) and bolts (2b) and tighten to the proper specification. Refer to TORQUE SPECIFICATIONS .
- Install the rear exhaust. Refer to MUFFLER, EXHAUST, REMOVAL AND INSTALLATION .
- Check the Rear Drive Unit (RDU) fluid level and add as needed. Refer to STANDARD PROCEDURE orREAR DRIVE UNIT (RDU) LEFT BODY FLUID DRAIN AND FILL or REAR DRIVE UNIT (RDU) RIGHT BODY FLUID DRAIN AND FILL .
- Install the lower rear fascia. Refer to FASCIA, REAR, REMOVAL AND INSTALLATION .
- Remove the support and lower the vehicle.
- Connect the negative battery cable. Refer to CABLES, BATTERY, REMOVAL AND INSTALLATION .