Removal And Installation: Installation
NOTE:
If a foam seal on the HVAC housing or air inlet housing is deformed or damaged, the seal must be replaced.
NOTE:
Replacement of the O-ring seal is required anytime a refrigerant line or A/C expansion valve is disconnected. Failure to replace the O-ring seal may result in a refrigerant system leak.
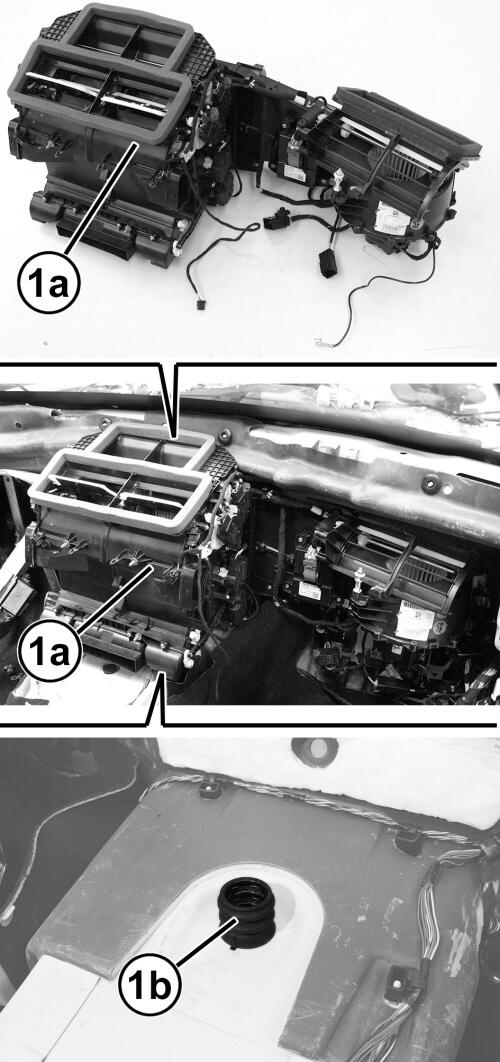
- With the help of an assistant install the HVAC housing (1a) into the vehicle, be sure to fully engage the condensate tube (1b).
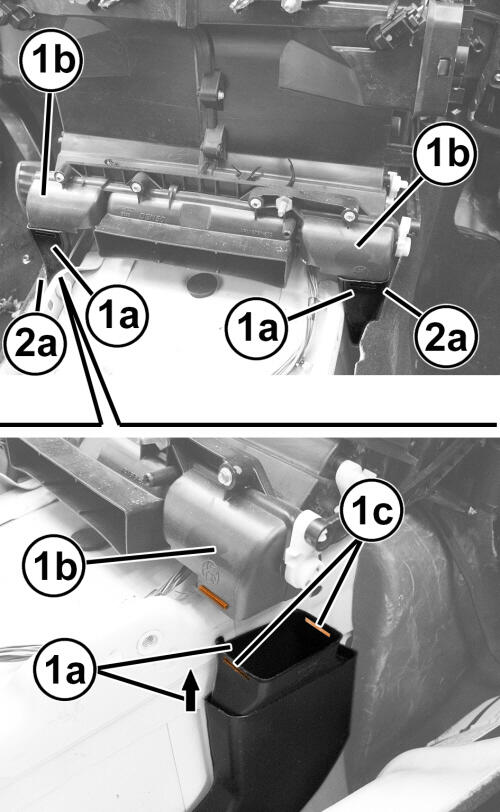
- Connect the rear floor duct connectors (1a) to the HVAC housing (1b), be sure that the retainers (1c) are fully engaged.
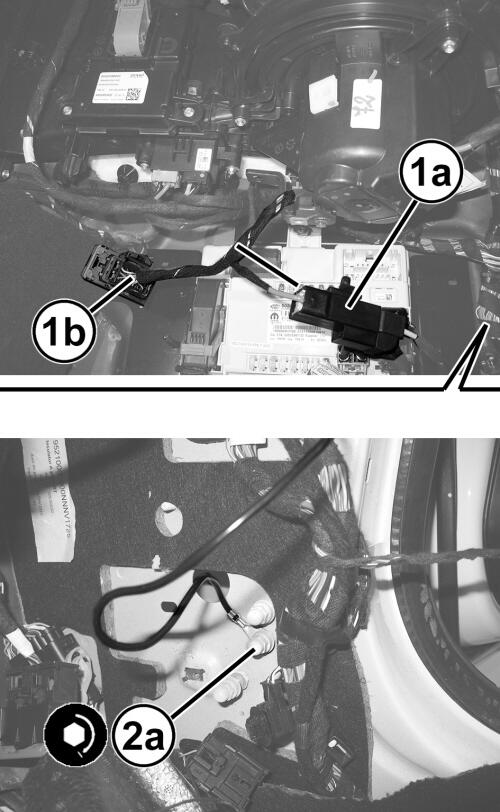
- Attach the ground wire to the ground wire stud in the vehicle and install the nut (2a). Tighten the nut securely.
- Connect the HVAC wire harness connectors (1a, 1b) and install the connectors into their retainers.
- Install the instrument panel carrier. Refer to CARRIER, INSTRUMENT PANEL, REMOVAL AND INSTALLATION
.
- Remove the tape or plugs from the opened refrigerant line fittings and the expansion valve ports.
- Lubricate NEW O-ring seals with clean refrigerant oil and install them onto the refrigerant line fittings. Use only the specified seals as they are made of a special material for the refrigerant in the system. Use only refrigerant oil of the type recommended for the A/C compressor in the vehicle.
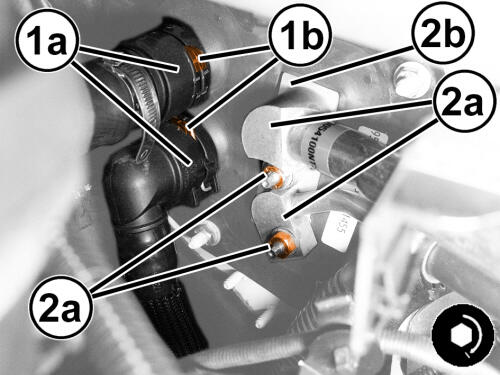
- Connect the A/C liquid and A/C suction lines (2a) to the A/C expansion valve (2b).
- Install the two nuts (2a) that secures the A/C liquid and suction lines (2a) to the A/C expansion valve. Tighten the nuts to the proper specification. Refer to TECHNICAL SPECIFICATIONS .
- Remove the plugs or tape from the heater core tubes.
- Lubricate the O-ring seals in the two heater hose connectors (1a) with clean engine coolant and connect the heater hose connectors to the heater core tubes. Make sure the two retaining clips (1b) in each connector are fully engaged to the tubes.
- Refill the engine cooling system. Refer to 2.0L, DRAINING AND FILLING THE ENGINE COOLING SYSTEM or 2.8L, DRAINING AND FILLING THE ENGINE COOLING SYSTEM .
- Connect the negative battery cable. If equipped with an Intelligent Battery Sensor (IBS), connect the IBS connector.
- Charge the refrigerant system. Refer to PLUMBING, STANDARD PROCEDURE .
- Install the engine cover. Refer to 2.0L, COVER, ENGINE, REMOVAL AND INSTALLATION2.8L, COVER, ENGINE, REMOVAL AND INSTALLATION .