Removal And Installation: Removal
To avoid serious or fatal injury on vehicles equipped with airbags, disable the Supplemental Restraint System (SRS) before attempting any steering wheel, steering column, airbags, airbag curtains, knee blocker, seat belt tensioner, impact sensor or instrument panel component diagnosis or service. Disconnect the Intelligent Battery Sensor (IBS)/negative battery cable assembly from the negative battery post, then wait two minutes for the system capacitor to discharge before performing further diagnosis or service. This is the only sure way to disable the SRS. Failure to take the proper precautions could result in accidental airbag deployment.
Review the warnings and cautions for this system before performing the procedure. Failure to follow these instructions may result in serious or fatal injury.
- Remove the engine cover. Refer to 2.0L, COVER, ENGINE, REMOVAL AND INSTALLATION2.8L, COVER, ENGINE, REMOVAL AND INSTALLATION .
- Partially drain the engine cooling system. Refer to 2.0L, DRAINING AND FILLING THE ENGINE COOLING SYSTEM or 2.8L, DRAINING AND FILLING THE ENGINE COOLING SYSTEM .
- Recover the refrigerant from the refrigerant system. Refer to PLUMBING, STANDARD PROCEDURE .
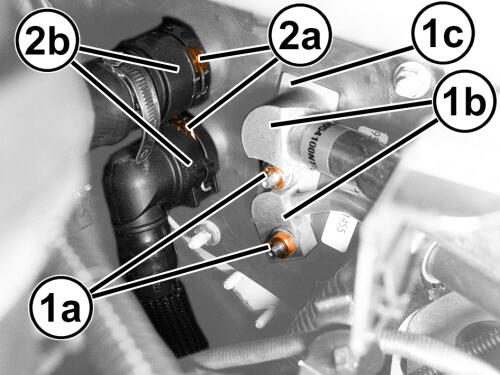
- Disengage both of the heater hose connector retaining clips (2a) and disconnect the connectors (2b) from the tubes.
- Install plugs in, or tape over the open heater core tubes to prevent coolant spillage inside the vehicle during HVAC housing removal.
- Remove the two nuts (1a) that secure the A/C suction and A/C liquid lines (1b) to the A/C expansion valve (1c).
- Disconnect the A/C suction and liquid lines (1b) from the A/C expansion valve (1c). Remove and discard the O-ring seals.
- Install plugs in, or tape over the open refrigerant line fittings and the A/C expansion valve ports.
- Remove the instrument panel carrier. Refer to CARRIER, INSTRUMENT PANEL, REMOVAL AND INSTALLATION
.
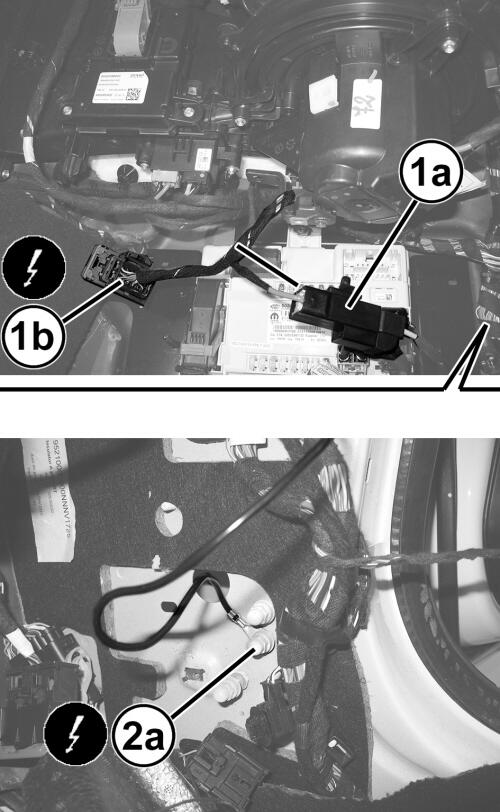
- With a suitable tool, release the wire harness connector retainers from the HVAC housing and disconnect the HVAC wire harness connectors (1a, 1b).
- Remove the ground strap nut (2a) and disconnect the ground strap.
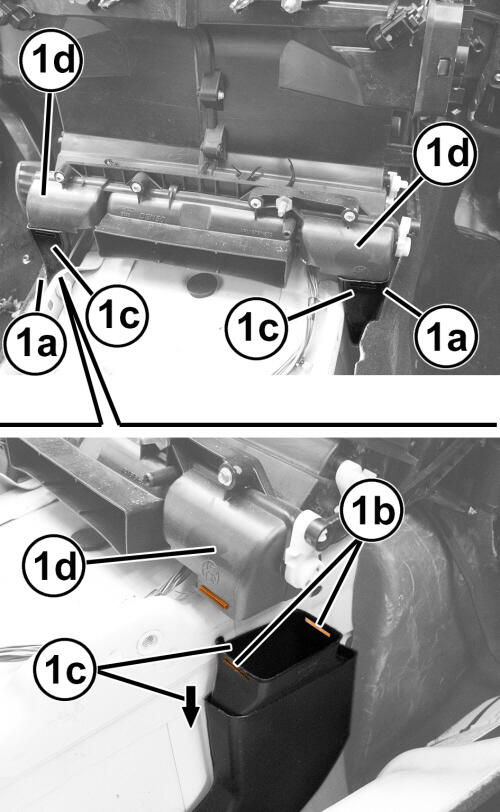
- Remove the rear floor duct connectors (1c) from the HVAC housing (1d), by releasing the retainers (1b).
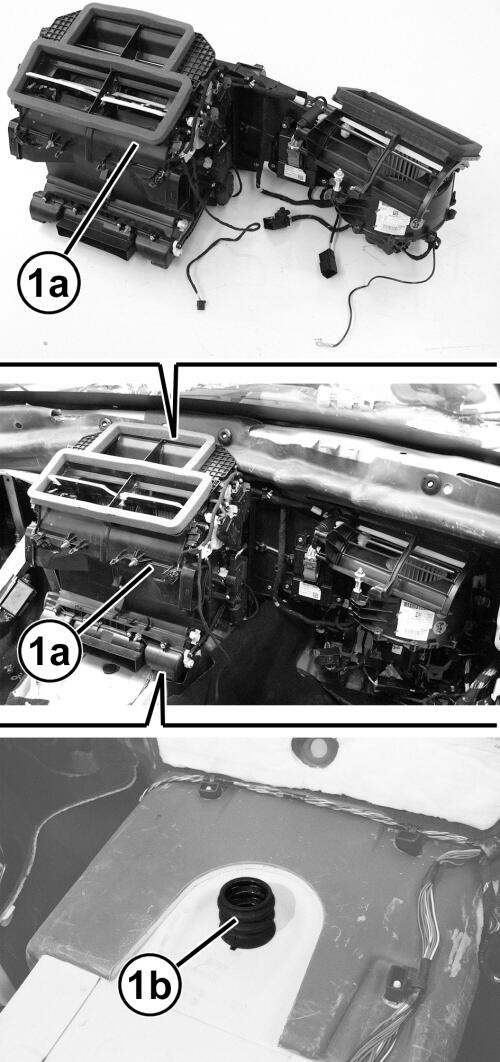
- With the help of an assistant, release the HVAC housing (1a) from the condensate tube (1b) and remove the HVAC housing.