Removal And Installation
WARNING: This page is about a different variant/trim than selected.
REMOVAL
- Disconnect and isolate the negative battery cable.
- Remove the left front tire and wheel assembly. Refer to REMOVAL AND INSTALLATION .
- Remove the belly pan. Refer to BELLY PAN, ENGINE, REMOVAL AND INSTALLATION or BELLY PAN, REAR, REMOVAL AND INSTALLATION or BELLY PAN, REAR SUSPENSION, REMOVAL AND INSTALLATION or BELLY PAN, SIDE, REMOVAL AND INSTALLATION .
- Remove the engine cover. Refer to COVER, ENGINE, REMOVAL AND INSTALLATION .
- Drain the turbocharger cooling system. Refer to DRAINING AND FILLING THE TURBOCHARGER COOLING SYSTEM .
- Drain the cooling system. Refer to DRAINING AND FILLING THE ENGINE COOLING SYSTEM .
- Remove the A/C condenser. Refer to CONDENSER, A/C, REMOVAL AND INSTALLATION
.
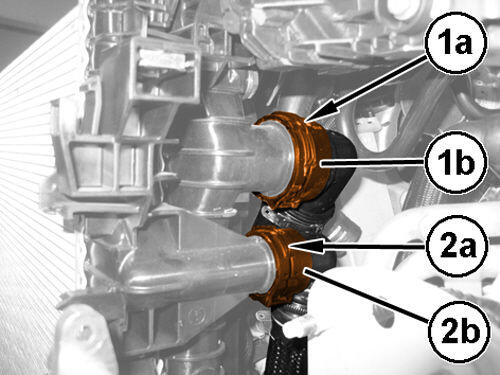
- Release the retaining clip (1a) and quick connector (1b) of the coolant supply hose to the radiator.
- Release the retaining clip (2a) and quick connector (2b) of the coolant supply hose to the turbocharger air cooling system radiator.
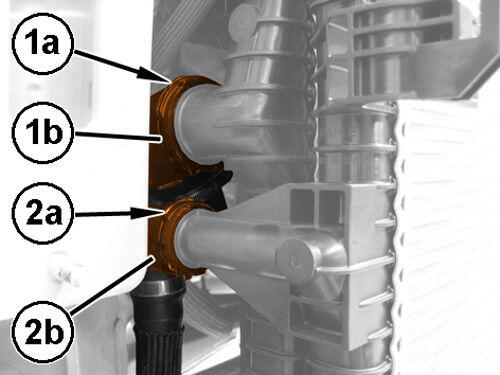
- Release the retaining clip (1a), remove the quick connector (1b) of the coolant supply hose from the radiator.
- Release the retaining clip (2a), remove the quick connector (2b) of the coolant outlet hose from the turbocharger air cooling system radiator.
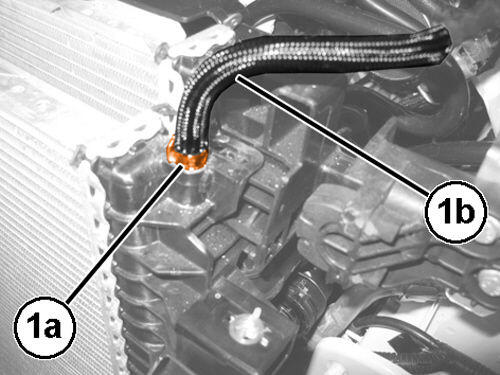
- Remove the hose clip (1a) and degassing hose (1b) from the turbocharger air cooling system radiator.
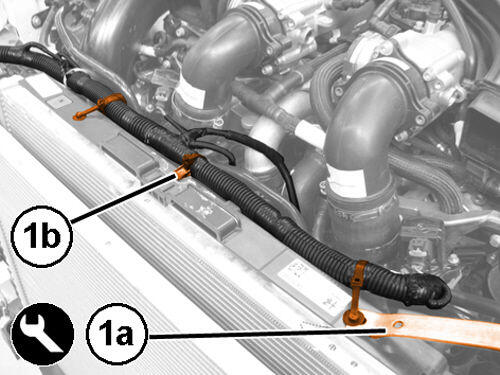
- Using the (special tool #C-4829A, Remover, Trim)tool (1a) to release the wiring retainers (1b).
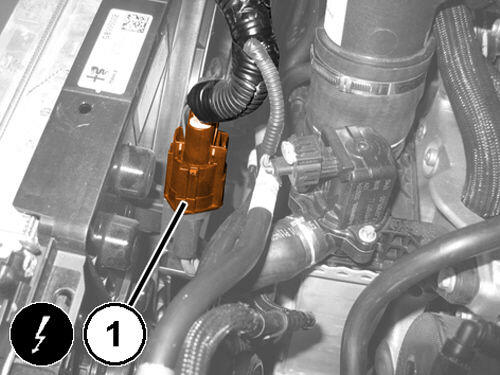
- Disconnect the cooling fan wire harness connector (1).
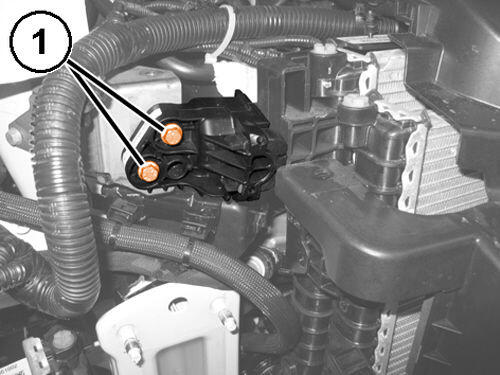
- Remove the bolts and the radiator support mounts from both sides.
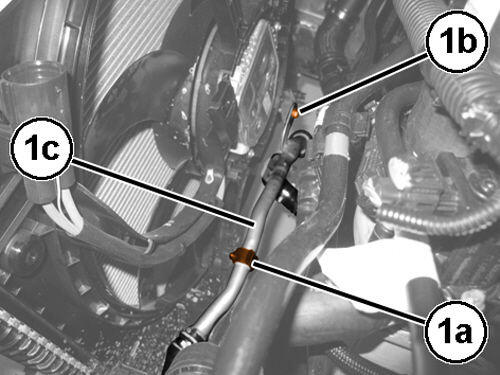
- Release the clip (1a) and remove the bolt (1b) securing the inlet multi-way pipe to the coolant pump of the turbocharger air cooling system (1c).
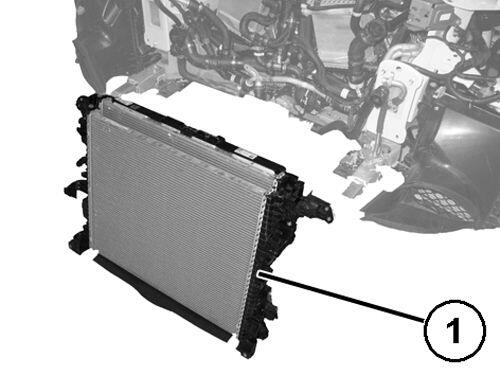
- Remove the complete engine cooling radiator (1), releasing the lower pins from the flexible mounts of the support brackets.
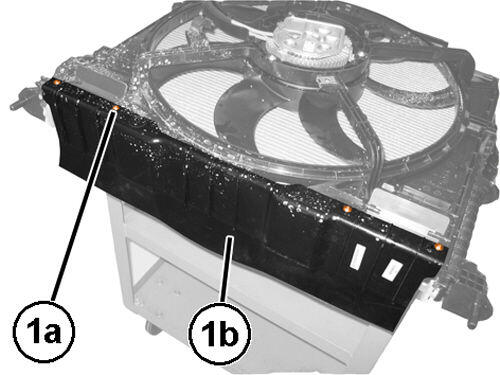
- Remove the bolts (1a) and the lower air manifold (1b) from the fan.
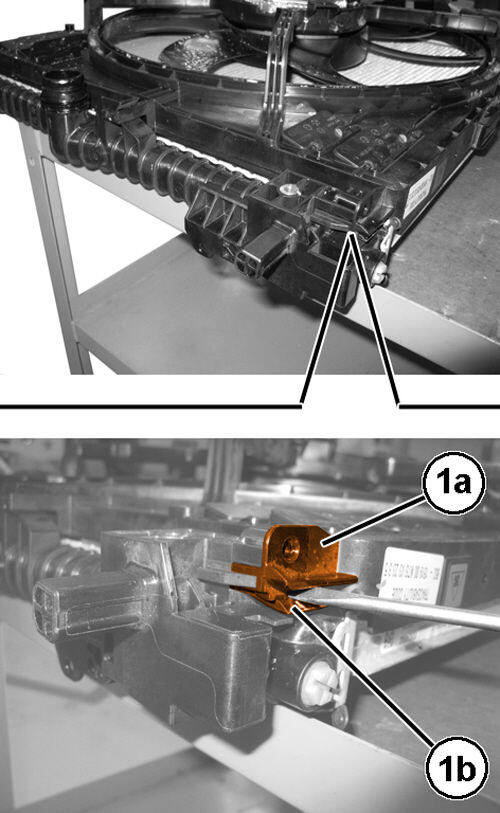
- Release the retaining clip (1a) and release the fan from the lower clip on both sides (1b).
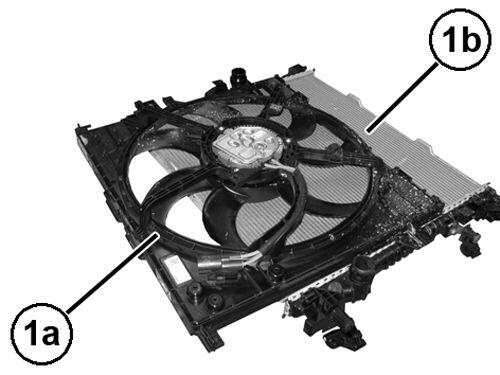
- Release and remove the fan (1a) from the radiator (1b).
INSTALLATION
- Install the fan in its housing and engage the lower retaining clips.
- Install the lower air manifold back in its housing and securely tighten the bolts.
- Install the complete engine cooling radiator back in its housing and engage the lower pins in the flexible mounts of the support brackets.
- Install the inlet multi-way hose to the coolant pump of the turbocharger air cooling system back in its housing, tighten the bolts and secure the retaining clip.
- Tighten bolts of the radiator support flexible mounts on both side.
- Connect the cooling fan wire harness connector.
- Connect the wiring retainers.
- Install the degassing hose to the radiator of the supercharger air cooling system and close the respective band.
- Install the coolant outlet hose quick connector to the turbocharger air cooling system radiator.
- Install the quick connector for the radiator coolant outlet hose.
- Install the quick connector of the coolant supply hose to turbocharger air cooling system radiator.
- Install the quick connector of the coolant supply hose to the radiator.
- Install the A/C condenser. Refer to CONDENSER, A/C, REMOVAL AND INSTALLATION .
- Fill the cooling system. Refer to DRAINING AND FILLING THE ENGINE COOLING SYSTEM .
- Fill the turbocharger cooling system. Refer to DRAINING AND FILLING THE TURBOCHARGER COOLING SYSTEM .
- Install the engine cover. Refer to COVER, ENGINE, REMOVAL AND INSTALLATION .
- Install the belly pan. Refer to BELLY PAN, ENGINE, REMOVAL AND INSTALLATION or BELLY PAN, REAR, REMOVAL AND INSTALLATION or BELLY PAN, REAR SUSPENSION, REMOVAL AND INSTALLATION or BELLY PAN, SIDE, REMOVAL AND INSTALLATION .
- Install the left front tire and wheel assembly. Refer to REMOVAL AND INSTALLATION .
- Connect the negative battery cable.